The Paper Bag Book

Bag & Book

I decided to make the little book for several reasons –

1) it was originally meant to be included in the ‘Box to Book’ project, but just wanted to be too big for its intended slot – so it became a stand alone piece.

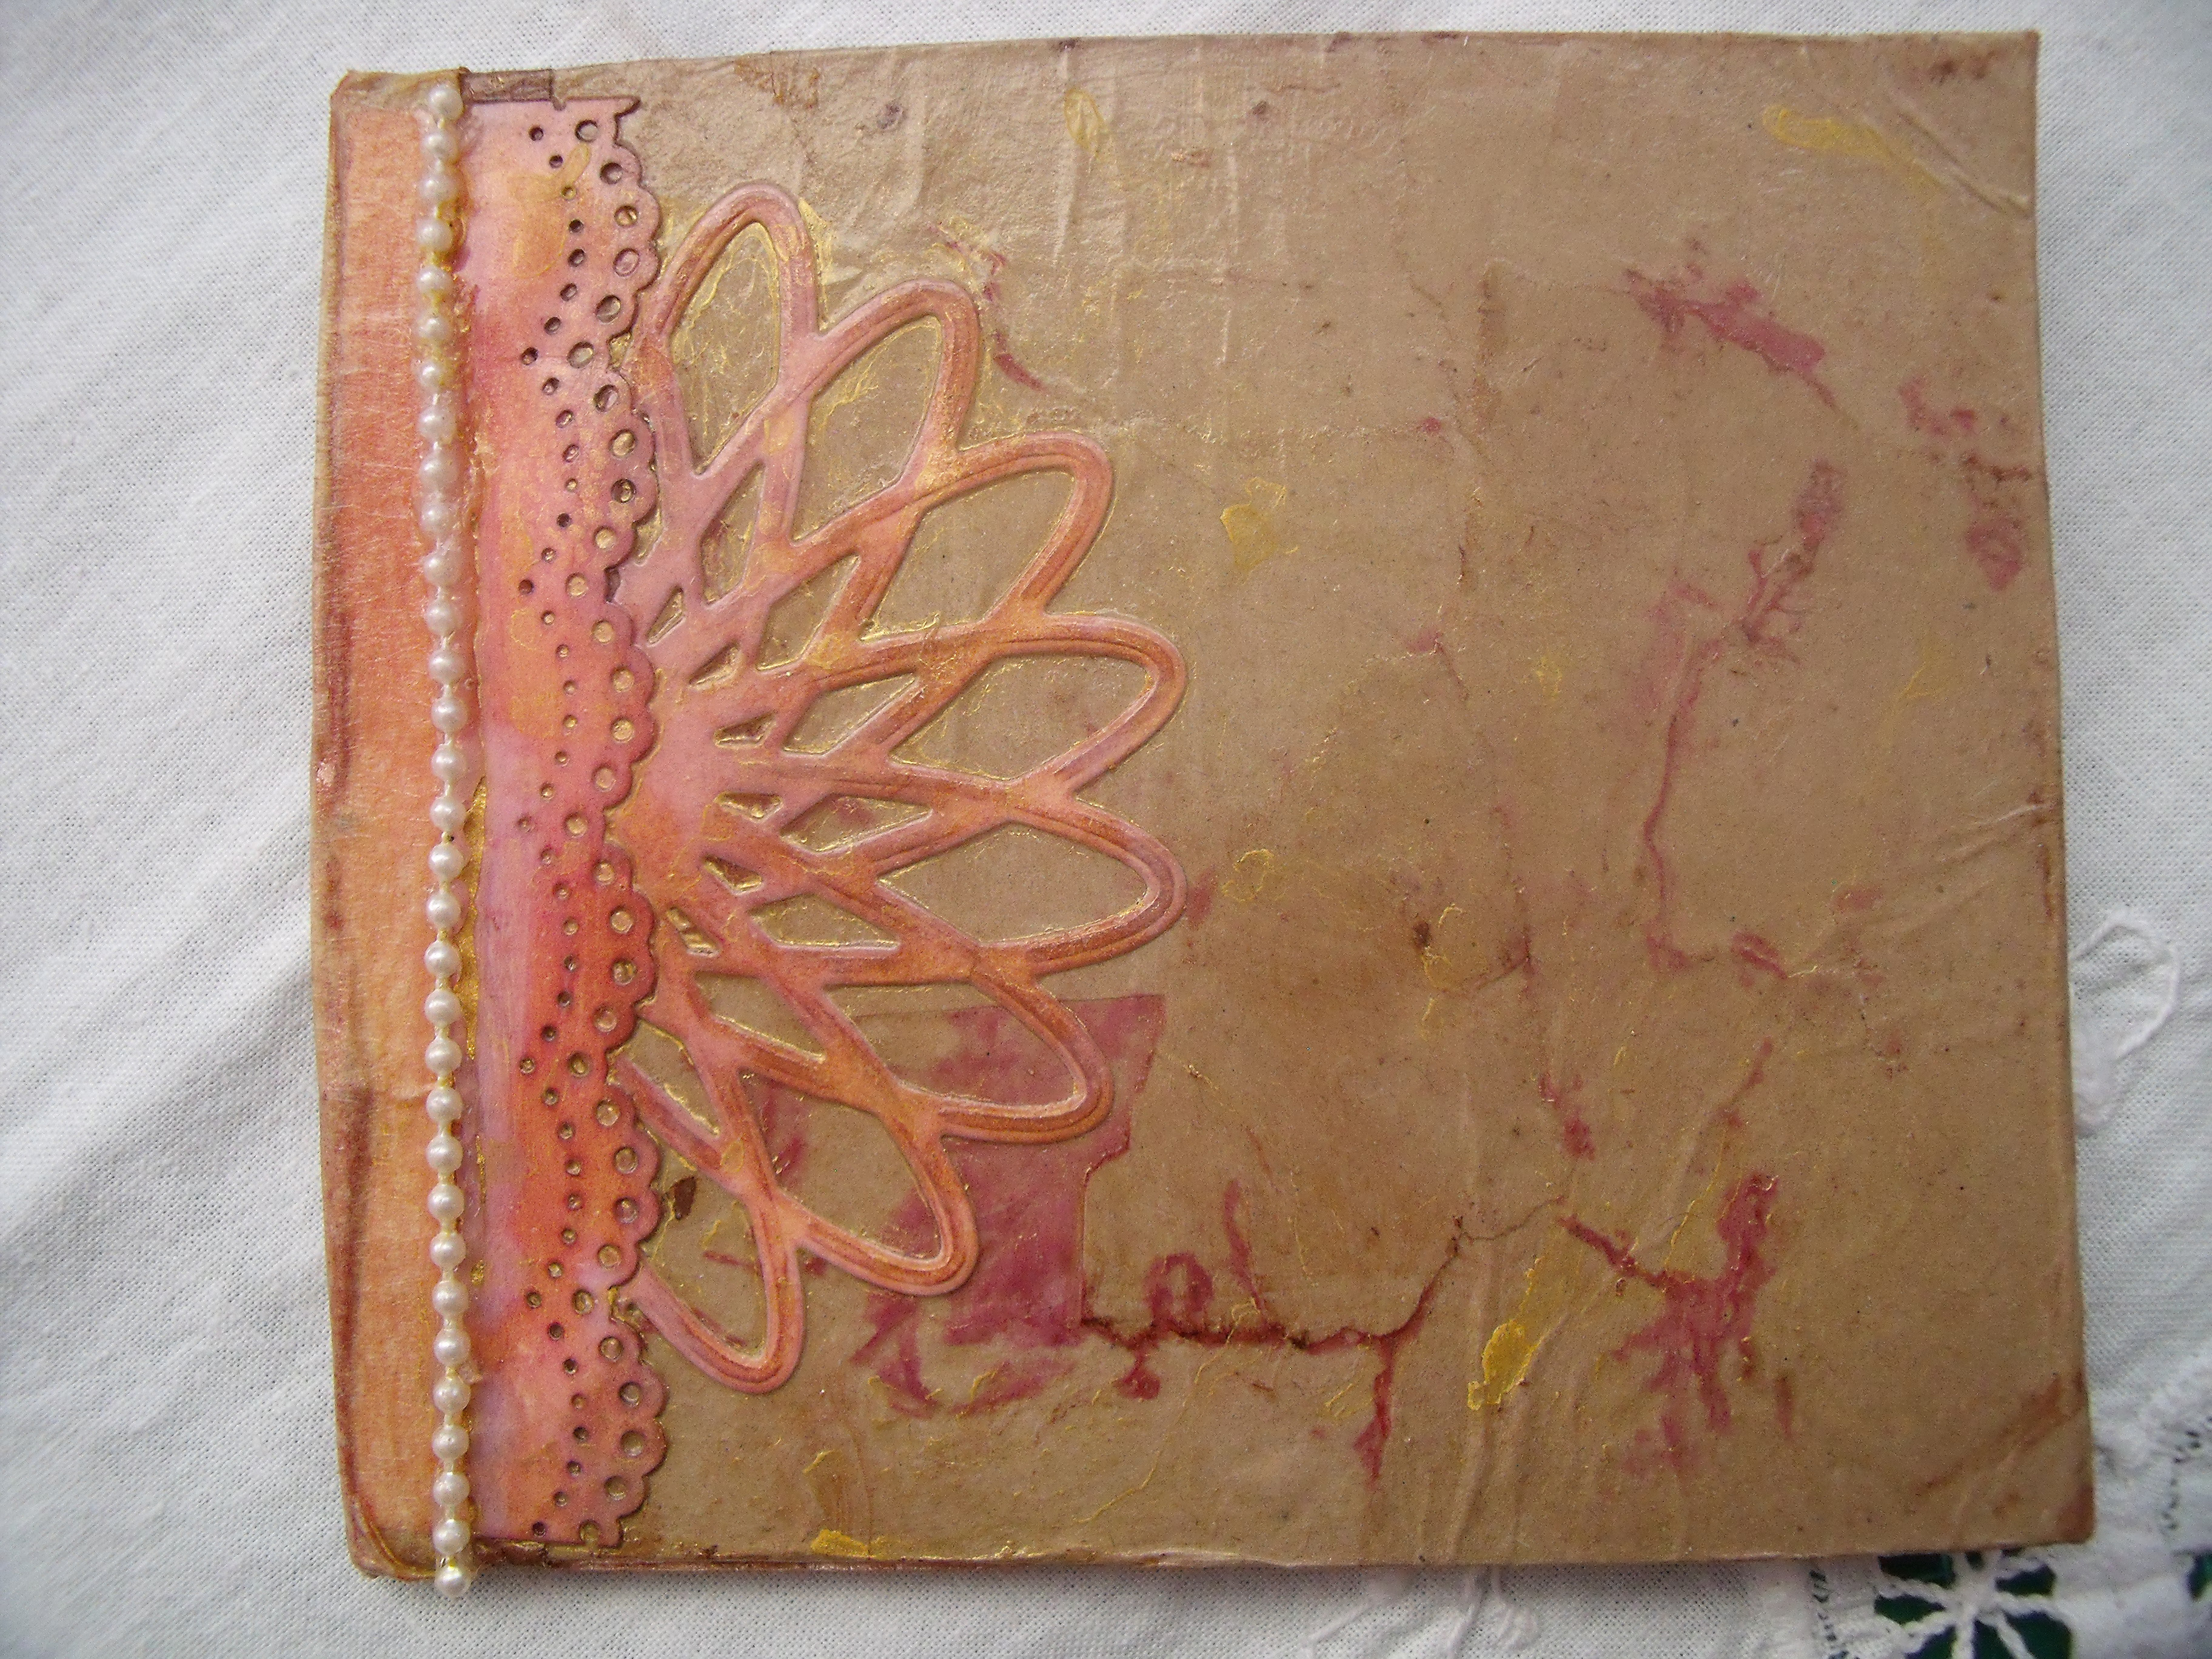
2)  I wanted to experiment with more aged and tattered looks, I wanted to make a little book that looked as if it had been well loved for a long time.

3) I’d been reading about the importance of leaving behind examples of your own writing for your loved ones – and remembering how touched I had been when I discovered words handwritten by beloved old relatives, now gone.   I thought I should make something that was written in my own hand.   I started it in the ‘Box to Book’ project, and continued it here.

4) My recycling bug needed to make use of some cardboard and paper bags and used dryer sheets that were lying about on the desk getting in my way…

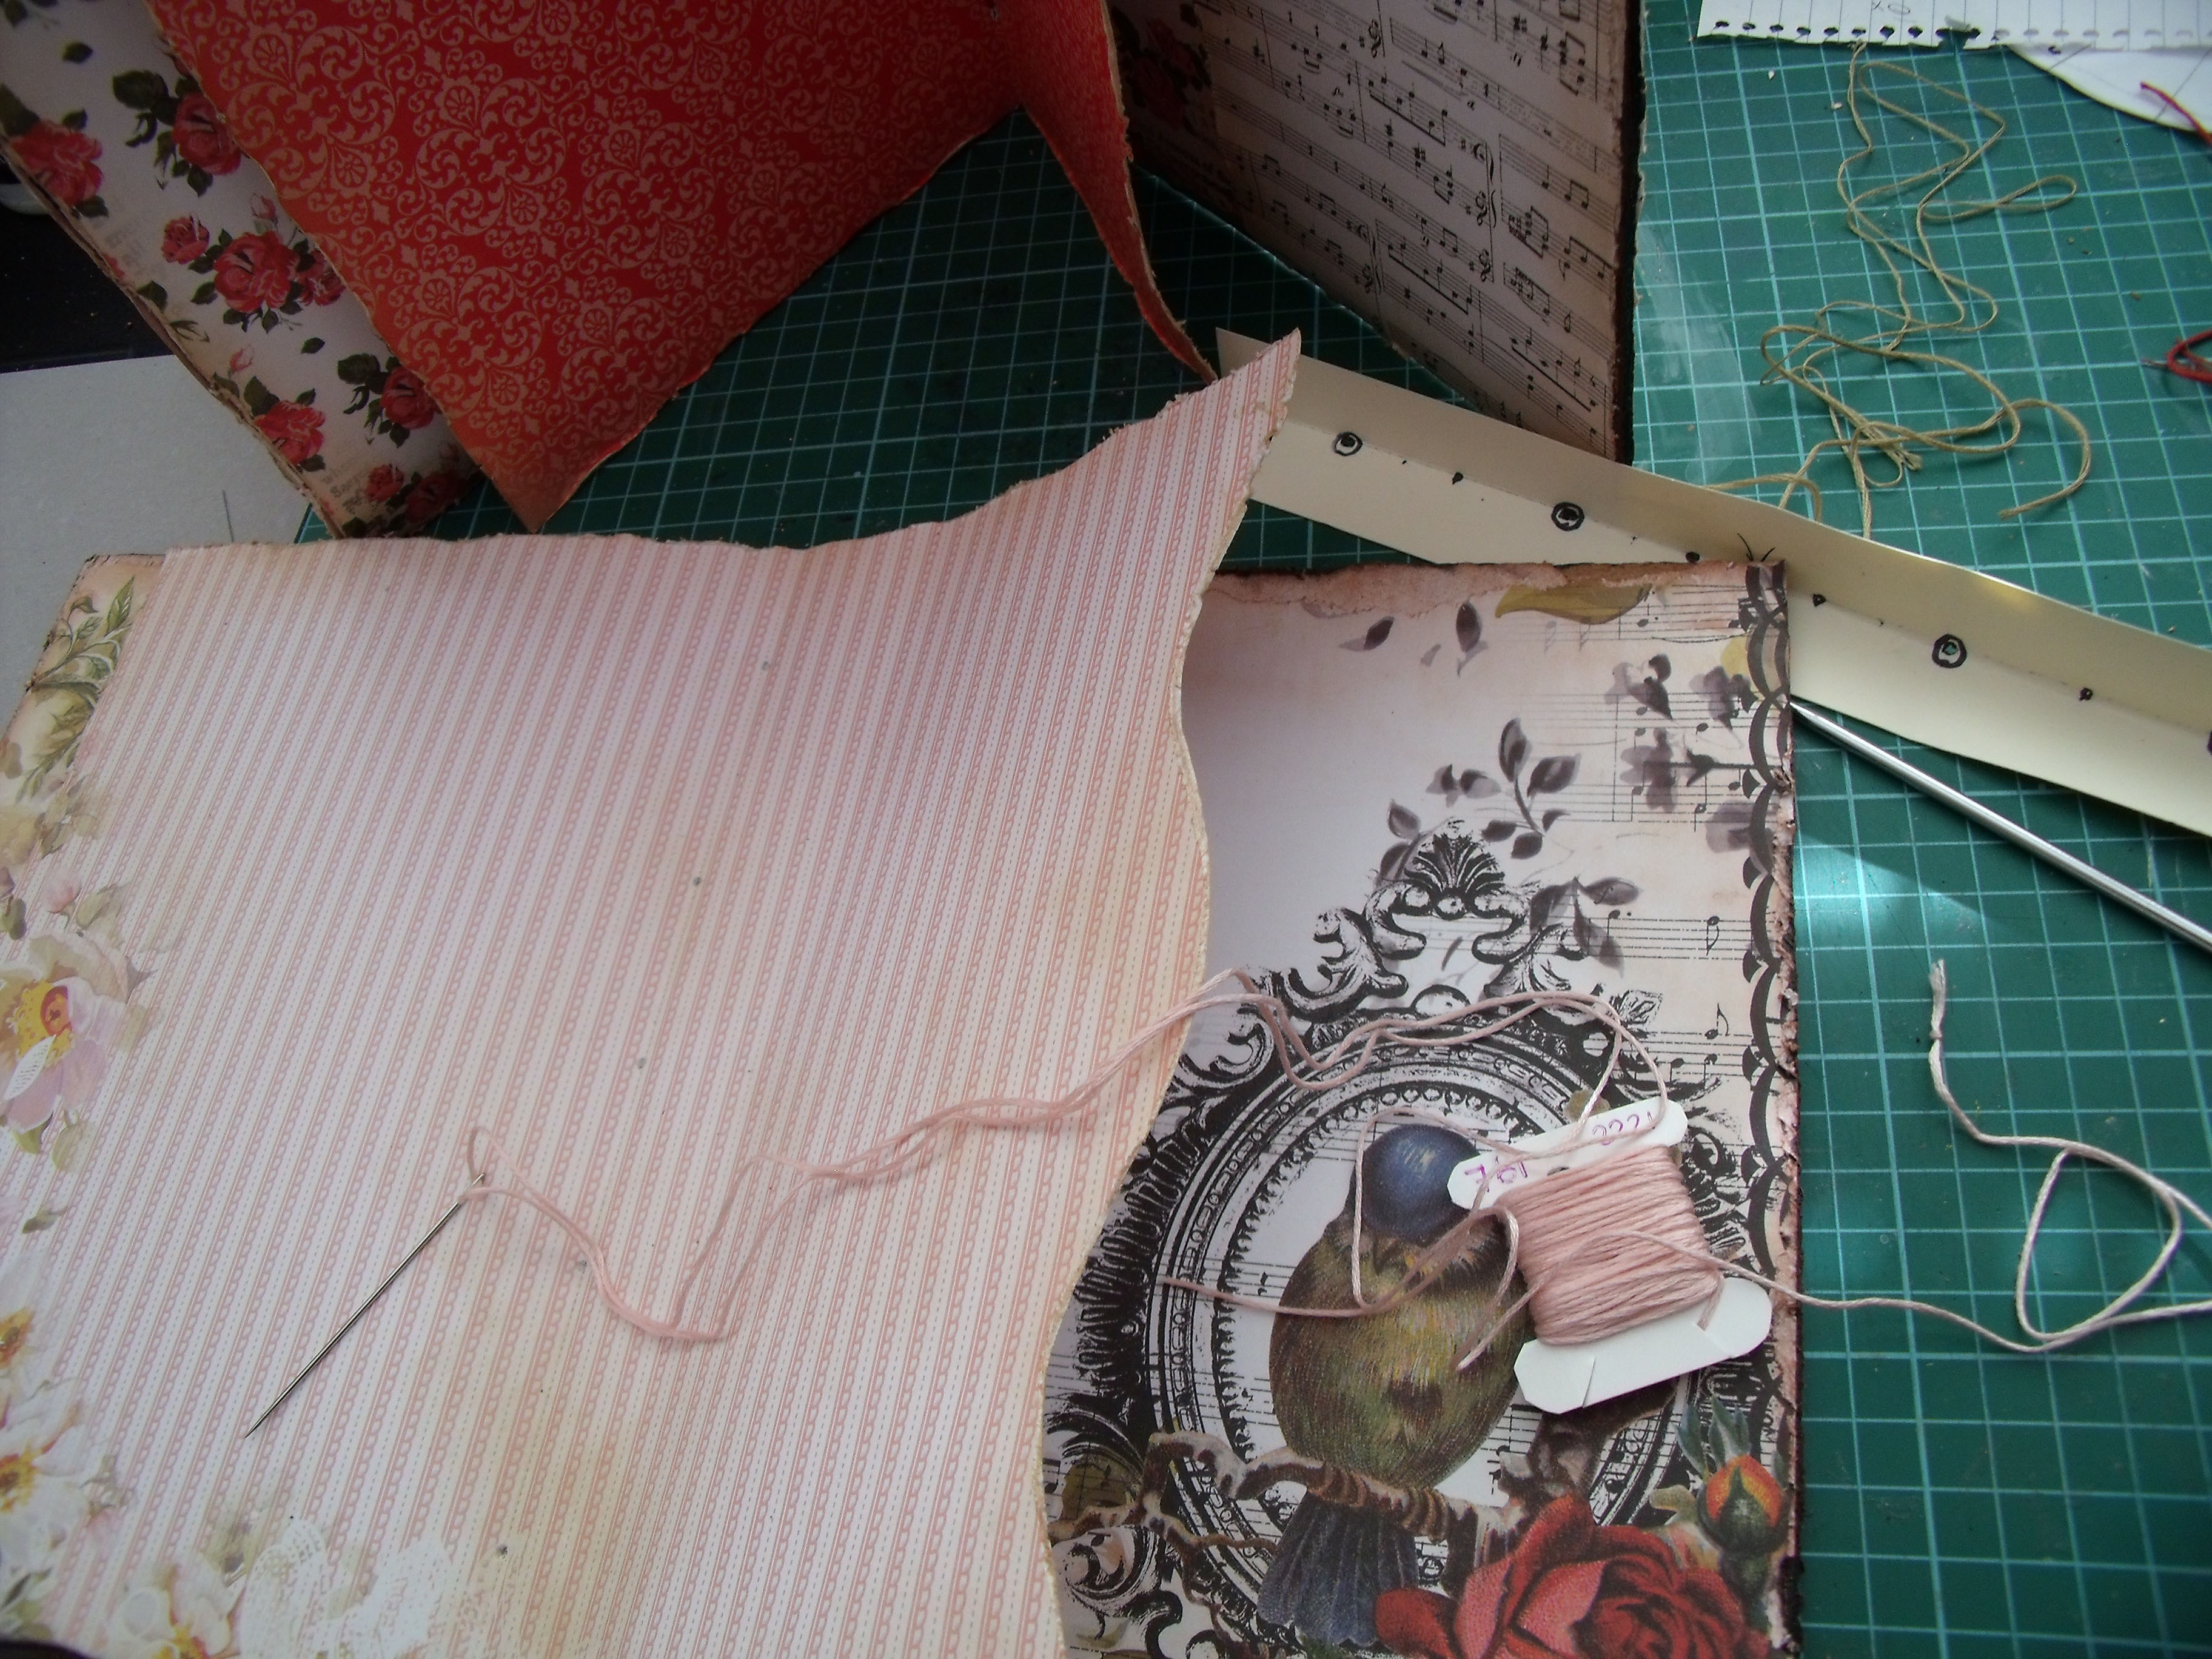
So, here we go.  The first pic depicts some of the items used in the process of turning a bit of cardboard and a brown paper bag into a faux leather book cover, assembled around the almost finished book:

Booklet 1

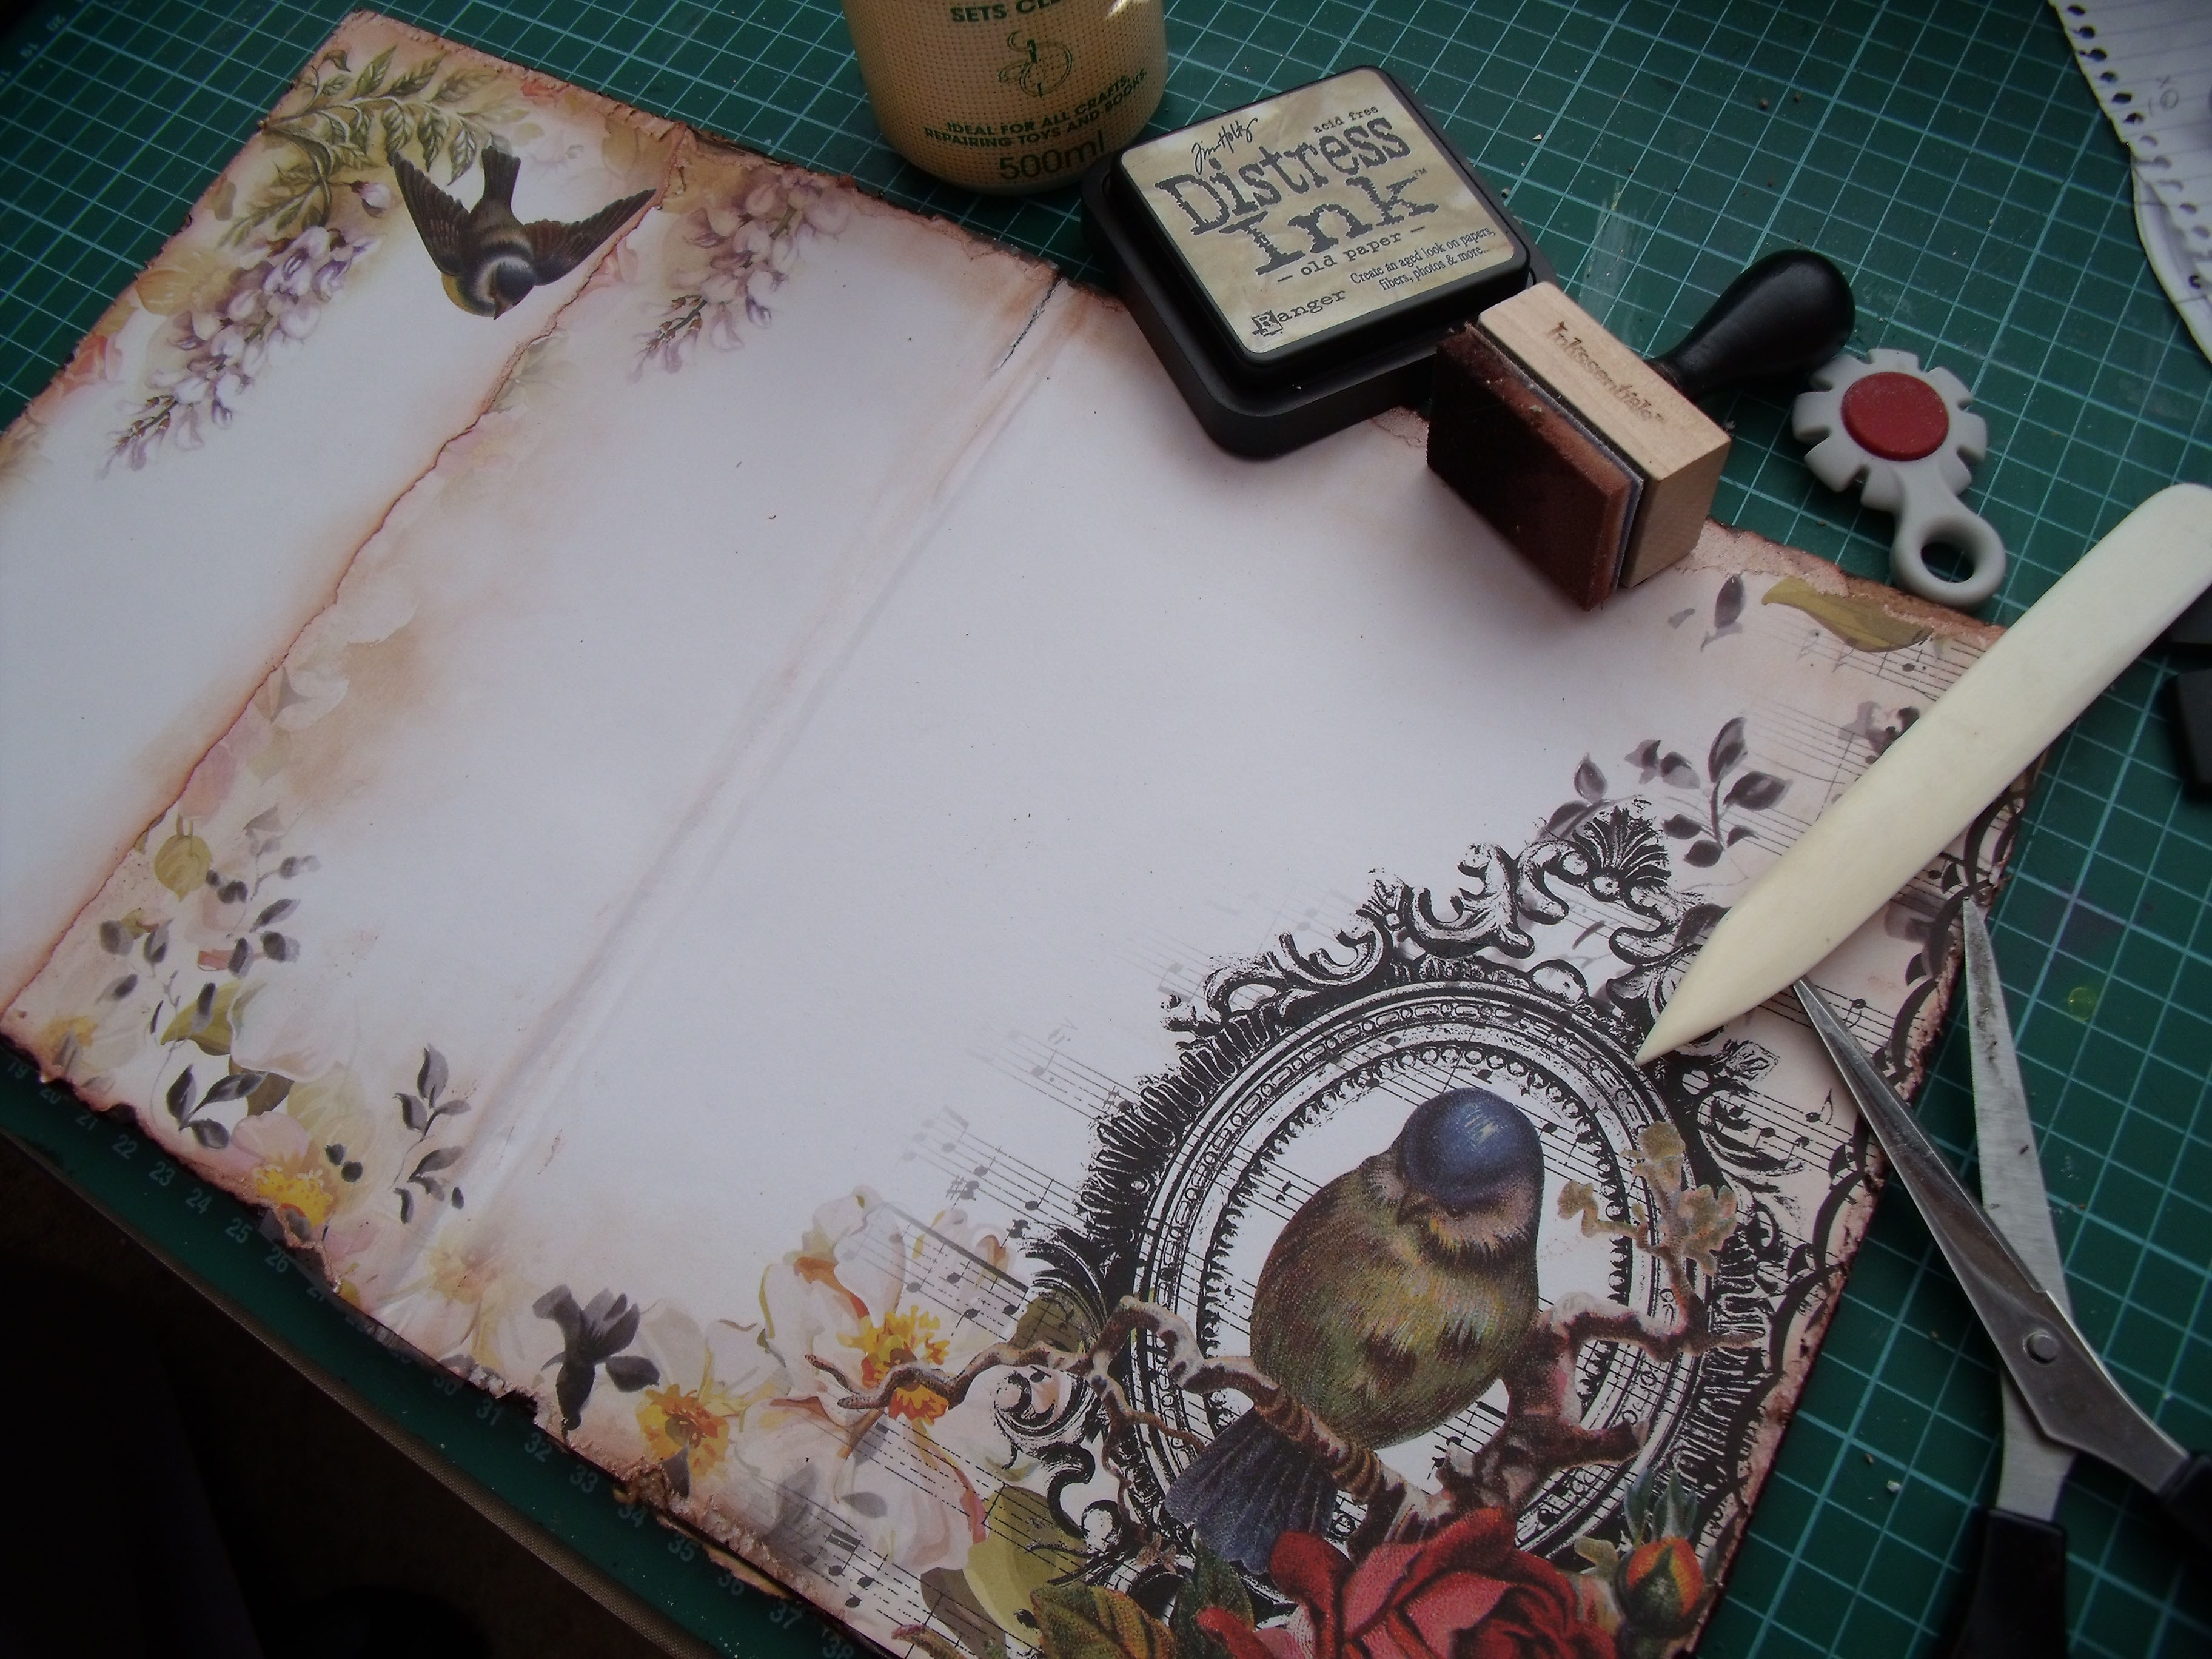
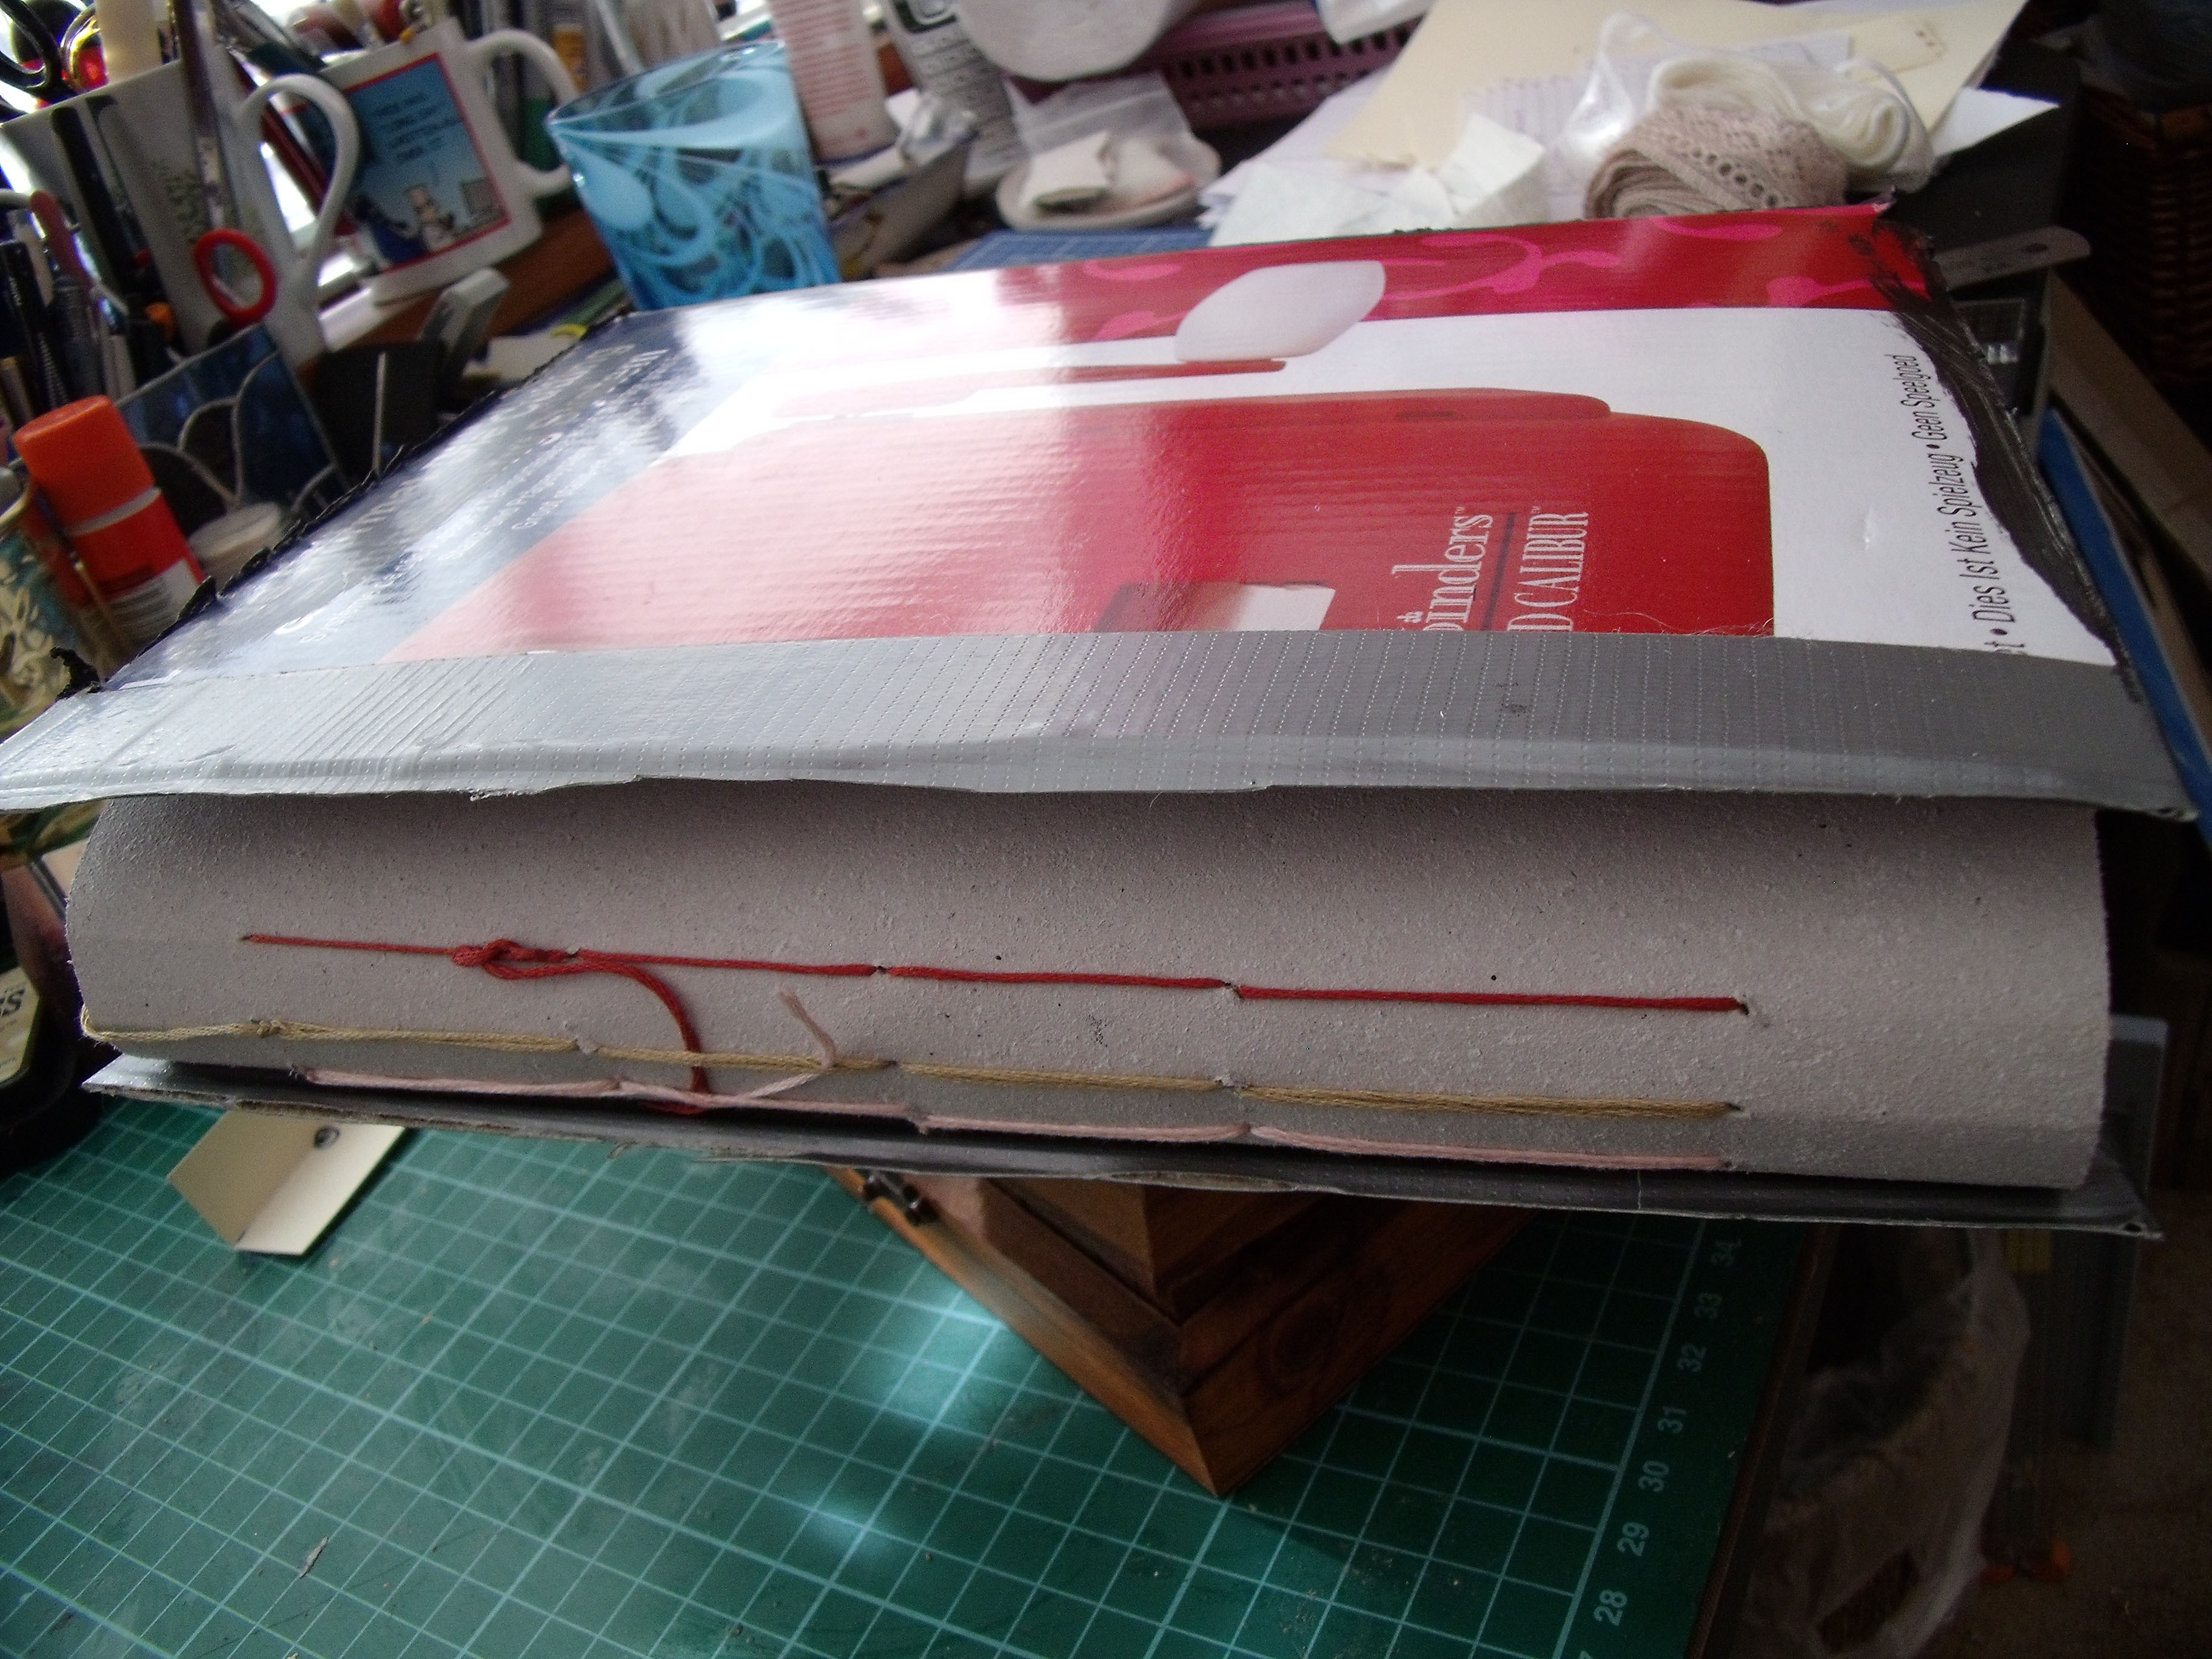
I cut the cardboard into two pieces.  The brown paper was cut to size, crumpled up and generally mistreated.  Then it was hit with swipes of ink straight from the ink pad in two colours – my favourites at the moment, Aged Mahogany and Old Paper.  The two pieces of card were then joined with binding tape, leaving a small gap so that the signatures could be sewn in

Booklet 2

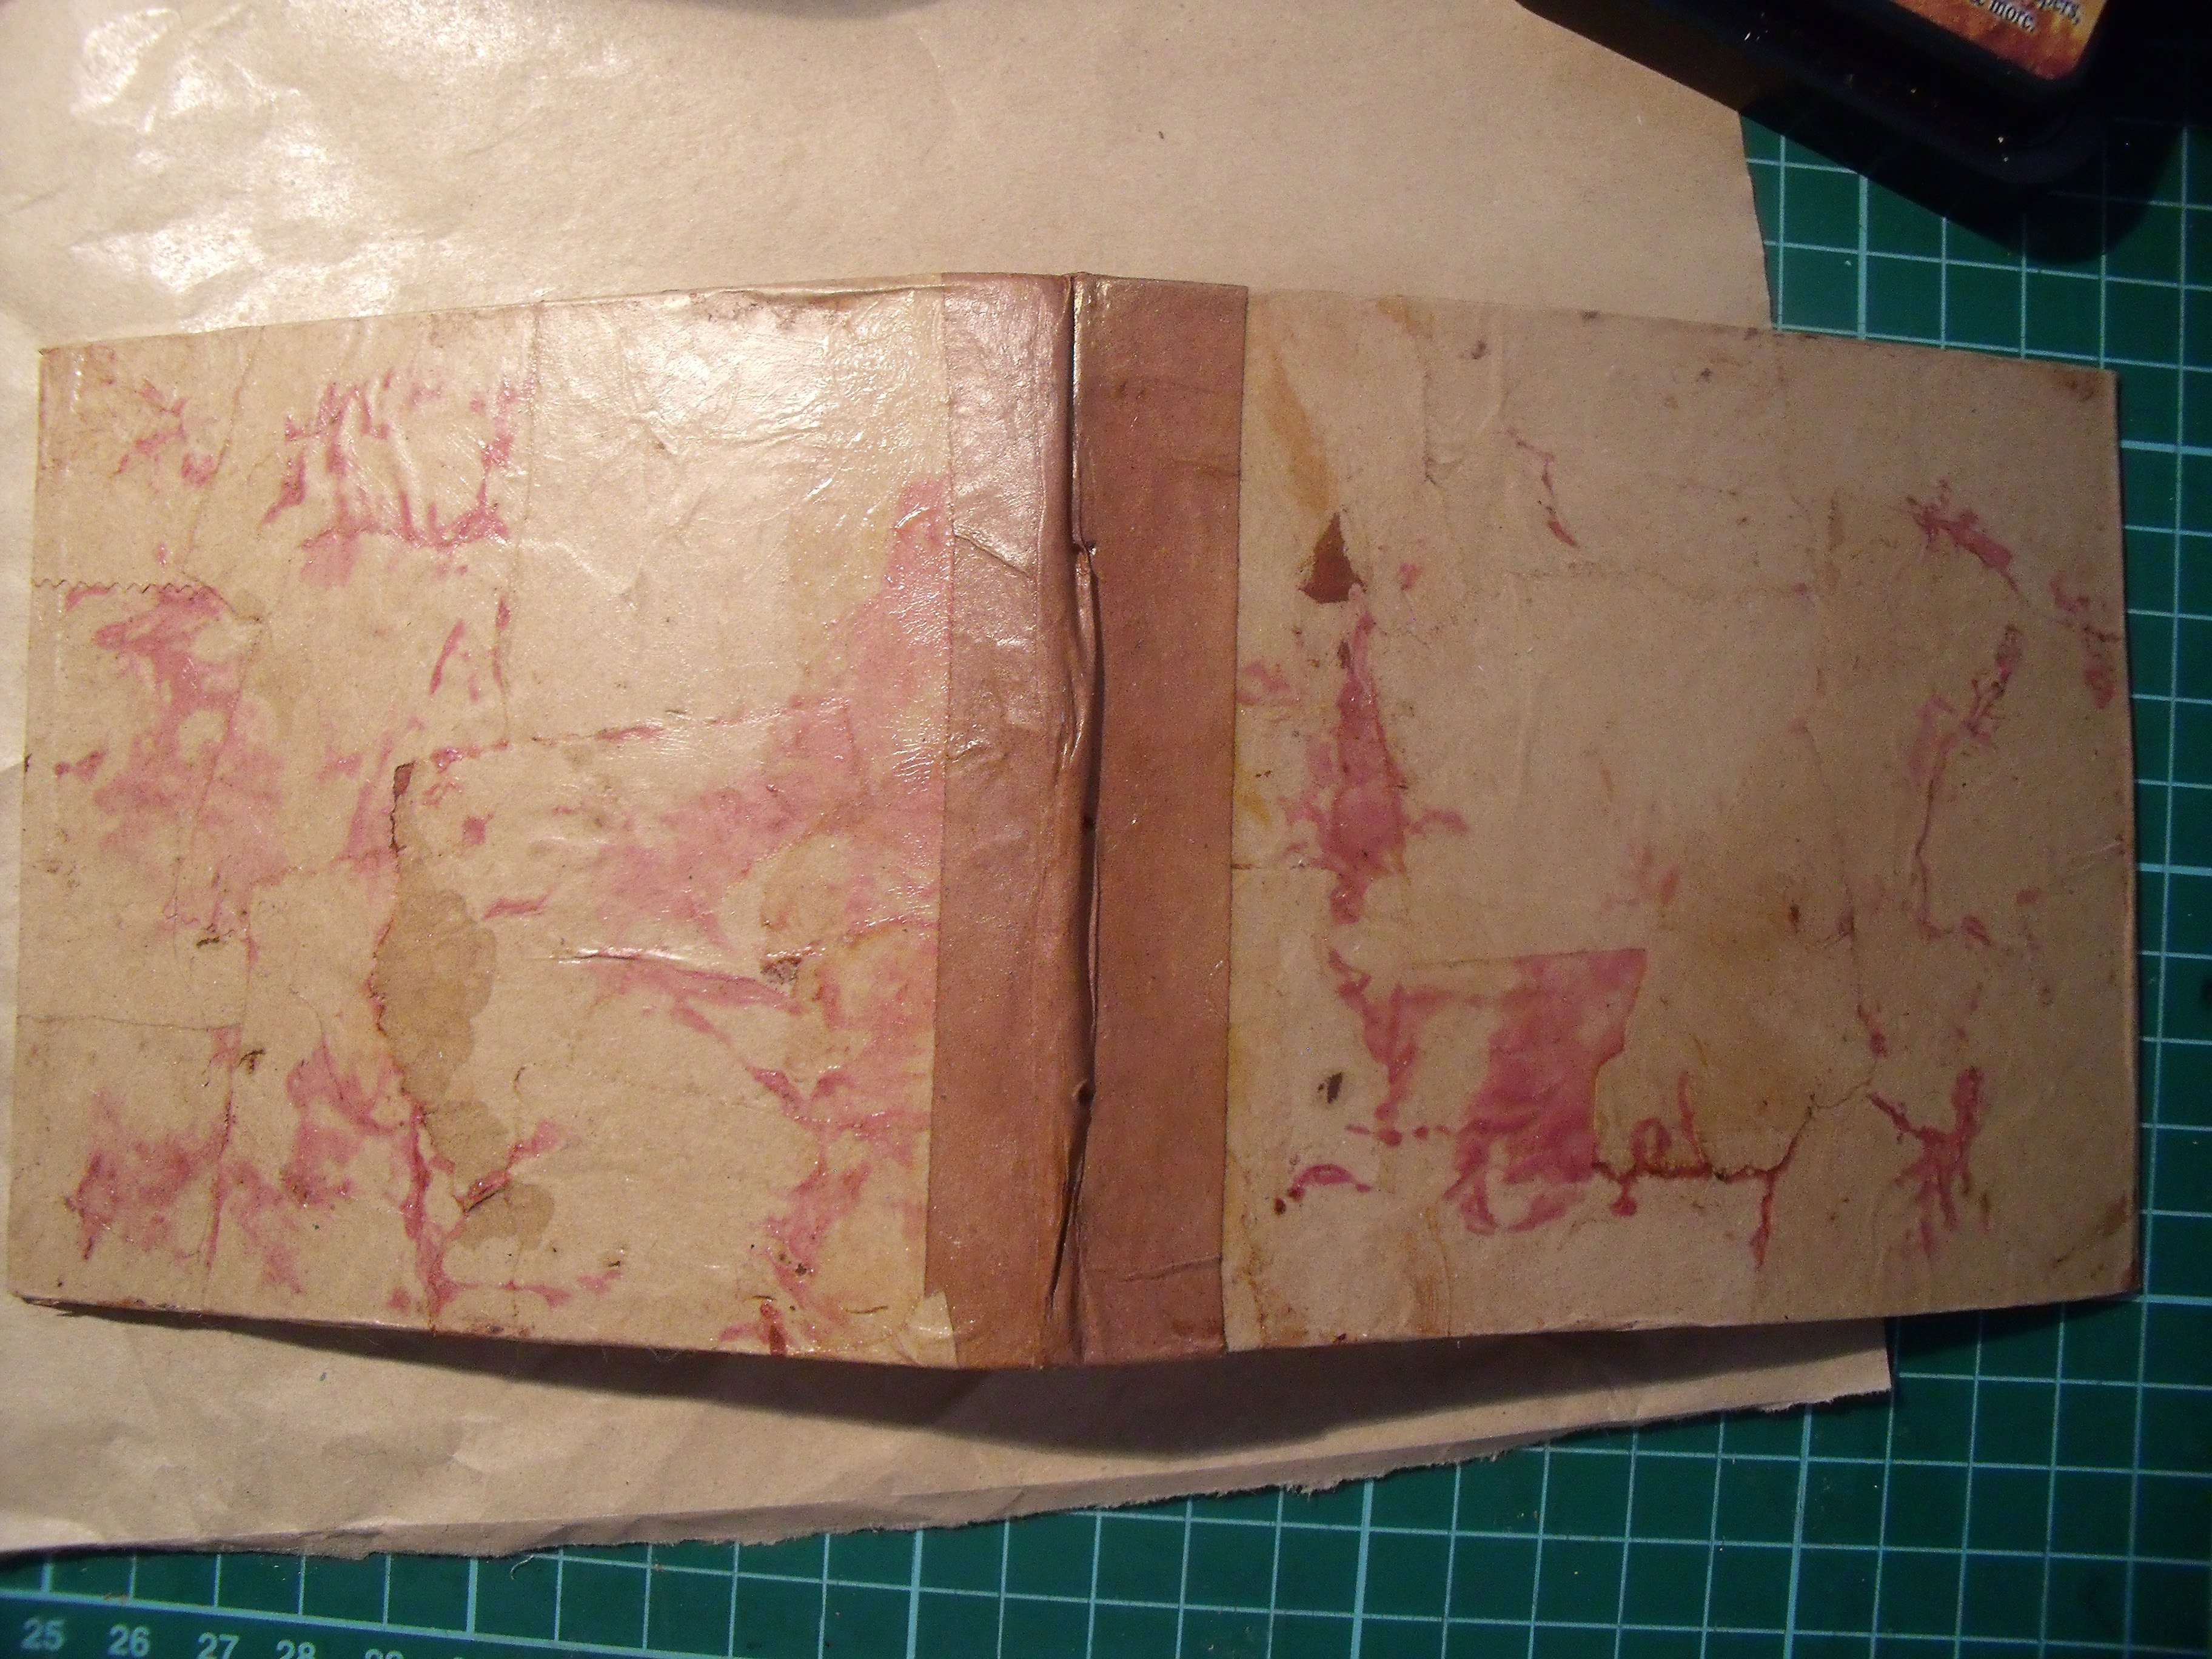
The inside of the cover recycled a used dryer sheet, which has a really nice texture, like old hand made paper –  liberally sprayed with a glimmer mist concoction of colours:

Booklet 3

The almost finished cover – before the tweaking process:

Cover

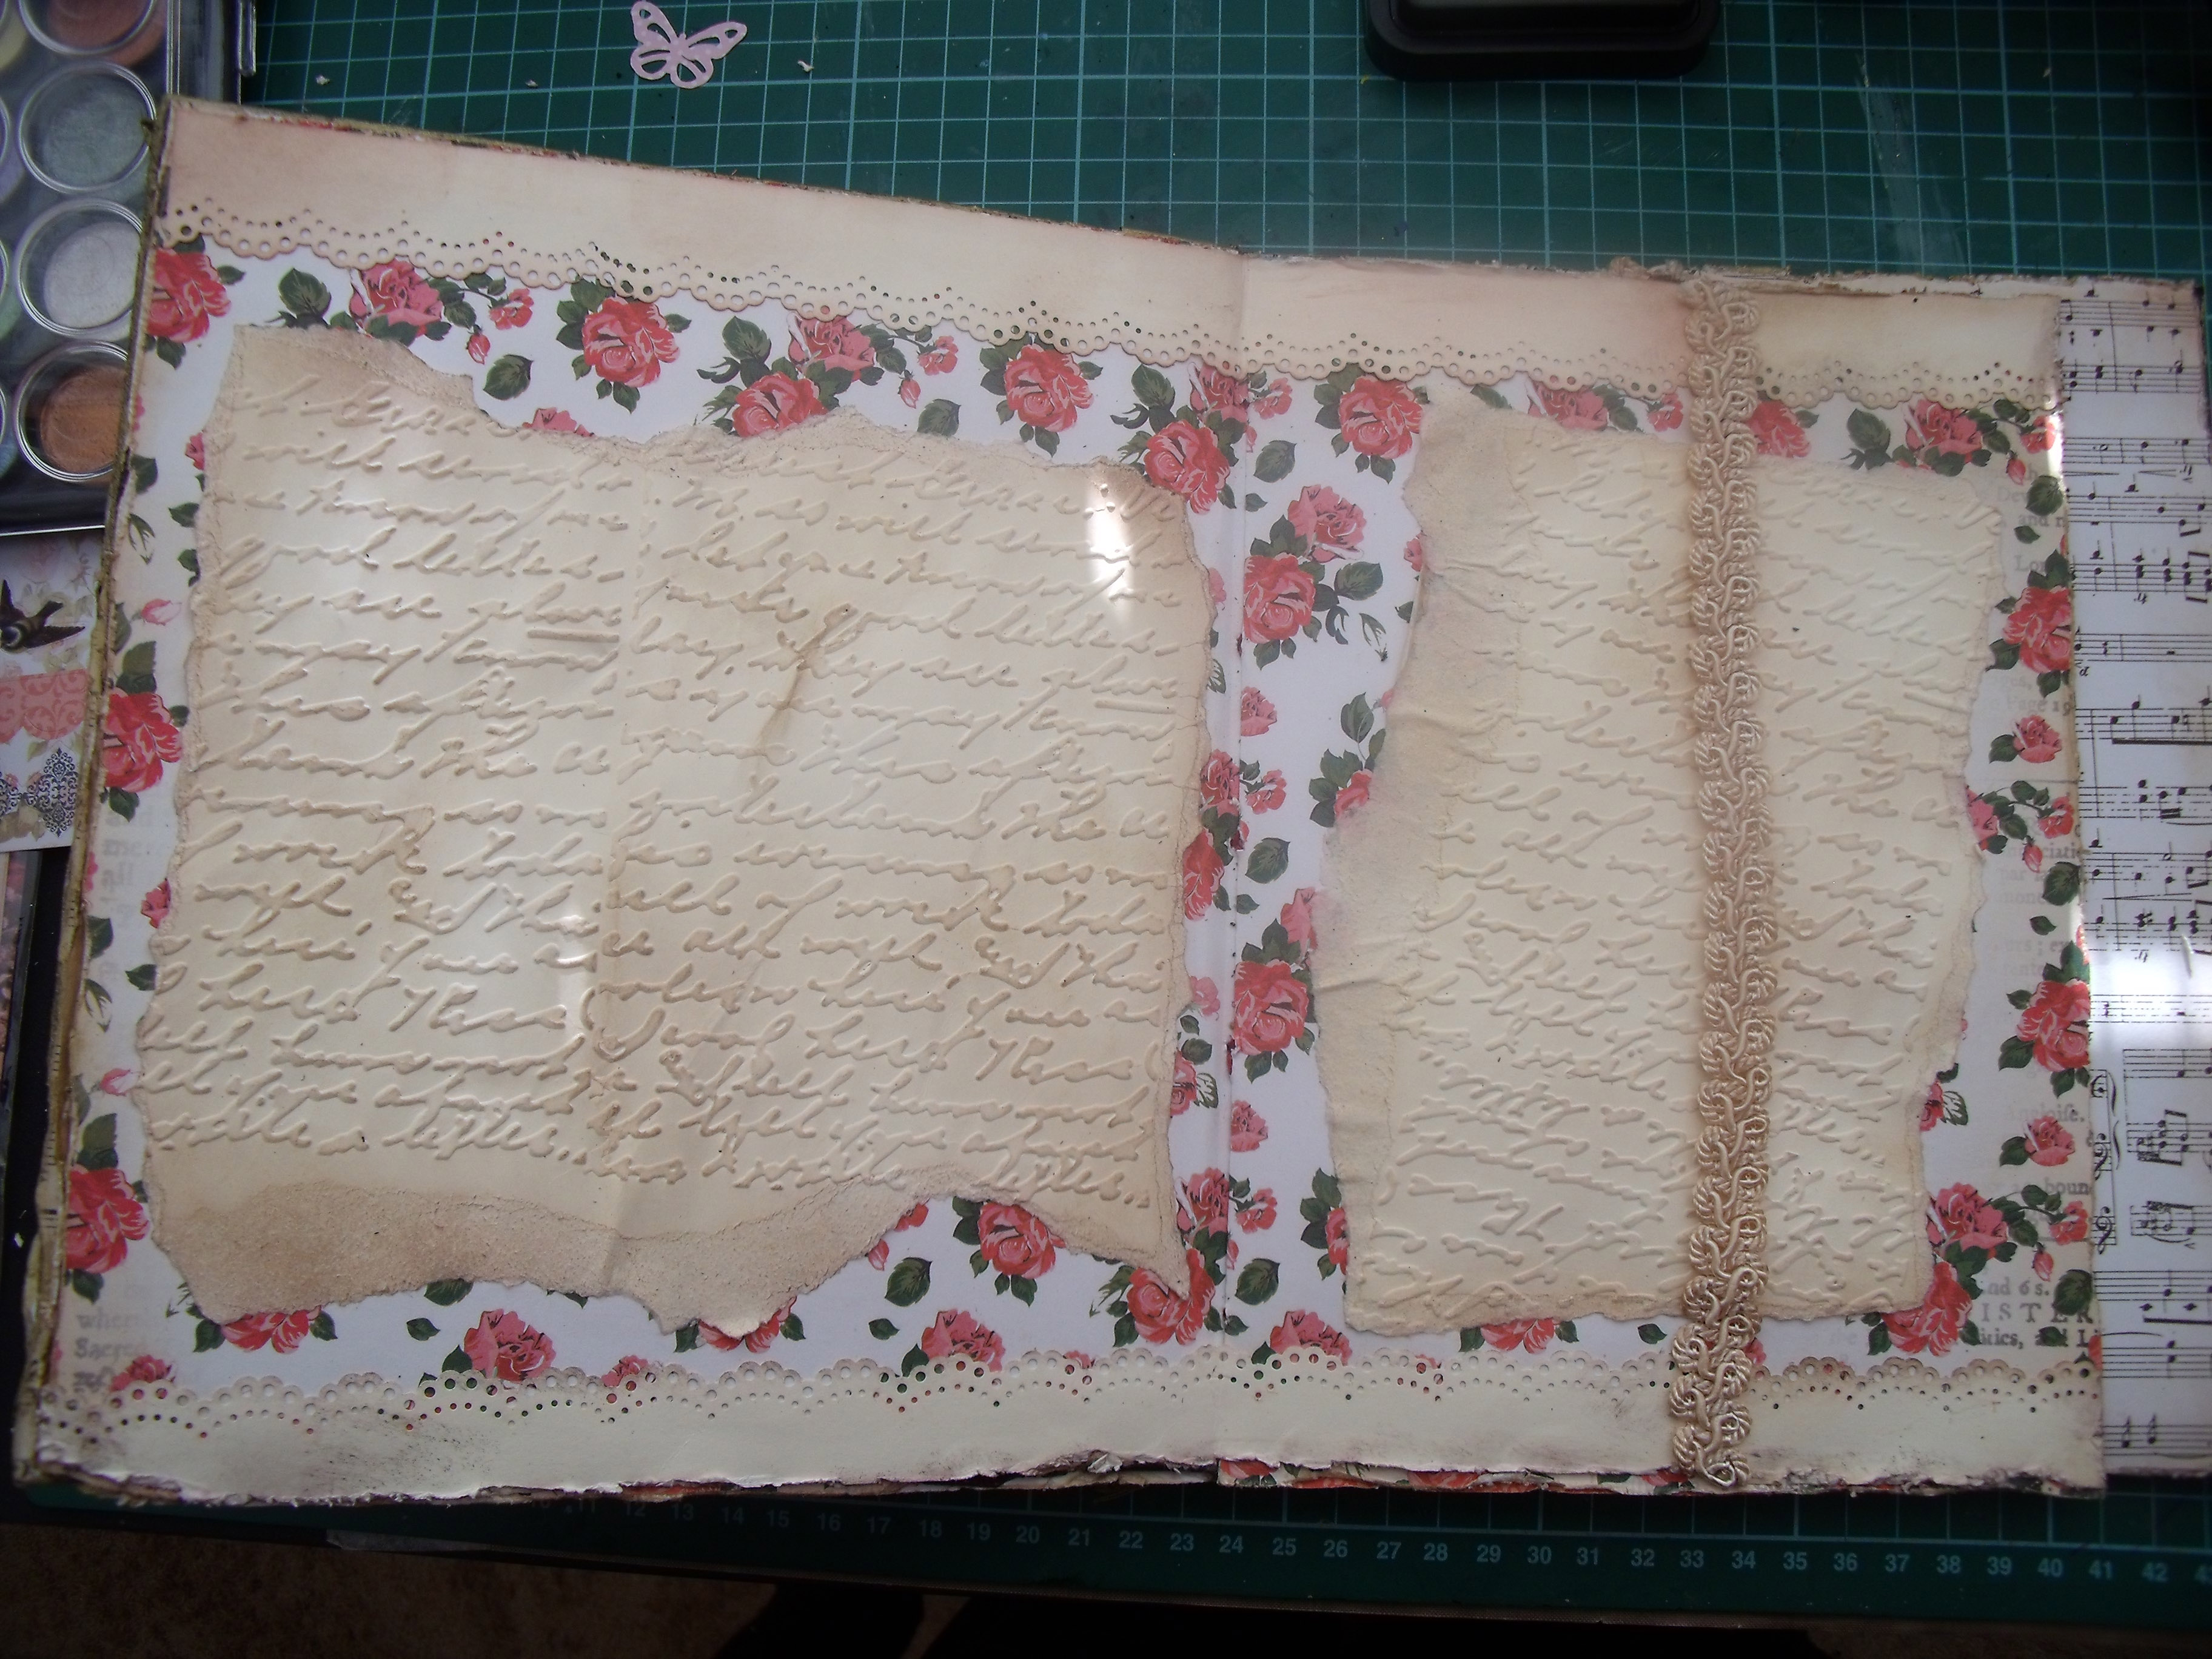
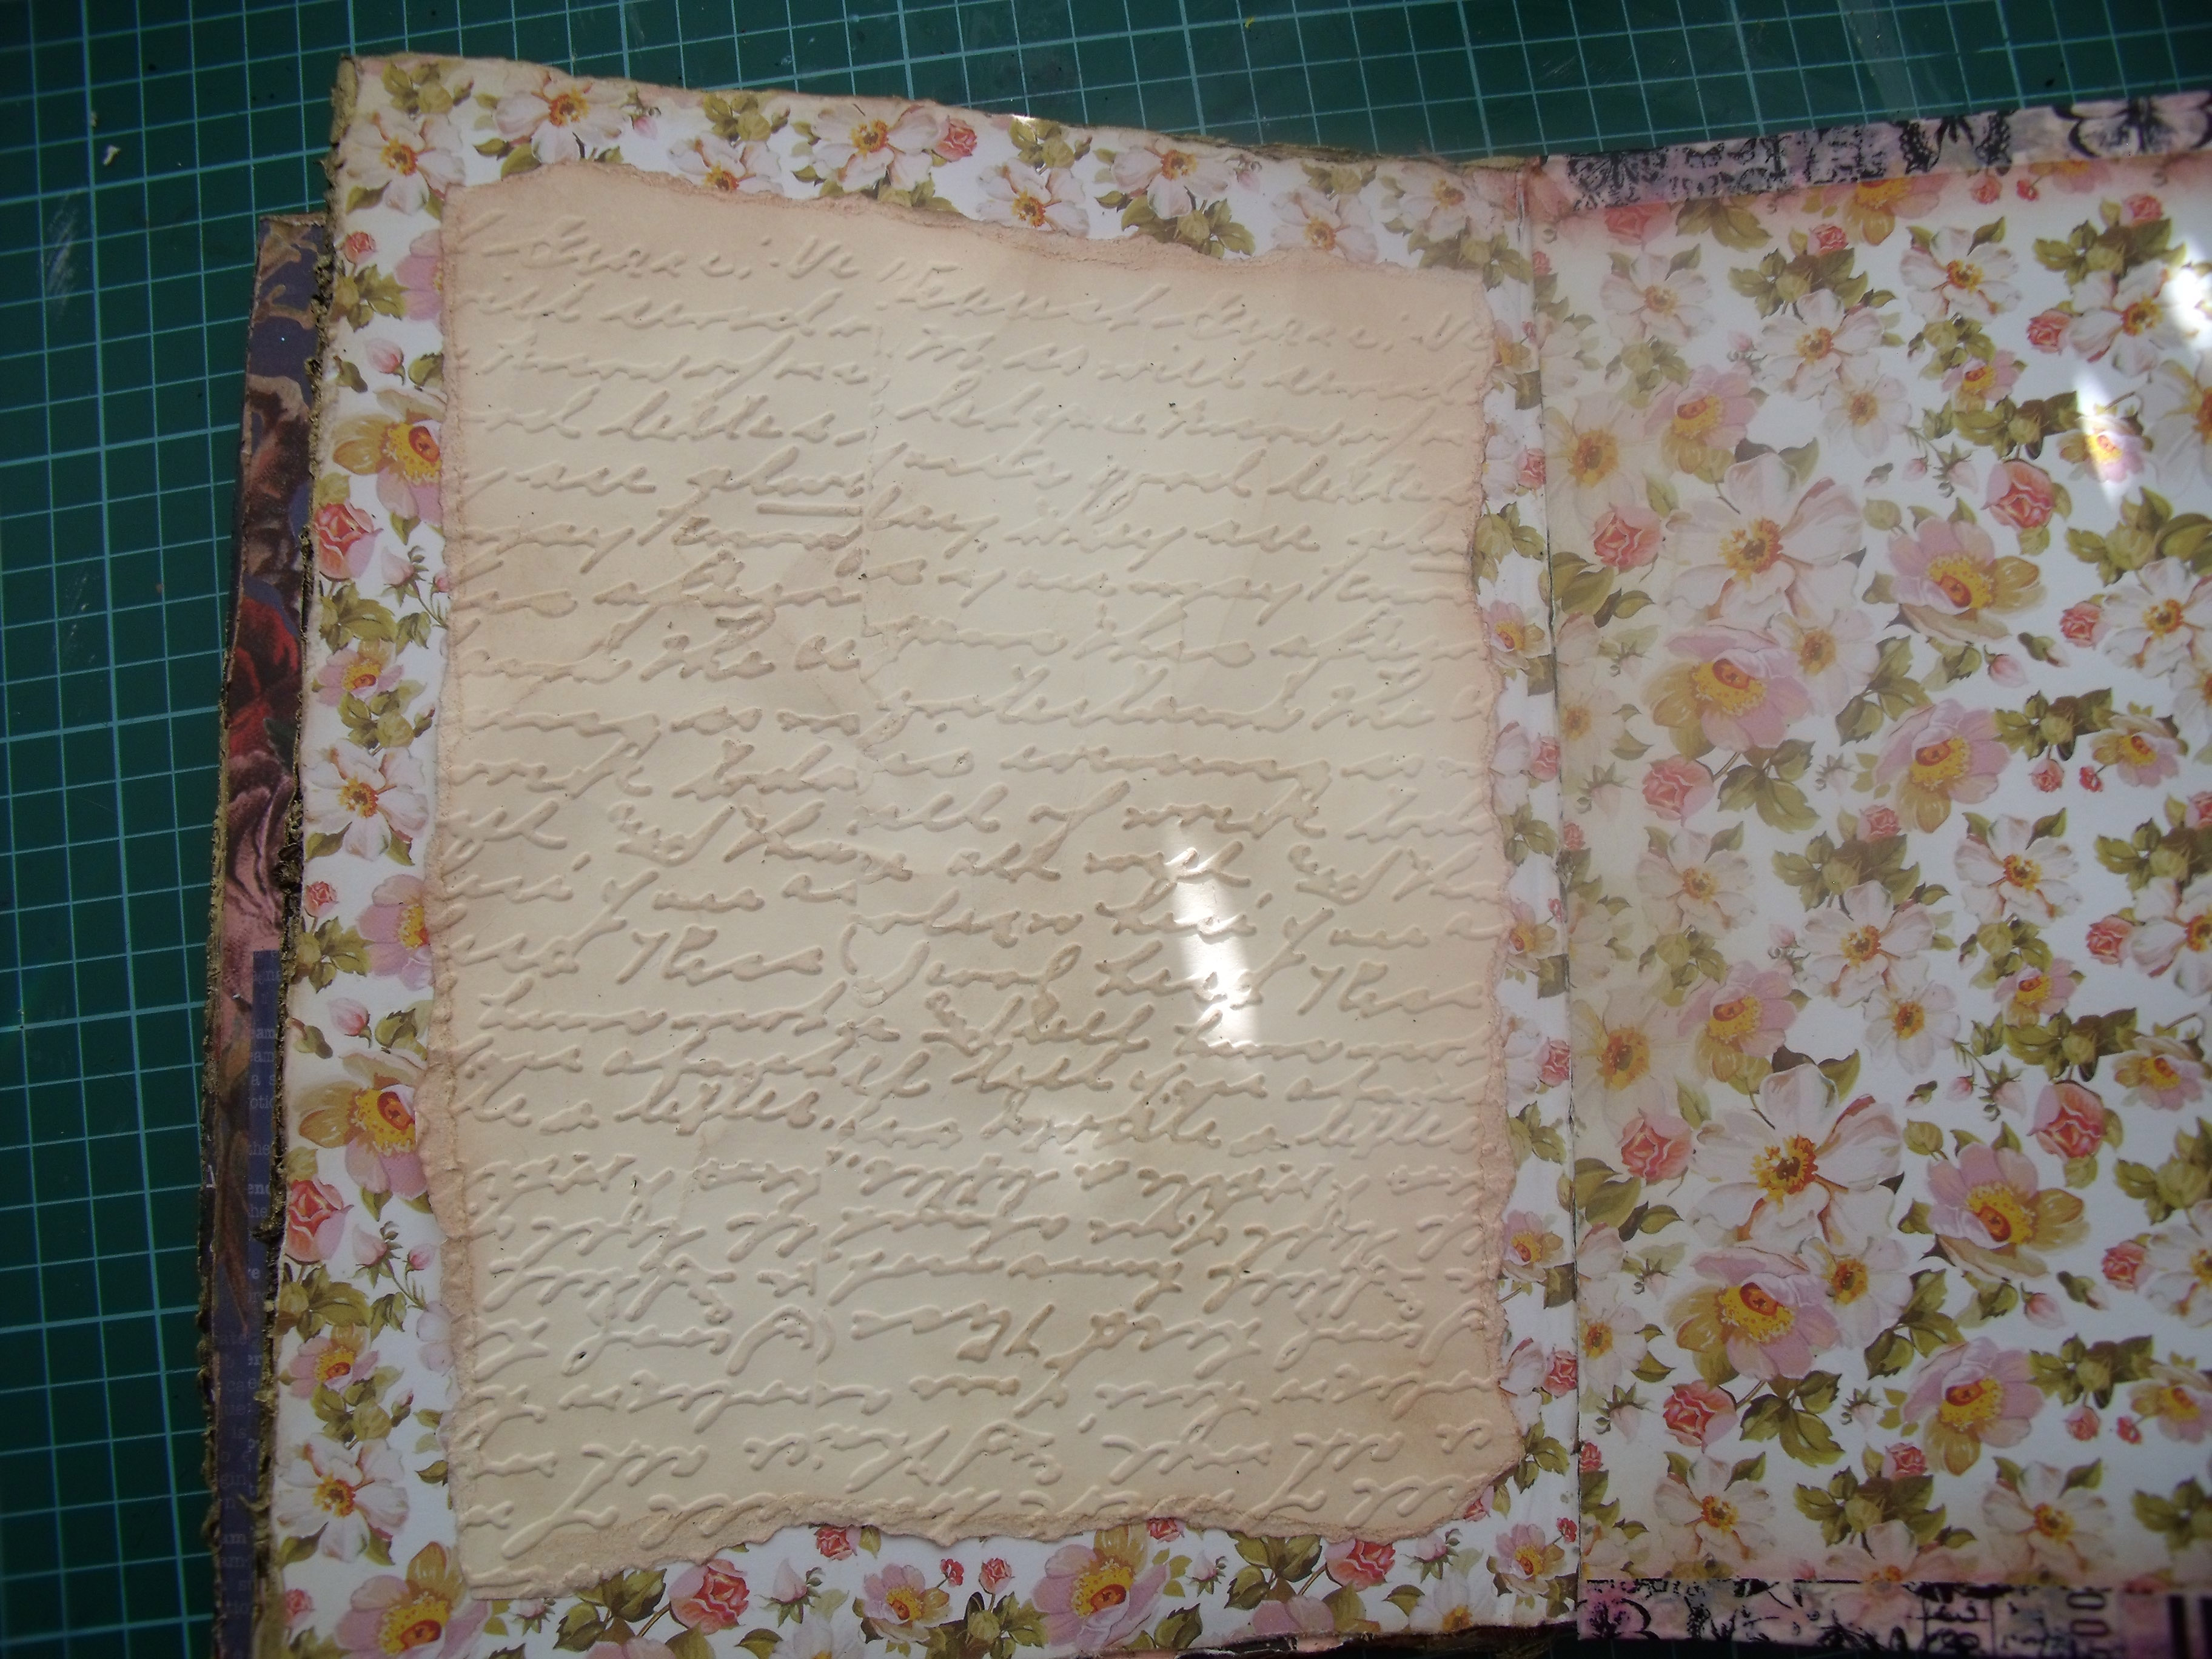
The pages were made from ordinary white paper, cut to size, tattered along the edges to look like the hand cut paper you used to see in old books and generally mistreated to achieve that well worn look……. I wanted to get something of the look of a palimpsest* to the thing [don’t ask me why, it was just another crazy idea….] so I stamped every page with an illegible handwritten stamp from La Blanche in Old Paper, coloured over it with a coat of Aged Mahogany and then  splattered drops of Old Paper in liquid form about, made a coffee cup sized stain on some pages and dog-eared others.  I then hand copied a poem or a quote on every page.Booklet 5

The pages looked too plain for my taste, so now the flower stamp you saw in the first photo was utilised on every page and I spent a couple of happy hours colouring in and producing ‘water colours’ .  Still not satisfied I hit every page with a good spray of gold glimmer mist for a bit of sparkle.

Cover Inside 1

Page 2

Page 1

Detail

Detail

Byron & Yeats

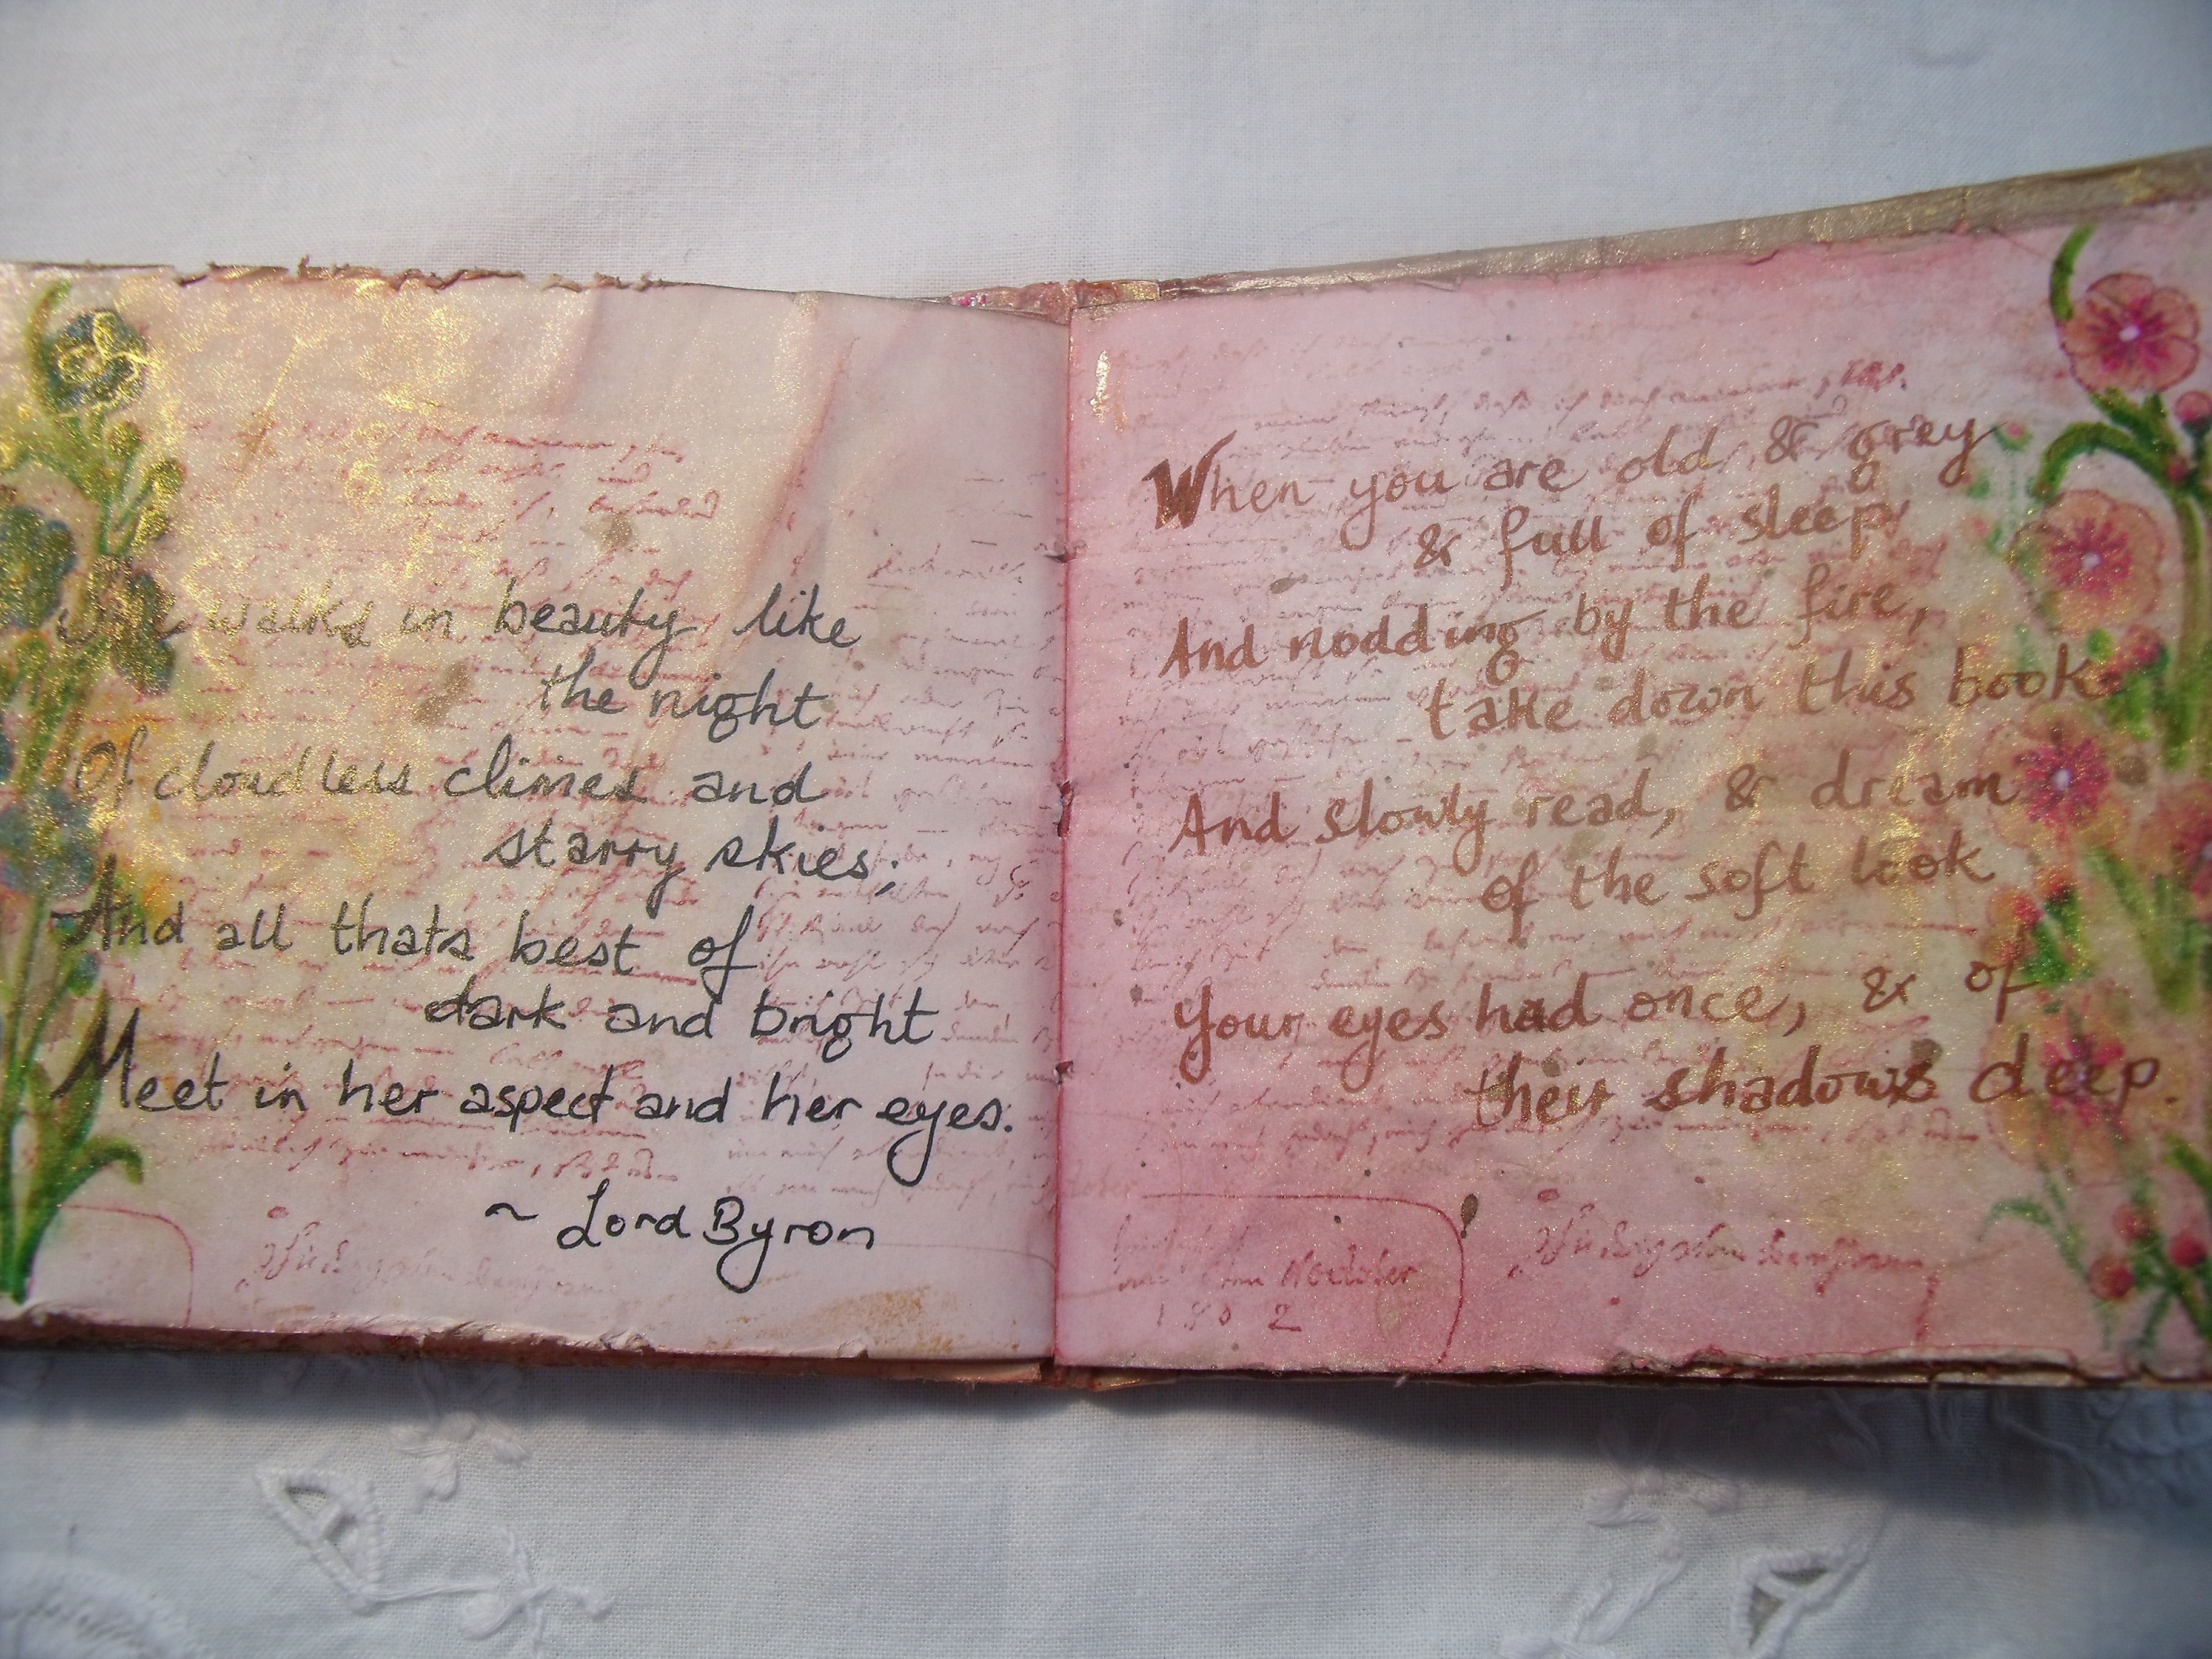
The little book looks suitably well worn, with coffee stains, age spots and the glimmer of worn gold still visible on some pages.  It’s tatty and dog eared pages contain a wide variety of quotes and poems – from Winnie the Pooh to Khalil Gibran; Rumi to Leonard Cohen and includes Elizabeth Barrett Browning, Shakespeare, Yeats, Byron and more.  It’s all about LOVE!

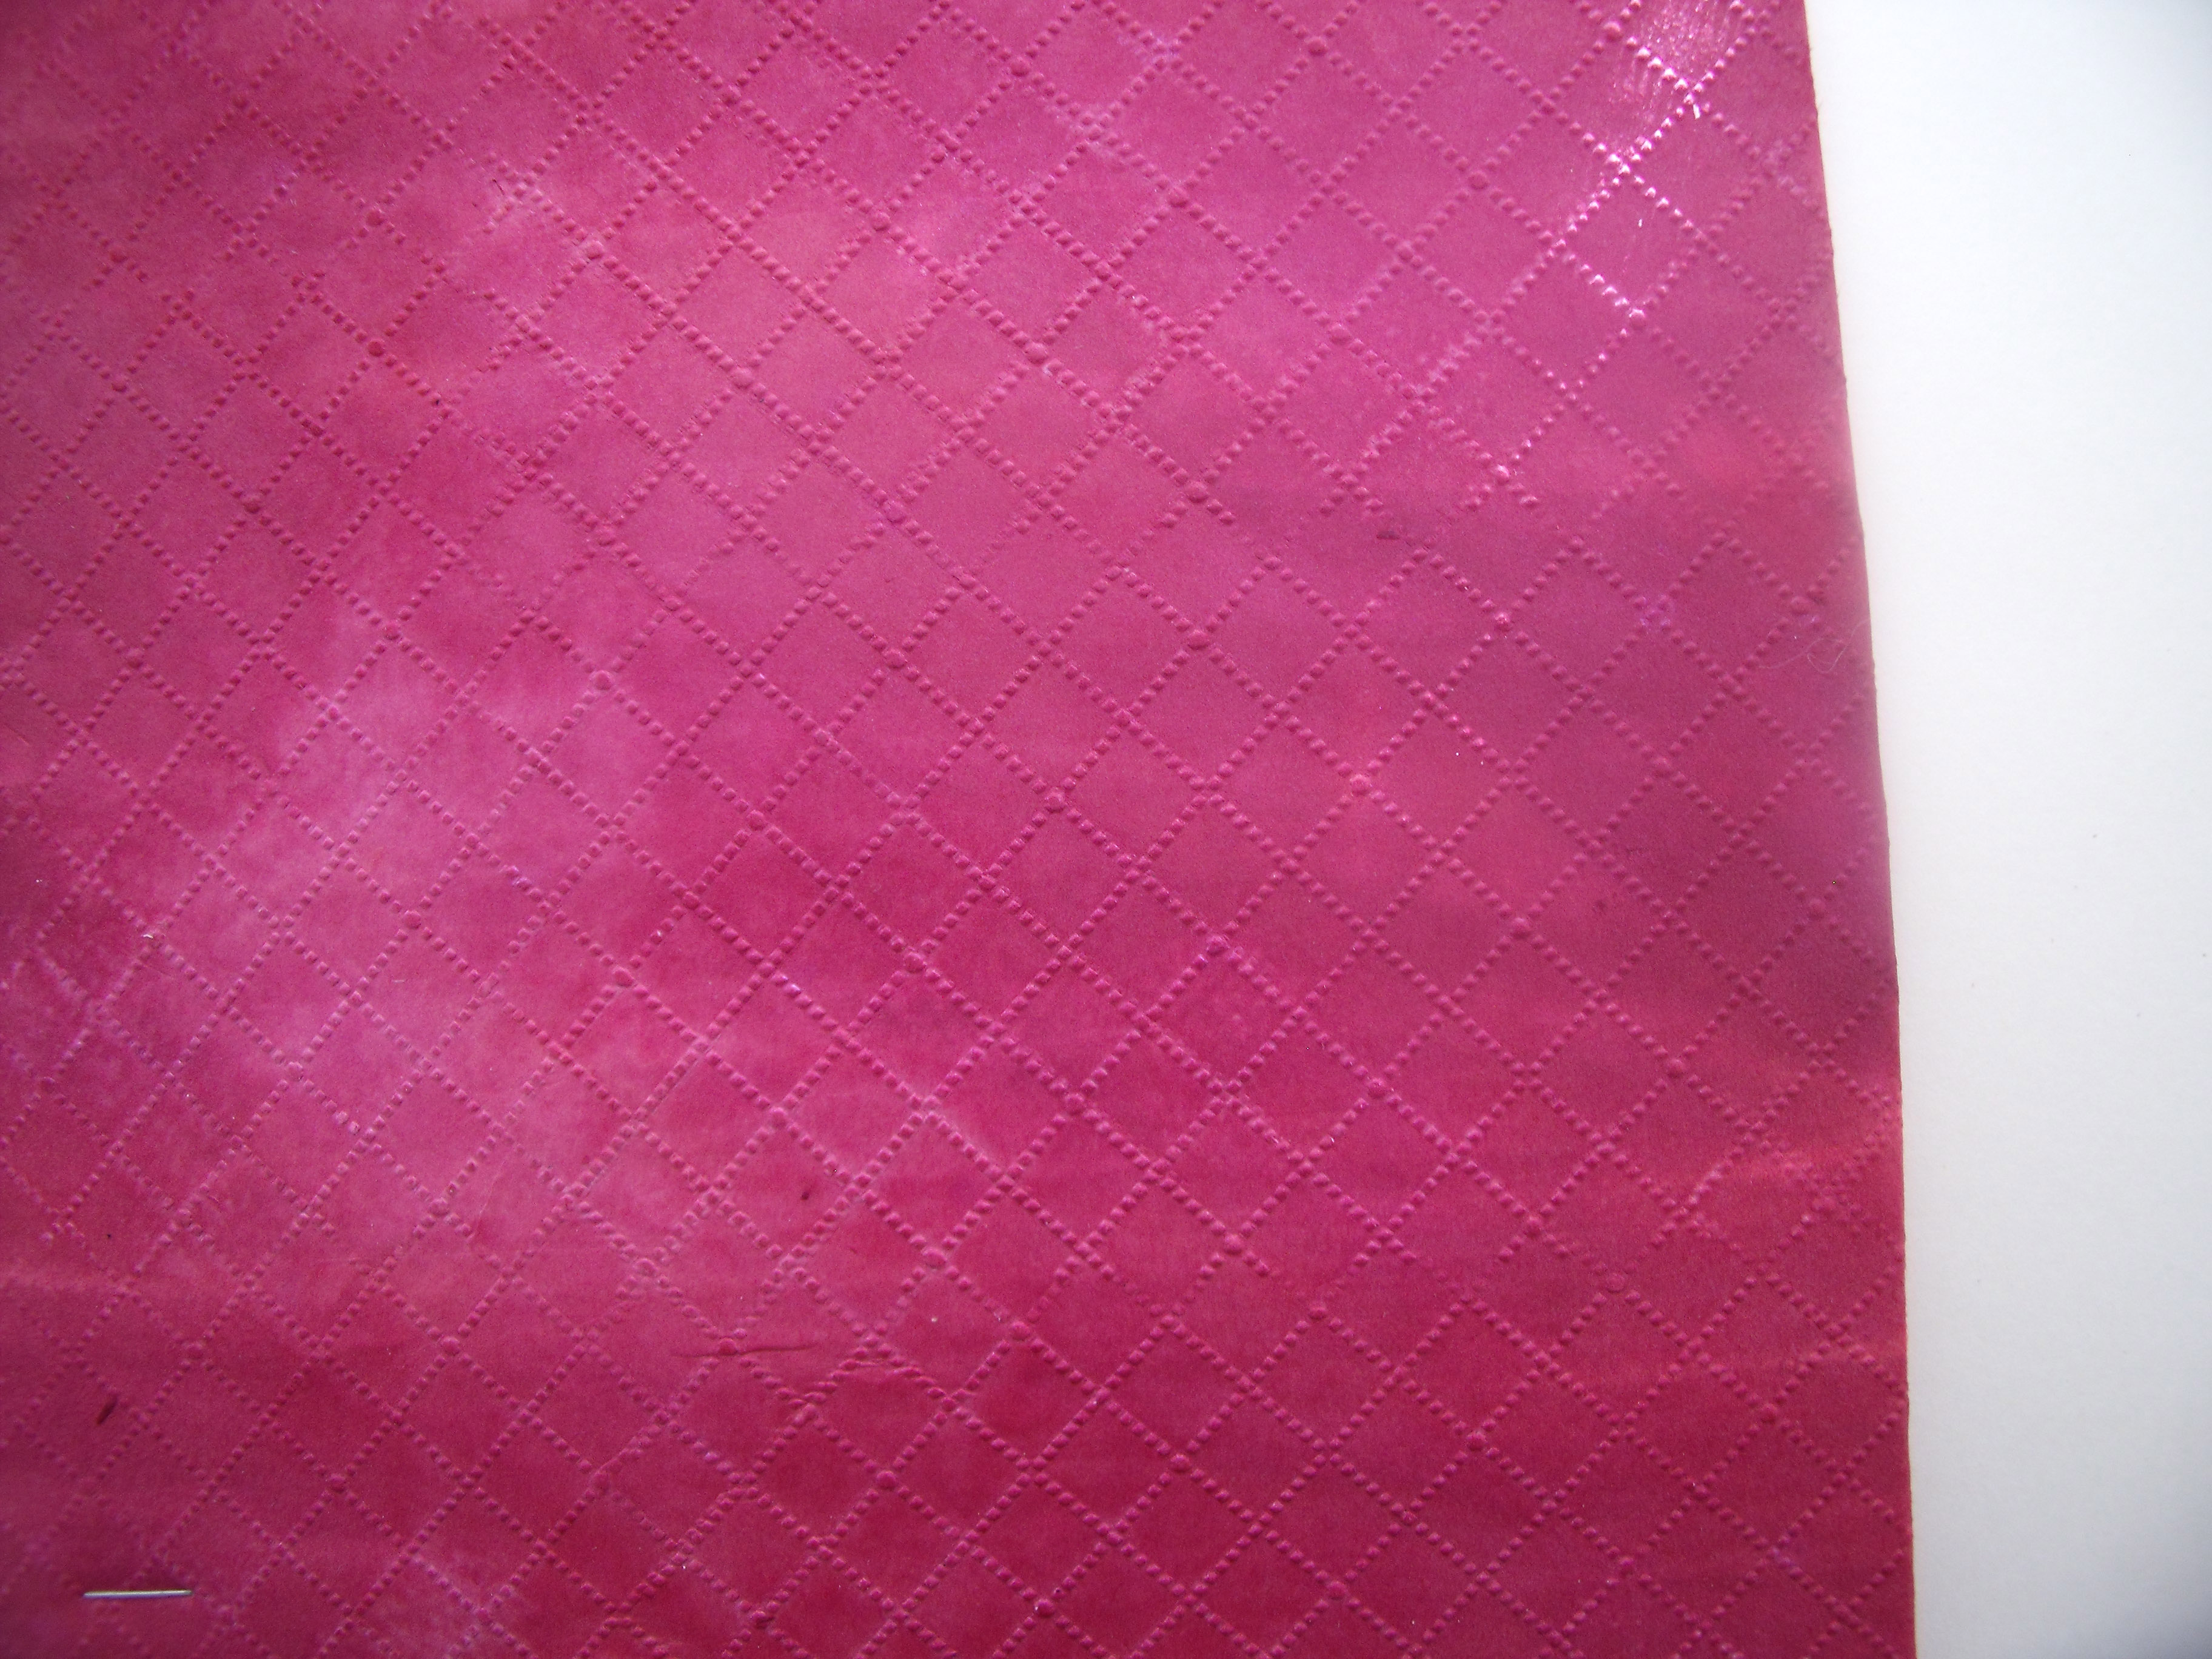
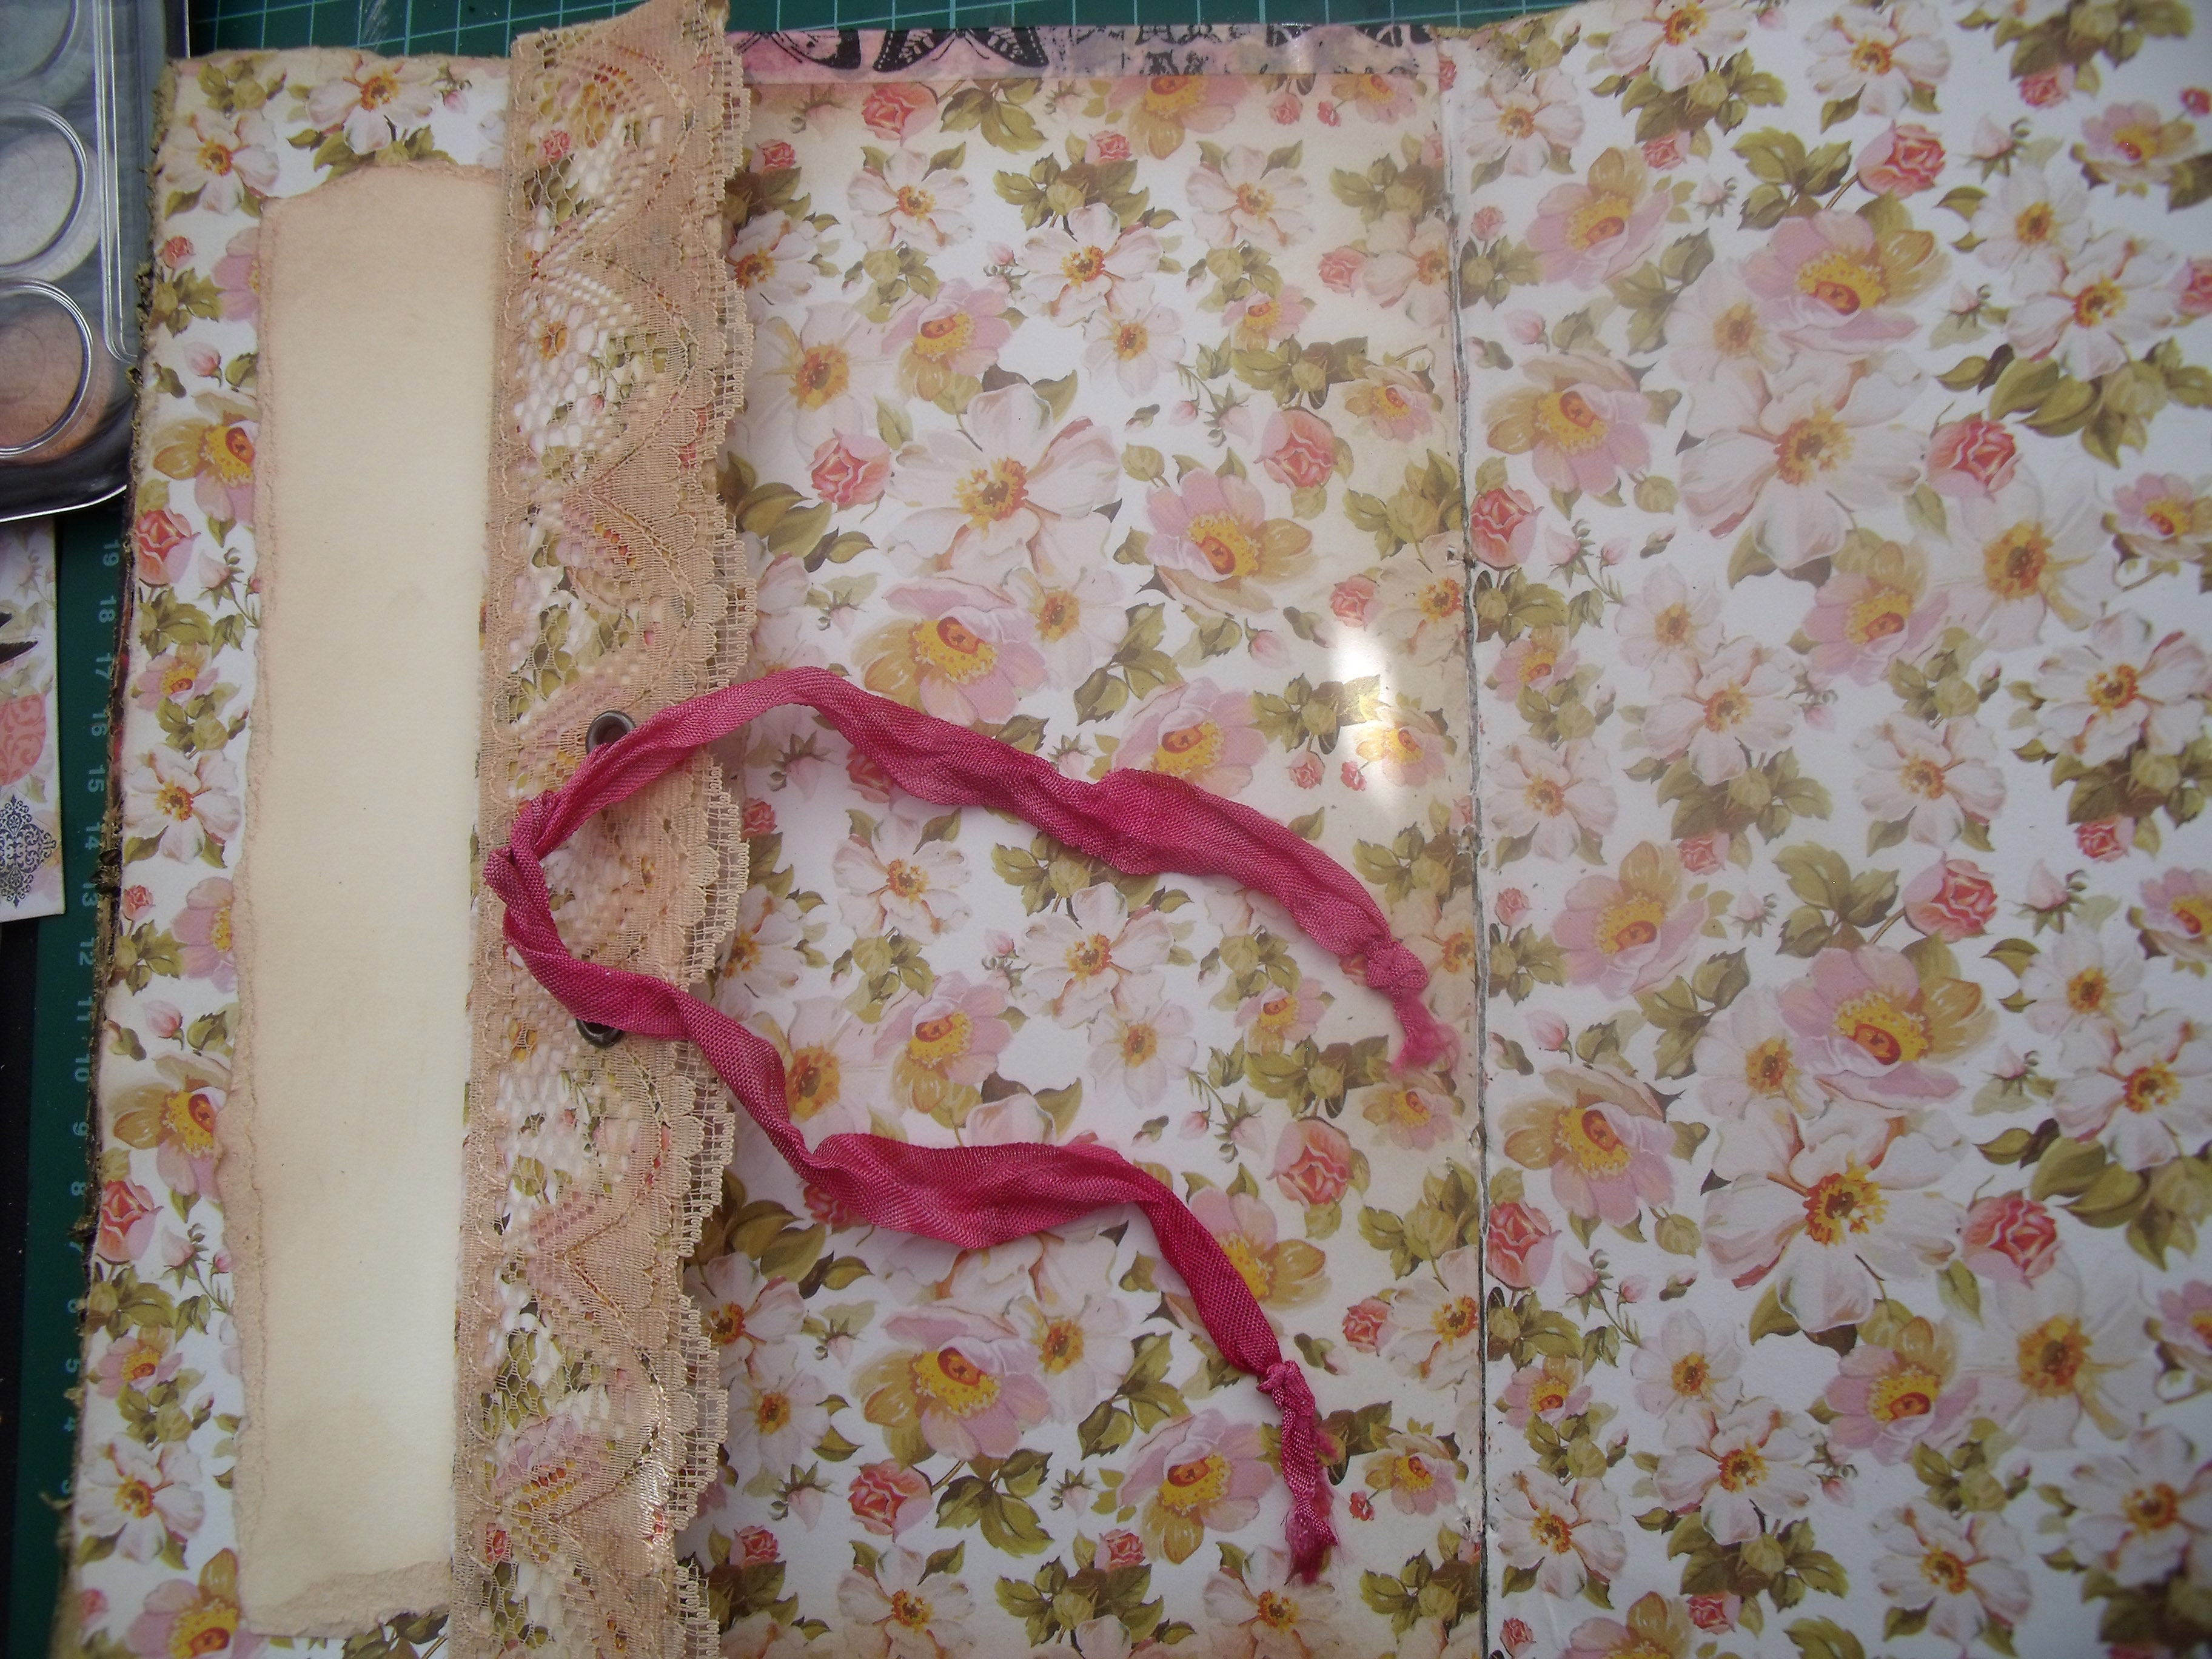
With the book all but finished [tweaking!] I turned my mind to the bag.  I opened up another brown paper bag and cut it into two, then stuck it back together again.  I crumpled it up and mistreated it in a similar fashion to the paper that made the cover of the book.  I glued down the medallion and gave it a good coat of multi medium gel for shine and strength and [hopefully] durability

Bag w gel

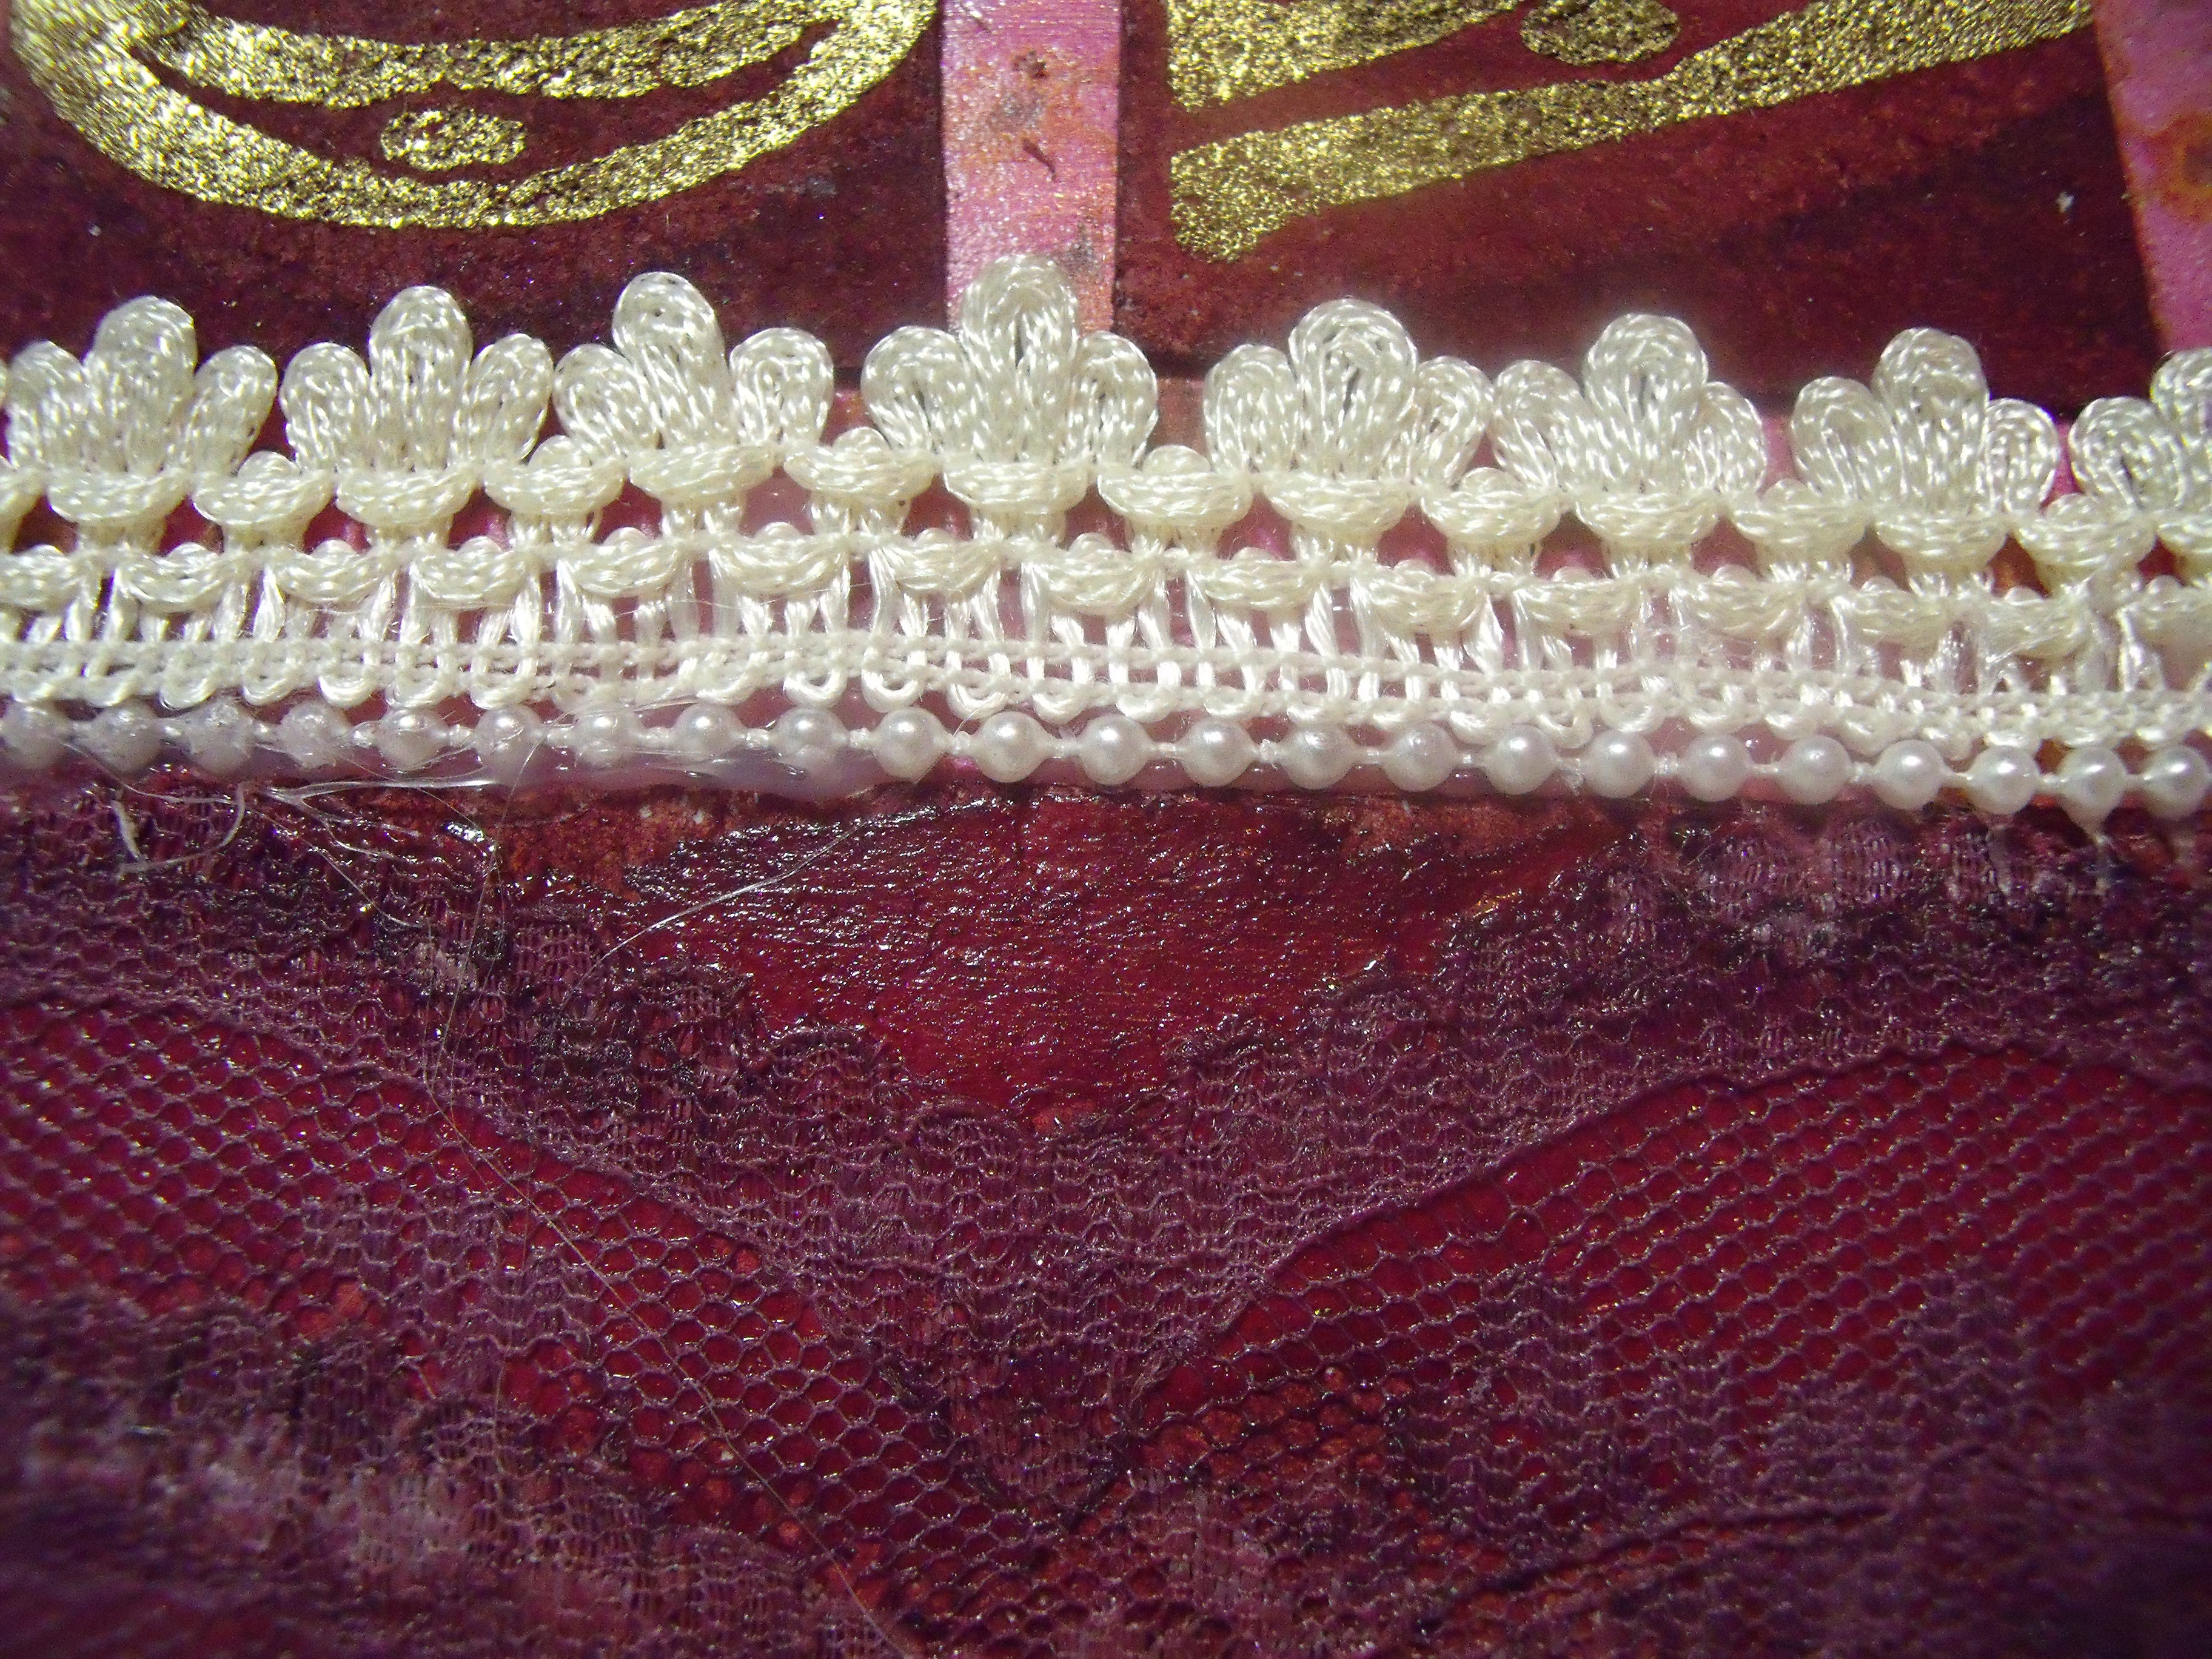
At this point I realised I’d stuck the medallion on the wrong side of the bag and would have to disguise the rather prominent hem, which you can see at the top of the picture ….. so out came the lace and the ribbon and pearls and hot glue gun…… and we ended up with this.

Bag 4 finished

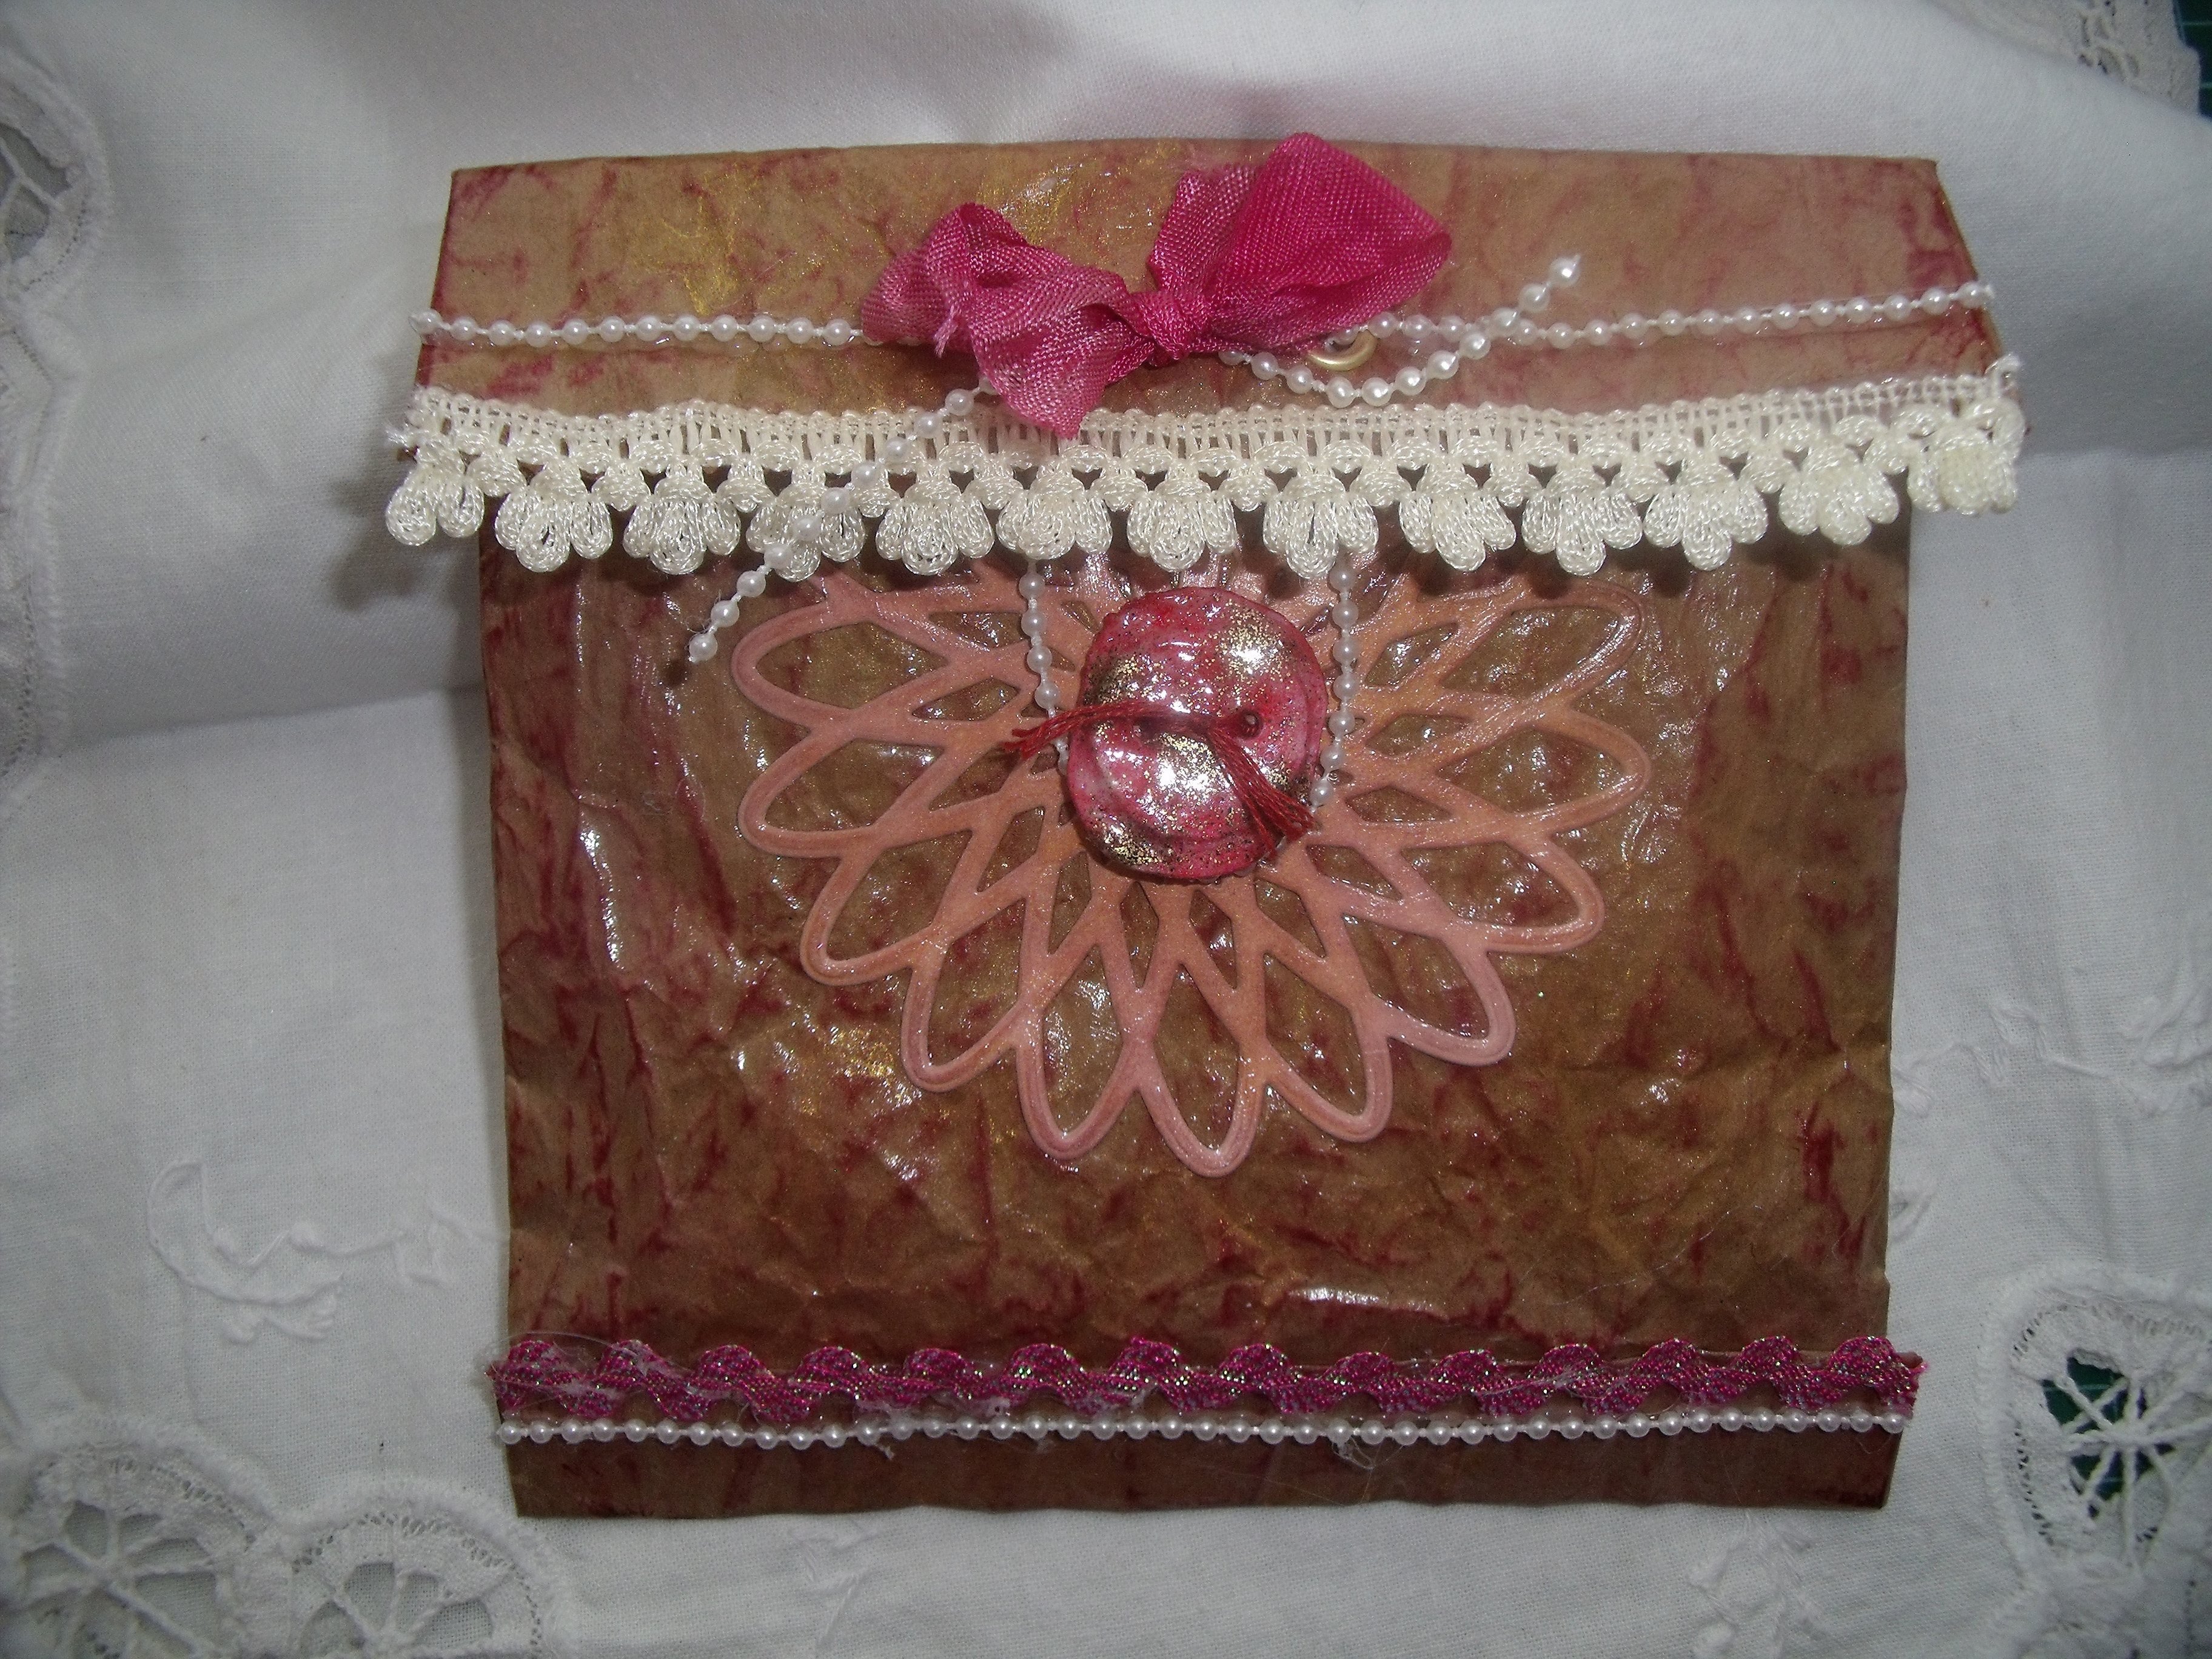
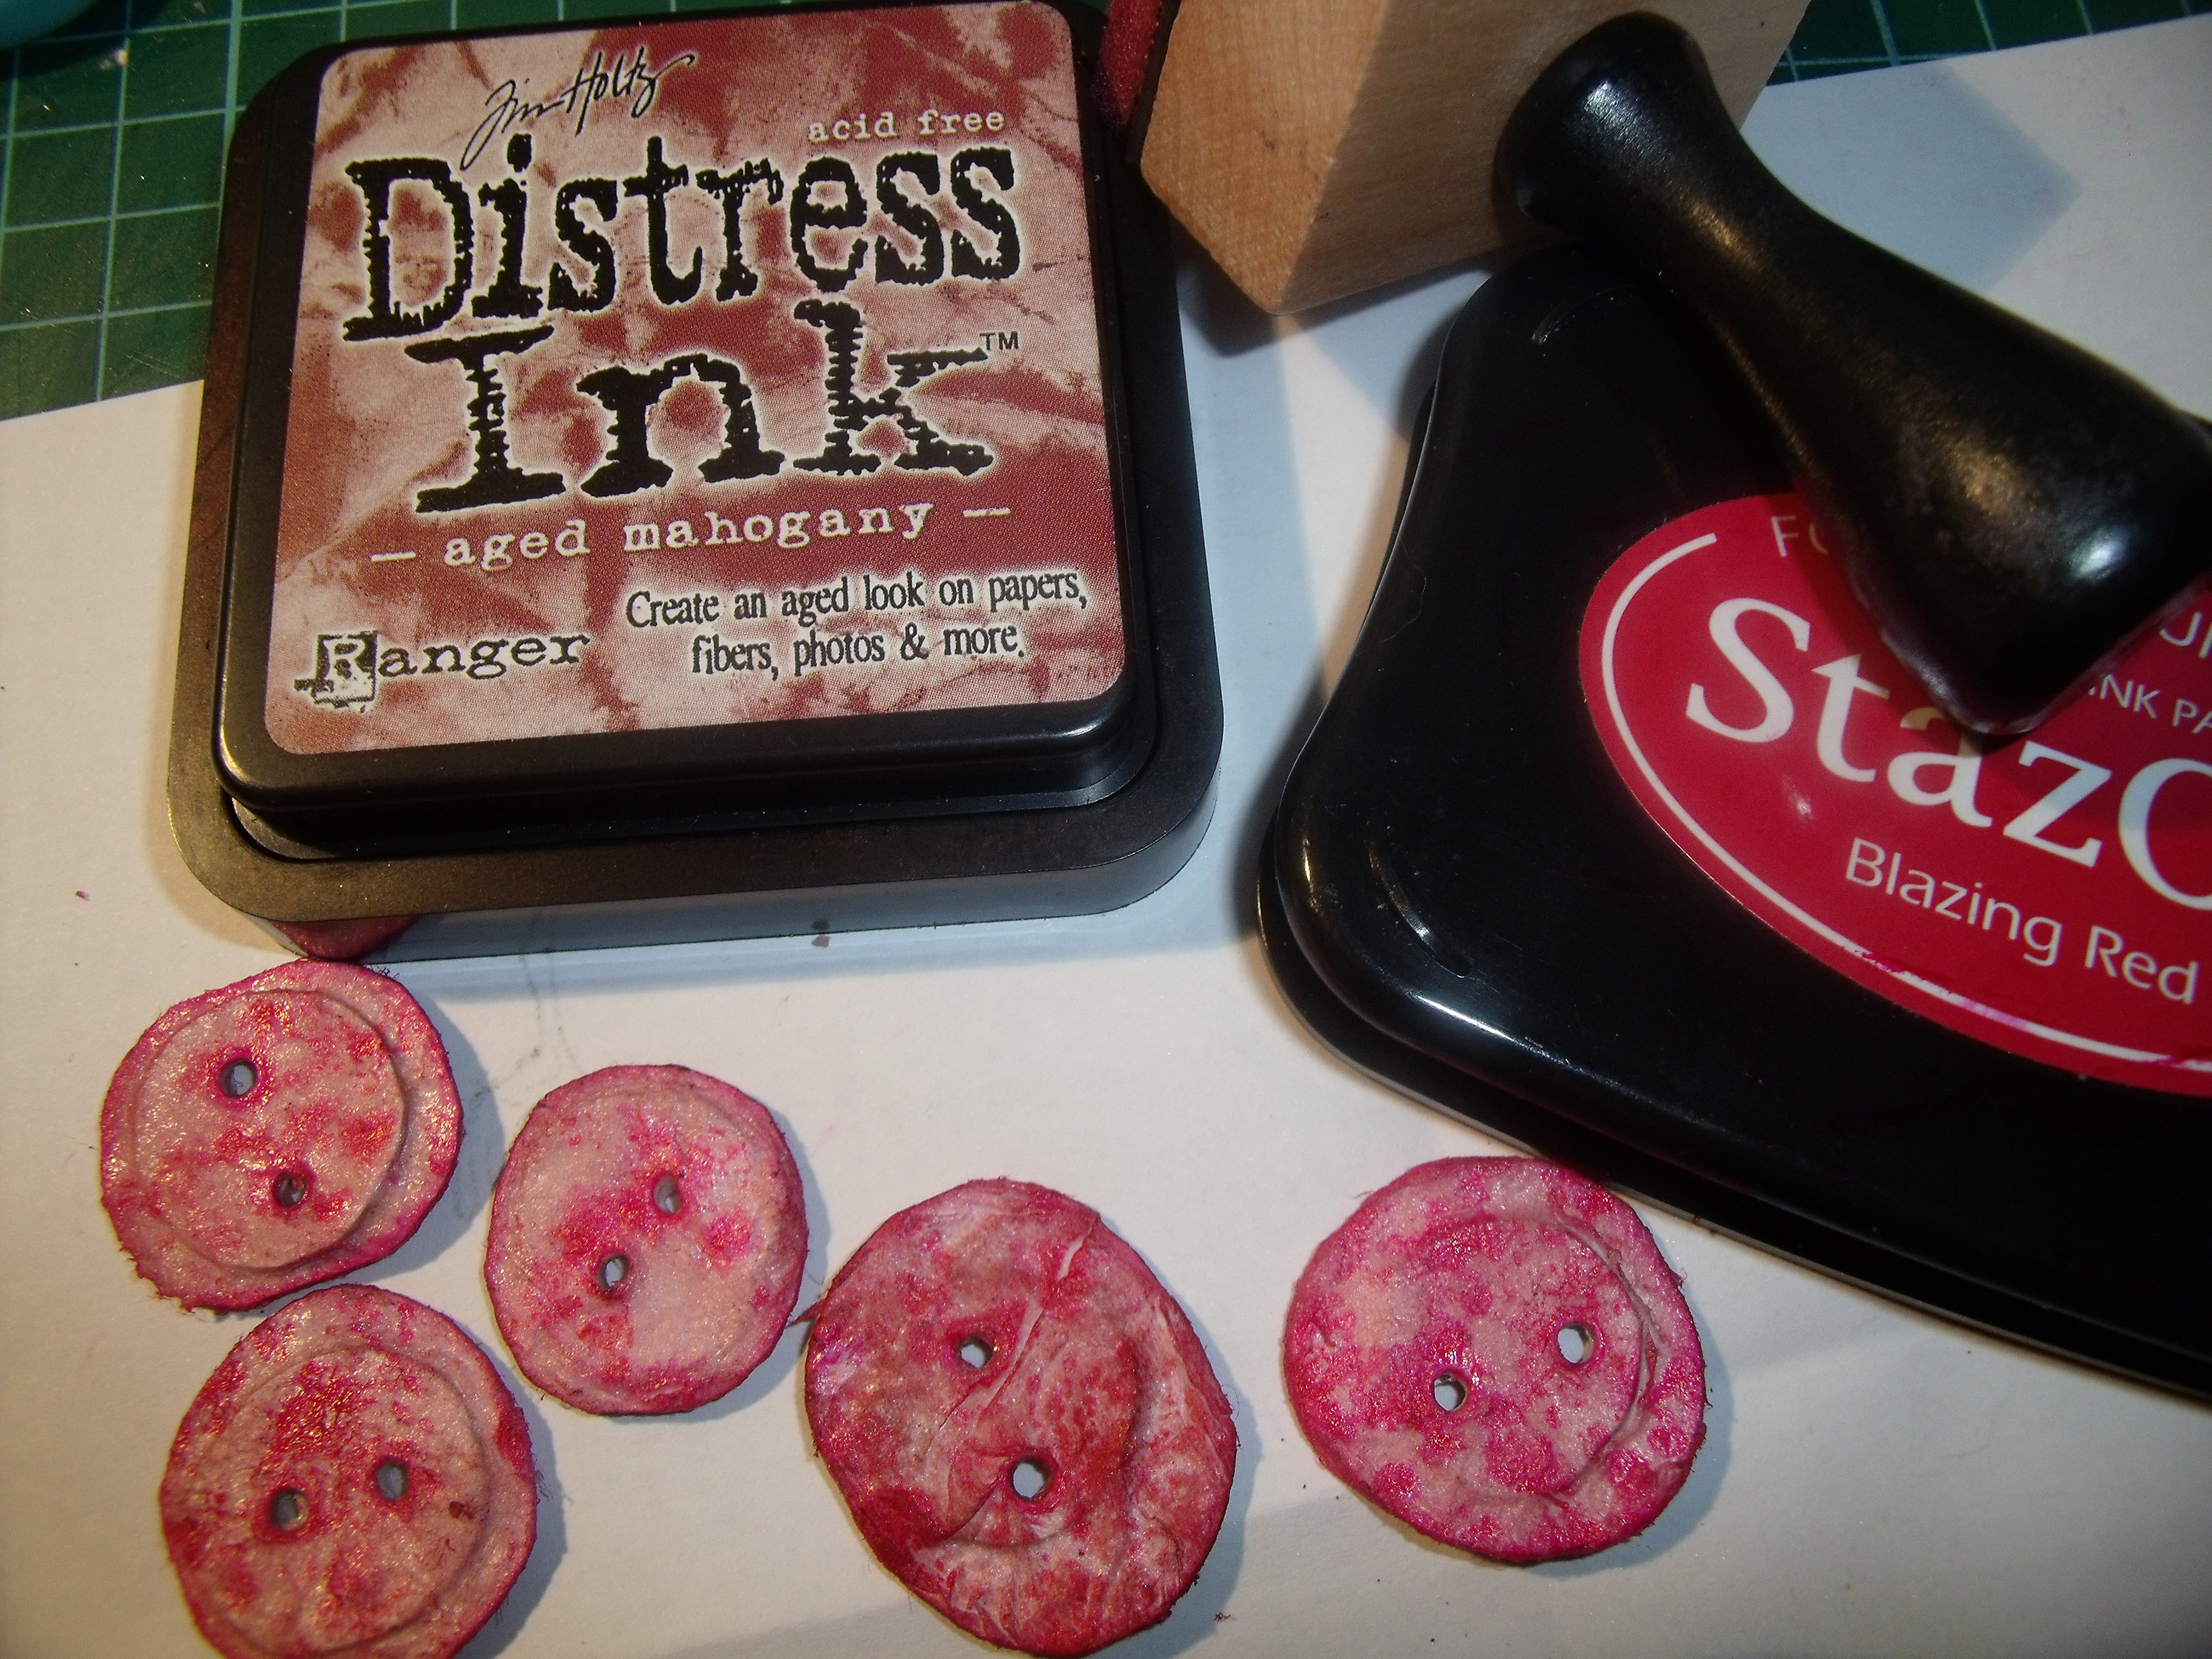
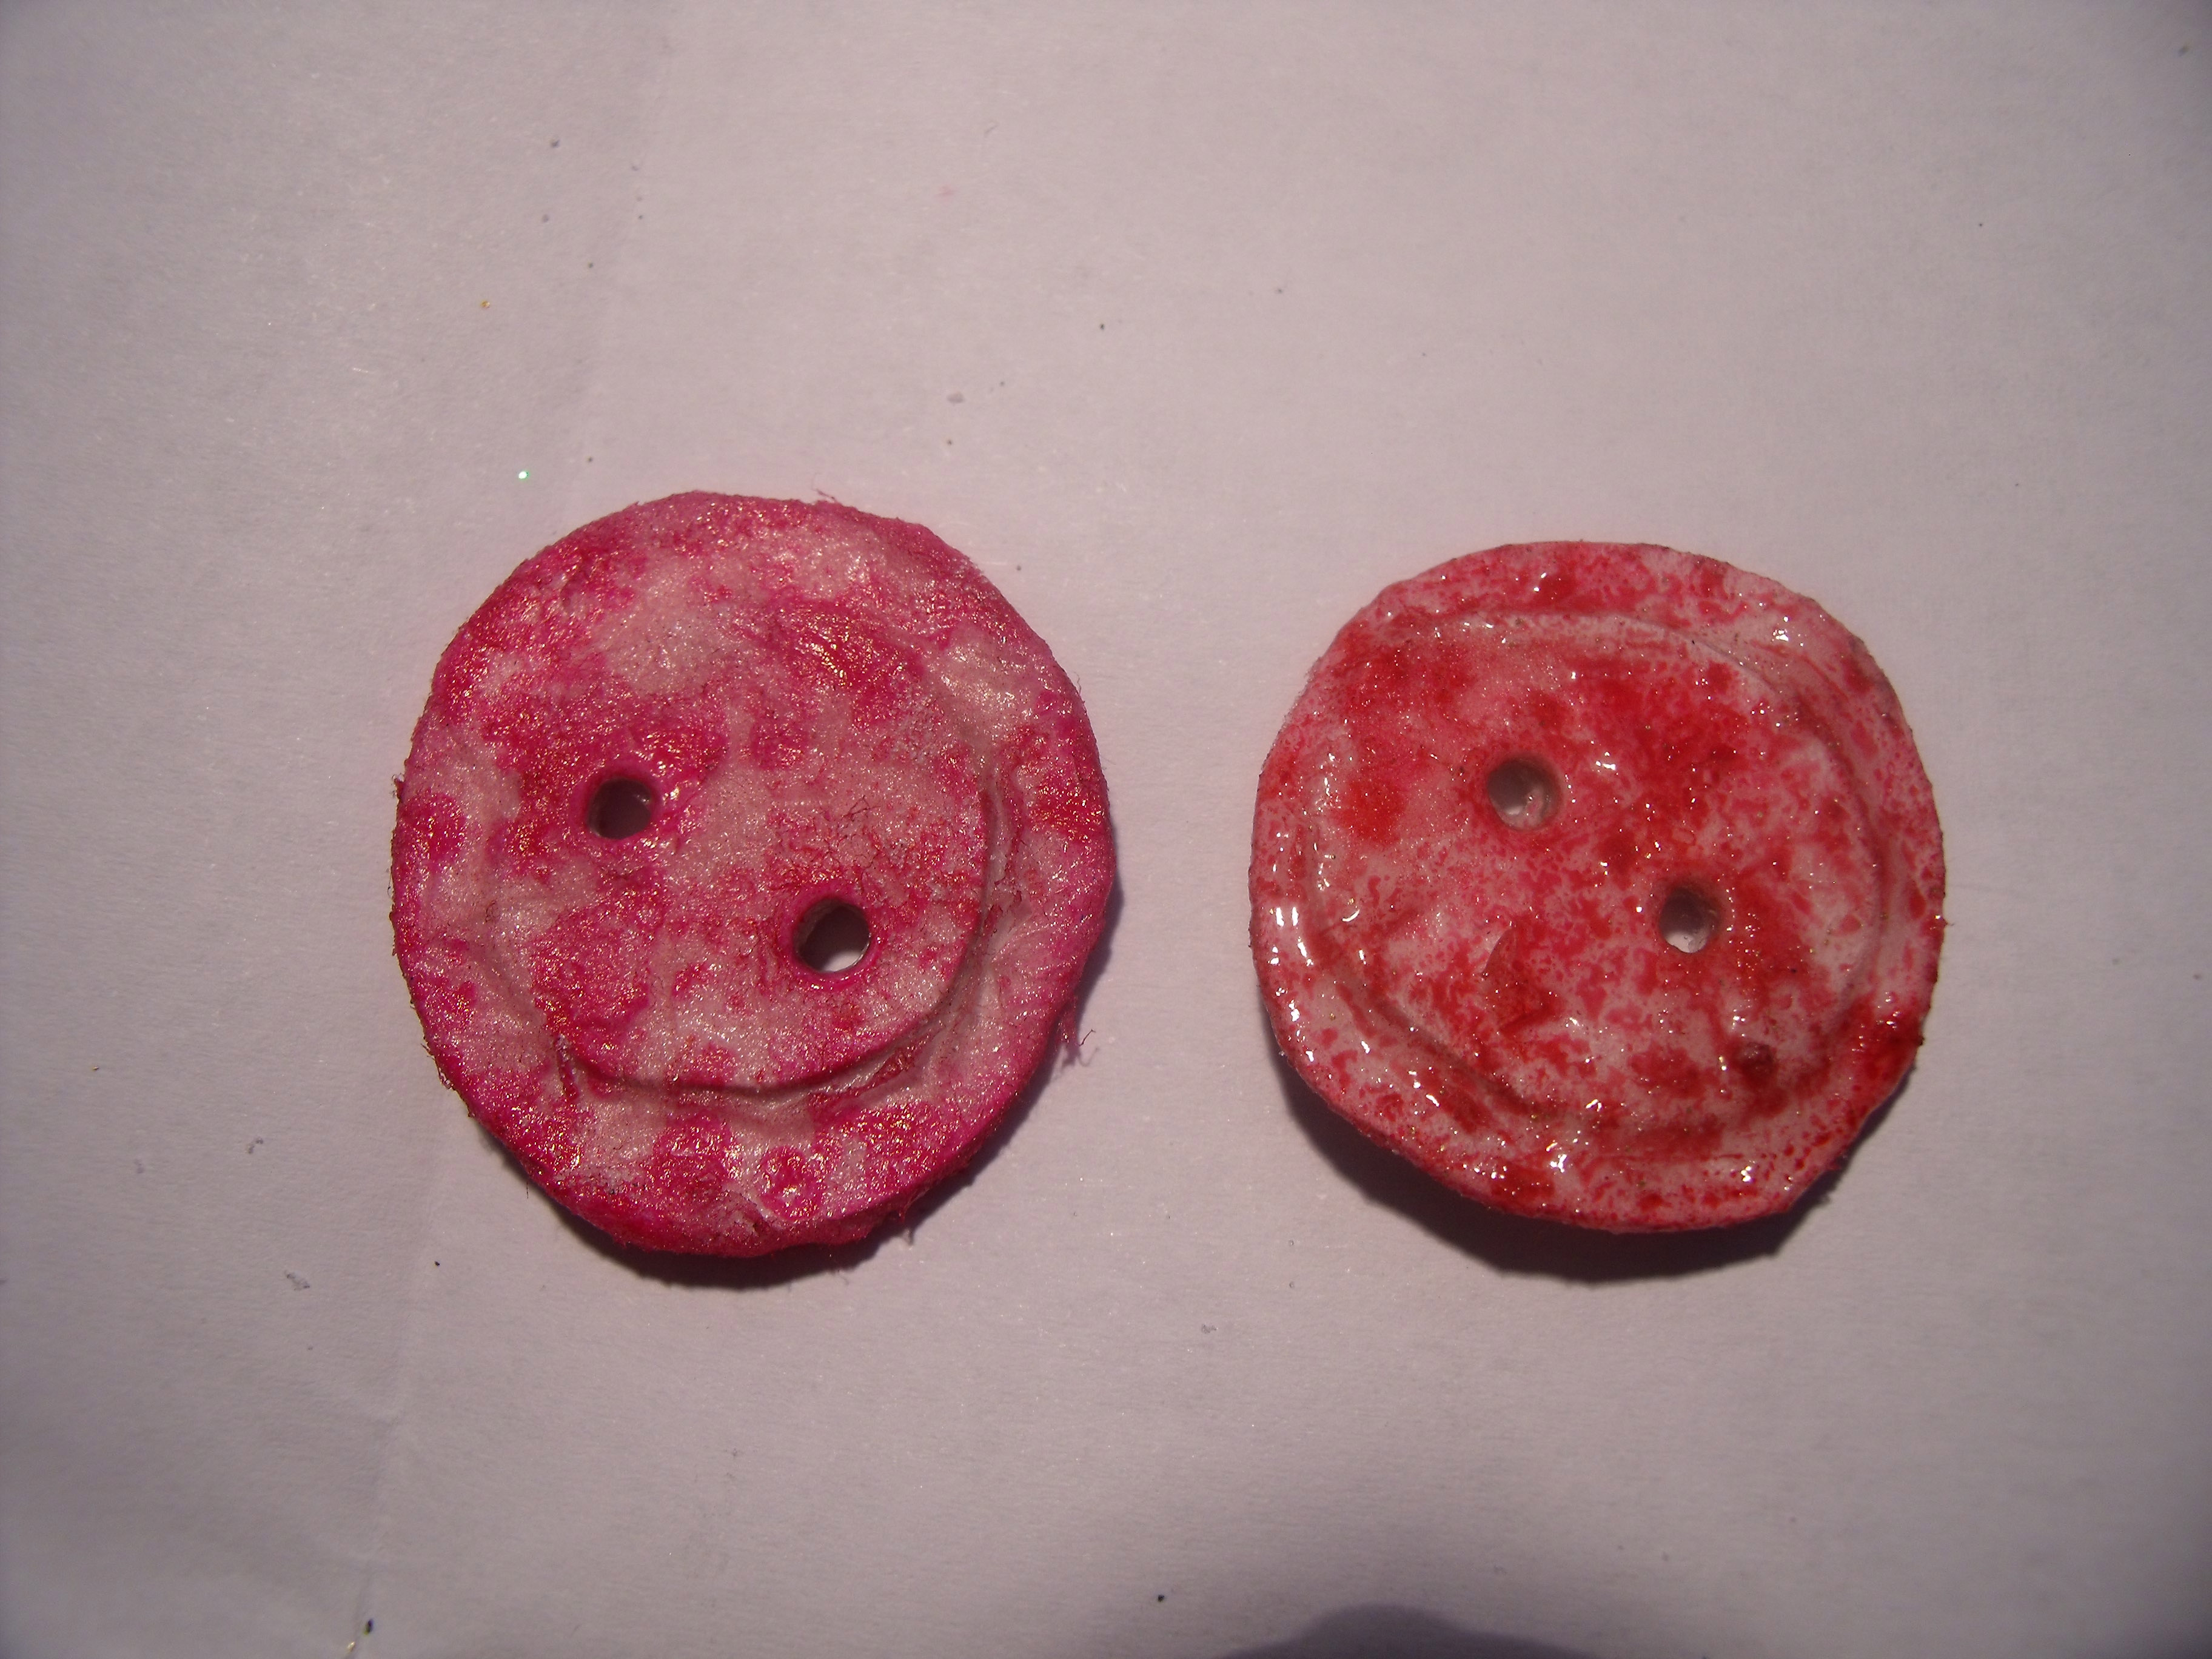
And did you spot the button?  It is one from the set that was made a few weeks back which I posted about as ‘Antique Buttons’.

I had fun making this and learned a lot in the process!

Thanks for dropping by, hope you enjoyed it – do say Hi – it’s nice to meet the visitors!  🙂

*Palimpsest literally means ‘scraped clean and used again’ 

Back in ye olde dayes when few knew how to write and paper/parchment was hard to come by it was common practise to scrape away previous script and use the paper again.  It was still common practise in the early medieval period for monks [who did most of the beautiful script work that survives today] to re-use even older manuscripts considered of no importance to produce their work on.  A recent discovery is the Archimedes Palimpsest.  It has caused great interest when it was found that the original writing was a 10th Century copy of a previously unknown treatise  by the renown philosopher.  Scientists and scholars are still working together to try and decode it. 

The ‘Last Tweak’ Syndrome

I’ve been playing around with a number of different ideas in my craft room – I have five projects in various stages of completion because I get to the ‘finished’ stage and then think ‘Oh, if I just do this, that bit will look better ……’  Then when I’ve done that I discover some other part of the project would also benefit from a wee tweak………. having done that of course the rest certainly requires being brought up to speed – and so it goes.

This is the case with the ‘Box to Book’ project, which is still in process, but which I assure myself is okay as it isn’t required until Christmas, so isn’t it good that I gave myself an eight month timeline with it …..?     🙂

The up side of all this prevarication and tweaking is that all kinds of exciting discoveries occur which leads to more inspiration, and all kinds of little practise runs happen and this, of course, leads to ‘I wonder what would happen if ….’  and so it continues.

I usually have to say ‘That’s it – no more!’ clap my hands together briskly and exit the room in order to stop the endless ‘last tweak’ syndrome.

Here are a couple of pictures of two items that came into being due to the tweak syndrome

Blue Tag

Blue is my favourite colour – so I kept this for me.  It dangles enticingly from the reading lamp on my desk, reminding me that tweaking is good!

How Does It Get Any Better

This one made an appearance when I was first learning how to make flowers and use stamps and has hung around ever since – it holds an inspirational question, which I try to remember to ask myself every day.  [If you read my blog you’ll know I fell off the horse with that one recently, but back on again now!]

Any way – the tweaking syndrome has led to another side project that I think is almost finished and which I will post details of in a couple of days – so this has all been a teaser to get your interest level raised – and to ensure that I cease tweaking and get it finished!

Hint:  Its a small book in a paper bag ……….and now I hope it’s worth the intro and that you come back to check it out   🙂

Thanks for dropping by!

Creating ‘Antique’ Buttons

I decided I may need some antique buttons for the infamous ‘Box to Book’ project………… I’m not absolutely sure, but might need to embellish a page or two with some.

I happen to have three Victorian buttons, one is from a beautiful antique night gown I used to wear when I was young and romantic – the night gown is long gone [along with my youthful romanticism – but that’s another story ….] and all I have left are the buttons, which I am a bit reluctant to actually use, as I just like having them lying about in my button box – smiling wistfully to myself whenever I stumble upon them…… which sounds a bit Miss Haversham-ish when said out loud…….

Two of them have such a beautiful hand made look to them ~ the one at the bottom left of the photo is off the night gown and the button on the right may be pre-Victorian and came from a ladies glove.  It is very delicate and bendy – that’s a technical term –  apparently just a bit of leather covered with some fabric:

Victorian Buttons

I’d recently seen a You Tube video from the remarkable Jennibellie, a talented young English artist who recycles everything and I took inspiration from her and decided I too could make my own buttons!

I wanted to achieve a similar hand made look, but knew I would never have the patience to make something quite so small and would need to be satisfied with a slightly bigger version and mine also needed to be coloured to complement their supposed destination………

However, in true Contented Crafter fashion I completely forgot to take photos until the project was almost complete, so I staged a couple of steps – like this first one

All you need to start

All you need to start

I used half a food wrap inner tube – about the same size as a toilet paper cardboard inner, just slightly weightier.  I opened it out and cut it into strips then squares, then rounded most of them up to make something resembling circles.  I cut bigger circles and an equal number of smaller circles and had enough to make nine buttons.

I glued one big and one small circle together, nine times.  When the glue was dry I punched two holes in each ‘button’ with my trusty WRMK  crop-a-dile.

Using the multi-media glue I took squares of white tissue and wrapped each button 3 or 4 times with layers of wet paper.  I used black tissue paper on two of the buttons and left them all overnight to set.

This morning they greeted me looking remarkably button like – I was most pleased with them and remembered to get the camera out!

Buttons 2

The next step was to add layers of colour and a little patterning for interest:

Buttons 3

I achieved this with a base of ‘Aged Mahogany’ and then randomly stamped a little floret stamp in ‘Blazing Red’ over the top.

When the inks were dry I embossed with clear powder to get a glazed appearance for the coloured buttons and made up a mixture of black, gold and green embossing powders to give an aged worn-gold appearance to the two black buttons:

Buttons 4

And now I have to apologise for the quality of photos [yes, again!] any light coming into my play-room had been stolen by the black thunder clouds that had moved in and begun to hurl hail stones the size of golf balls at my tiny house………… poor Orlando retired to the bedroom and burrowed under the duvet ….. where I was tempted to join him despite it being 1:00 in the p.m.!!

I soldiered on and kept on embossing until I was satisfied with the results.  Here is a close up of two buttons, on the left is un-glazed and the one on the right has been completed:

Buttons 5

And here are all nine, finished and ready to go:

Buttons 6

One pink button has been treated to a wee scatter of the worn gold mixture and has a satisfyingly well worn appearance, which my unfortunate photography skills have entirely missed capturing ….

Now it will be interesting to see if they make it into the current project – or maybe turn up somewhere else altogether!

Thanks for dropping by – always lovely to see you’ve been!  🙂

Box To Book – Part 5 – The Cover Finished

I thought I’d better post these photos of my progress before I get side tracked [again!]

We are having exciting weather – it was supposed to snow but that appears to have missed my part of the country and we have just had rain – endless rain …… cold, wet, hard-falling rain!

Lots of flooding and landslides and roads closed and bits of the promenade falling off into the wild southern ocean ….. I’m not a fan of weather like this – give me snow any day!

However Orlando is as happy as a bug in a rug – or a cat ….. he gets to go outside to potty and come back in and get a towel down.  He loves a towel down!  He suddenly finds he has to go potty many, many times in the day  – far more often than at any other [drier] time of the year – and, on his return,  presents himself side on so that I may touch the wet fur and retrieve his towel and do my job…………..

If I could film at the same time as towel down I’d post a little something for your eddication and enjoyment…….. head back, eyes closed, mouth a little open and rumbling like an aeroplane preparing for take -off……….

However I digress.  Here are the last photos I took a few days ago:

The finished cover

The finished cover

Cover finished 2

The title is made with individual letters stamped onto dyed grunge paper and embossed with gold and rubbed down a bit for a worn look.  The antique lace was an after thought – found in my stash when I was looking for something else –  and is perfect for just right there don’t you agree?

Lace has been attached to the spine for added texture

Lace has been attached to the spine for added texture

The row of tiny pearls shows up in this last photo, nestled alongside the antique lace…..

Currently I’m working on the verses and finishing touches for all pages – I do what I can in between towelling down the cat, keeping the cat warm, singing to the cat, taking the cat for his daily walk – well, I walk he rides in my arms and points the way with his nose – retrieving his lost toys from under furniture and or appliances ……and now and again seeing to the needs of myself or other folk……….

Lovely that you stopped by, leave us a note do….

Box To Book – Part 4: The Cover

Welcome, if you are a new reader [or follower 🙂  ] here is a brief introduction to this project:

Last Christmas I received a Grand Calibur die cutting machine which came in a large and sturdy box which – in a moment of madness – I decided to turn into a book.  There are three previous posts showing the progress I was making – I haven’t made much progress for a while really………….

****************************************

So I hit a wall – I was thinking too much and everything I did was awful – truly awful!!

A good lesson for me to learn – stop thinking and start creating!

I got into the rut because I really wanted to make something special out of that box – the idea is to return the box to the original giver in a new form, so therefore I couldn’t muck it up………….. and, of course, therefore I thought too much and mucked it up ….. !!!

So I had a wee paddy and went into the play room today saying through gritted teeth – just go with your gut and play and chuck out all the ‘shoulds’.

And a miracle happened and in just a few hours I made the cover for the book:

I took some cream card stock and painstakingly put it through the machine six times to get the embossed pattern into it.  I used stains in ‘Aged Mahogany’ and ‘Brick Red’ to colour it and when it was dry I sprayed liberally with glimmer mist ‘Black Cherry’ to get a slightly worn, but rich red.  [NB:- The photos were taken with the low winter sun streaming onto the desk, the colour is not quite this pink in reality]

Day 7 Cover 1

Then I prepared the inside lining for the cover.  The small paper example to the right is the original, to the left after it is sprayed with the same glimmer mist colour.  The edges are stained and slightly tattered:

Day 7 Cover Inside 1a

When I had made two boards – front and back covers – I left them to dry and played around with the glimmer mist on some lace and punched a length of pretty paper using a Martha Stewart punch:

Day 7 Cover 2

I decided it looked a bit insipid, so it too got sprayed liberally with the glimmer mist!

I cut a strip of grunge paper to size and that got a good coat of ‘Aged Mahogany’ stain and came out really pretty – it looks and feels like velvet!  Then I attached the dyed lace with a light coat of multi-medium.

Day 7 Cover 4 Spine

There was a strip of the inside paper lying around so I decided to use that on the front cover too, everything was glued on seperately and layered carefully.

Finally I attached the outer spine using a combination of hidden staples and tacky glue and then – fittingly – left it sitting under the weighty die cutting machine – the item which came in  the original box – to dry:

Day 7 Cover 5 Drying

When it emerged from under the machine it looked like this:

Day 7 Cover 6

I’ve started on the title and a little something else which is needed – and I’ve got a line of pearl beads to attach tomorrow –  but the worst of it is done.  What a relief!

I’m really happy as at last it is starting to look the way I wanted it to – like a really old book that was beautifully and carefully hand made and has been much used and is now just a little the worse for wear ……

Thanks for sticking with it – let me know what you think………..

Box to Book Part 3

Two weeks have gone by and the work on this project is not going according to plan …..   But I am remaining true to my usual way of working, and continue merrily on with my hit or miss style

I’ve been working on different embellishments that will be added into the book – most of them still requiring finishing touches as I kept running out of supplies – and as I buy most of my stuff on-line there can be a five day delay between ordering and receiving.

If I discover, say on a Friday afternoon [and this actually has happened] that I need more embossing powder it can be Thursday before it gets to me – depending on the supplier.  It can really stop me in my tracks – so I’ve spent a  bit of time checking everything this week and making a list…………. [Yay me!]

So consequently all I have to show at the moment is the layering process which is underway.

What you are about to see is simply phase two and there are at least another two steps to be taken in this process – And just to keep your interest up [hopefully] I’ll finish with a quick peek at a possible phase three page.

Day 6 Layering 1

This is a page towards the back of the book.  Card-stock has been torn, dry embossed [the script] and then attacked with some ‘Old Paper’ ink to age it up.  The edging of lace is done the same way – but this may well disappear altogether as I don’t really like it……

The strip of fabric edging on the right side is loose so that more pages can be tucked under it later on.  Most of what you can now see will soon disappear…..

Day 6 Layering 2

A close-up of the lower left page.

Day 6 Flip Page

This is a page towards the front of the book – it’s actually two pages as the curved part is the edge of a flip page, narrower and incorporating a pocket for more embellishments to be tucked into, and the bird belongs on the following page – I quite like that you can see this glimpse of what comes next..

A couple of pages on you’ll find this:

Day 6 Envelope Page

Another flip page, made to look like an envelope with lace edging and ribbon tie.  Well it doesn’t just look like an envelope, it is an envelope and will hold a couple of poems inside.

Day 6 Layering 3

This is the page before the envelope – that’s the back of the envelope on the right hand side.  The page on the left has its first layer on and the next pic shows what I am considering as layer three for this particular page:

Day 6 Layering 4

I can’t adhere anything as yet as I still haven’t decided what text I am going with  – but two strong contenders are Khalil Gibran – selected extracts from ‘The Prophet’  – or a selection of my favourite Rumi verses…….decisions, decisions!!  But once that decision is made and the verses all printed out then everything will come together – I’m hoping another two weeks will see it done………

Stay tuned!

Thanks for taking the time to drop by – I love that you came!

Box To Book – Part 2

I haven’t spent as much time on my recycling project as planned…… we are experiencing our first mild frosts of the season and the days that follow are beautiful, sunny and warm and they call Orlando and me outside.  We sit in the courtyard with our faces turned up to the sky and, smiling slightly, enjoy the warmth and the feeling of warm air on our skin or fur….. we both sometimes purr……

But I have done some work.  I’ve begun the process of sorting out embellishments I would like to add, finding just the right poem scraps and verses to include [which simply takes forever, there are so many] and making the extra fancy bits.

I had completed the first fancy pocket before realising I had not recorded the process – duh!! So I made some more and here is a small sampling of a couple of things where I had employed the camera:

The raw materials, cream cardstock and dies

The raw materials, cream cardstock and dies

These are two of my favourite dies – the lacy corner is from Heartfelt Creations and the open book is a Marianne die.

Because I am going to use those lacy corners as pockets I glued them onto clear rigid plastic [recycling the packaging that everything comes in these days] with multi medium gloss gel – that is the milky white that is showing up in the photos as it was still wet at photo call time.  Disappears when dry, so at first glance the pockets will appear transparent but will not rip when other items are placed into them……… Prior to this I had painted, inked, embossed them and then screwed them up to get a really well worn look.

Ready for their new home

Ready for their new home

I want to write in tiny text a little poem in the book ….. not sure what yet.

One page almost complete

One page almost complete

Still got a long way to go.  Thanks for checking in, leave a comment and let me know what you think – love to hear from you! 🙂

Blogging – A New Community Concept

I finally got around to signing up for the Freshly Pressed  posts – I’m slow on the uptake sometimes, I just live in my own wee world….. It has taken me a while to figure out that some of the bloggers I follow are using the weekly and daily prompts to express themselves, to practise the art of  photography, poetry, writing – whatever it is they are into, and I have been so impressed with many of the posts I am reading on a regular basis.

Inevitably I decided to join in too.

And this has meant that even more of my time has been spent drifting about in the blog-o-sphere getting to know a few more folk, dipping in and out of lives like a ghostly eavesdropper….. sometimes leaving a message, sometimes not.  Sometimes remembering to click ‘follow this blog’ and sometimes not [which I know will lead to a moment of angst when I want to find that post or person again.]

I’m new at this stuff and have been amazed at the world that exists here – I wrote a post a couple of weeks back titled I Like Blogging!  where I attempted to explain all the unexpected delights I was discovering, and now those delights just keep on increasing.  

There are so many interesting people out there – it feels like I can sit in my wee home and meet the entire world!  I’m in danger of never actually doing anything ever again – I may just spend the rest of my days sitting in front of my computer, reading about all the things other people are doing and experiencing!

I enjoy posts from all kinds of people, on all kinds of subjects and I especially enjoy a good chuckle, if not a belly laugh.

But – and now I’m getting to the point of this post – more and more I am reading autobiographical posts that are heart-wrenchingly honest and open and wounded and raw.

I have read posts that leave me sitting silent at the final word, or saying ‘Wow!’ out loud – posts that remind me of – or take me back through –  my own life experiences, posts that make me sit up and take notice, posts that move me to tears.

Some posts deserve slow and careful reading to truly take in the events, to taste the descriptions, to hear the music, to touch the soul of the writer.

All are open and honest and trusting that their words will be read with respect if not full understanding and empathy,  

I read their words and I meet the soul of the writer – the shining being who is suffering or who has suffered, and who is over-coming and is learning and growing and becoming stronger and wiser.

Pain gives us the opportunity to grow and mature and become better people.  Through pain we may learn our life-lessons, to develop our empathy and intuition and perhaps even get an inkling of an understanding of our reason for being here.  Painful events do not define us, it is what we do with those events that we will be remembered for.

This then is the real gift of the blog-o-sphere.  In our fast paced, ever moving, technologically driven modern time when community is fast becoming an endangered concept, and more and more people live outside of the accepted ‘norm’ the blog-o-sphere offers a new community – an enlarged extended family of people interested in people, supporting and caring, empathising and listening to each other.  

So I remain impressed, I am enchanted and most of all I am uplifted to see that here there is a safe platform for expression of personal pain and a community that allows that expression and responds in kind with affirmations, sympathy, empathy and sometimes even [the kindest of] humour.

Rock on bloggers!

And if you knew all this before I apologise for taking up your time – but thanks for reading to the end 🙂

And I promise this is my last post about my thoughts on blogging 🙂

Have a great day and reach out to someone who needs to hear your voice, feel your empathy and touch your soul.

Box to Book – Part 1: Transformation and Recycling

A while back I was wandering around in You Tube and came across a beautiful altered book video by a talented young woman called Paveena whose channel is called ‘myautumnsunset’.  The book she is showing is absolutely stunning – and I was inspired!

One of the things I really liked was the thickness of the pages – she had been able to burrow into them and inlay some found pieces.  I didn’t have such a book to hand, nor was I likely to find one.  So the idea sat for a while somewhere in the dark recesses of my creative mind.

Last Christmas Eldest Daughter had completely surprised me with a wonderful gift – a new ‘Grand Calibur’ die cutting machine.  It came in a lovely big, strong box which was sitting under a table in my play room, getting in the way, but with it bound to be handy for something one day, I had refrained from sending it to the recycling station.

So that lovely ‘Aha!’ moment arrived – and although I did not cry ‘Eureka!’ and leap from the bath – metaphorically you may say I did!

You know where I’m going with this – ‘The box’, I said to Orlando, ‘will perfectly transform into a book….’.

So that idea sat for a bit – which is my usual way of working.  When I get a new idea I let it sit around, I move it about a bit, imagine the end product – which gives me a kind of over view of how I might get there – sometimes I even jot down a note or two, but nothing much outwardly happens.  Then one day I’ll go into the play room and lose busy myself in the creative process.  Most often the finished product bears little resemblance to the initial idea – hence the ‘hit or miss’ label I give myself.  But something interesting usually transpires.

But this task is different.  This is everything from a box, I only have one box so can’t muck it up – well not too much anyhow – I have to have a plan, a process, a recipe.  I have to think before I leap – or cut – I have to know how it is all going to go together……..

Now this is the part where you get to be very pleased, proud and happy for me – I did it!

And not only did I do it, I also remembered to photograph each step along the way – or nearly every step – nobody’s that perfect are they?  I didn’t actually take a photo of the box before it began its transition ……

So here we go:

Day 1: Dismantle and cut up the box into page size pieces.  Paint all edges black.  Tape two ‘pages’ together to make a double page with a slight gap between the two for ease of folding and the later step of sewing the signatures together.  Do this three times.

The 'pages' painted and taped

The ‘pages’ painted and taped

Day 2: Choose paper and cut to size.  Distress all edges by tearing, razoring [?] and applying ‘Old Paper’ Distress Ink.  Using tacky glue liberally adhere paper to cardboard pages.

Goodbye box, hello page!

Goodbye box, hello page!

A small corner is left to remember it's provenance!

A small corner is left to remember it’s provenance!

The three cardboard signatures ready for the next step

The three cardboard signatures ready for the next step

Day 3: Now that the cardboard signatures are ready I made a paper insert for the centre of each one using paper from the same line.  These were shaped and the edges were distressed in a similar manner to the cardboard.  Then each signature was individually stitched to a pre-measured and pre-spiked length of grunge paper which is to be the inner spine. [Grunge is perfect for this due to its strength and flexibility]  I used embroidery floss to sew each signature to ensure the colour matched the paper .

The signature ready for sewing to the spine inner

The signature ready for sewing to the spine inner

The three signatures sewn to the spine inner with the cardboard cover balanced precariously on top - so you get the idea!

The three signatures sewn to the spine inner with the cardboard cover balanced precariously on top – so you get the idea!

Tomorrow I am having a day out with Youngest Daughter which will give me lots of time to brew an answer to the question do I put the cover on next or start decorating the pages?

Do I leave the cover til last?

What would you do?

Thanks for reading this far, I love that you took the time to pop in.

Have a great day and come back soon! 🙂

Today Winter Has Arrived…….

It’s cold and raining.  It was warm and sunny.  Beautiful late Autumn weather – people buzzing about on the street in front of my wee house, chatting cheerfully, children calling out, mums pushing strollers, dogs walking their people, cats walking themselves or taking a rest in the middle of the street.  All gone.  The street is deserted except for the odd car that swishes past spraying water from that dip by the corner.

Winter.

Last spring I made a journal page and now is a good time to remember that it will be here again in just five more months.

I was just playing with serviettes and tissue paper and the idea of randomly writing my thoughts before applying the media.

Image

Image

Image


Thanks for dropping by, I hope you are having – or have had – a great day!