
I decided I may need some antique buttons for the infamous ‘Box to Book’ project………… I’m not absolutely sure, but might need to embellish a page or two with some.
I happen to have three Victorian buttons, one is from a beautiful antique night gown I used to wear when I was young and romantic – the night gown is long gone [along with my youthful romanticism – but that’s another story ….] and all I have left are the buttons, which I am a bit reluctant to actually use, as I just like having them lying about in my button box – smiling wistfully to myself whenever I stumble upon them…… which sounds a bit Miss Haversham-ish when said out loud…….
Two of them have such a beautiful hand made look to them ~ the one at the bottom left of the photo is off the night gown and the button on the right may be pre-Victorian and came from a ladies glove. It is very delicate and bendy – that’s a technical term – apparently just a bit of leather covered with some fabric:

I’d recently seen a You Tube video from the remarkable Jennibellie, a talented young English artist who recycles everything and I took inspiration from her and decided I too could make my own buttons!
I wanted to achieve a similar hand made look, but knew I would never have the patience to make something quite so small and would need to be satisfied with a slightly bigger version and mine also needed to be coloured to complement their supposed destination………
However, in true Contented Crafter fashion I completely forgot to take photos until the project was almost complete, so I staged a couple of steps – like this first one

All you need to start
I used half a food wrap inner tube – about the same size as a toilet paper cardboard inner, just slightly weightier. I opened it out and cut it into strips then squares, then rounded most of them up to make something resembling circles. I cut bigger circles and an equal number of smaller circles and had enough to make nine buttons.
I glued one big and one small circle together, nine times. When the glue was dry I punched two holes in each ‘button’ with my trusty WRMK crop-a-dile.
Using the multi-media glue I took squares of white tissue and wrapped each button 3 or 4 times with layers of wet paper. I used black tissue paper on two of the buttons and left them all overnight to set.
This morning they greeted me looking remarkably button like – I was most pleased with them and remembered to get the camera out!

The next step was to add layers of colour and a little patterning for interest:
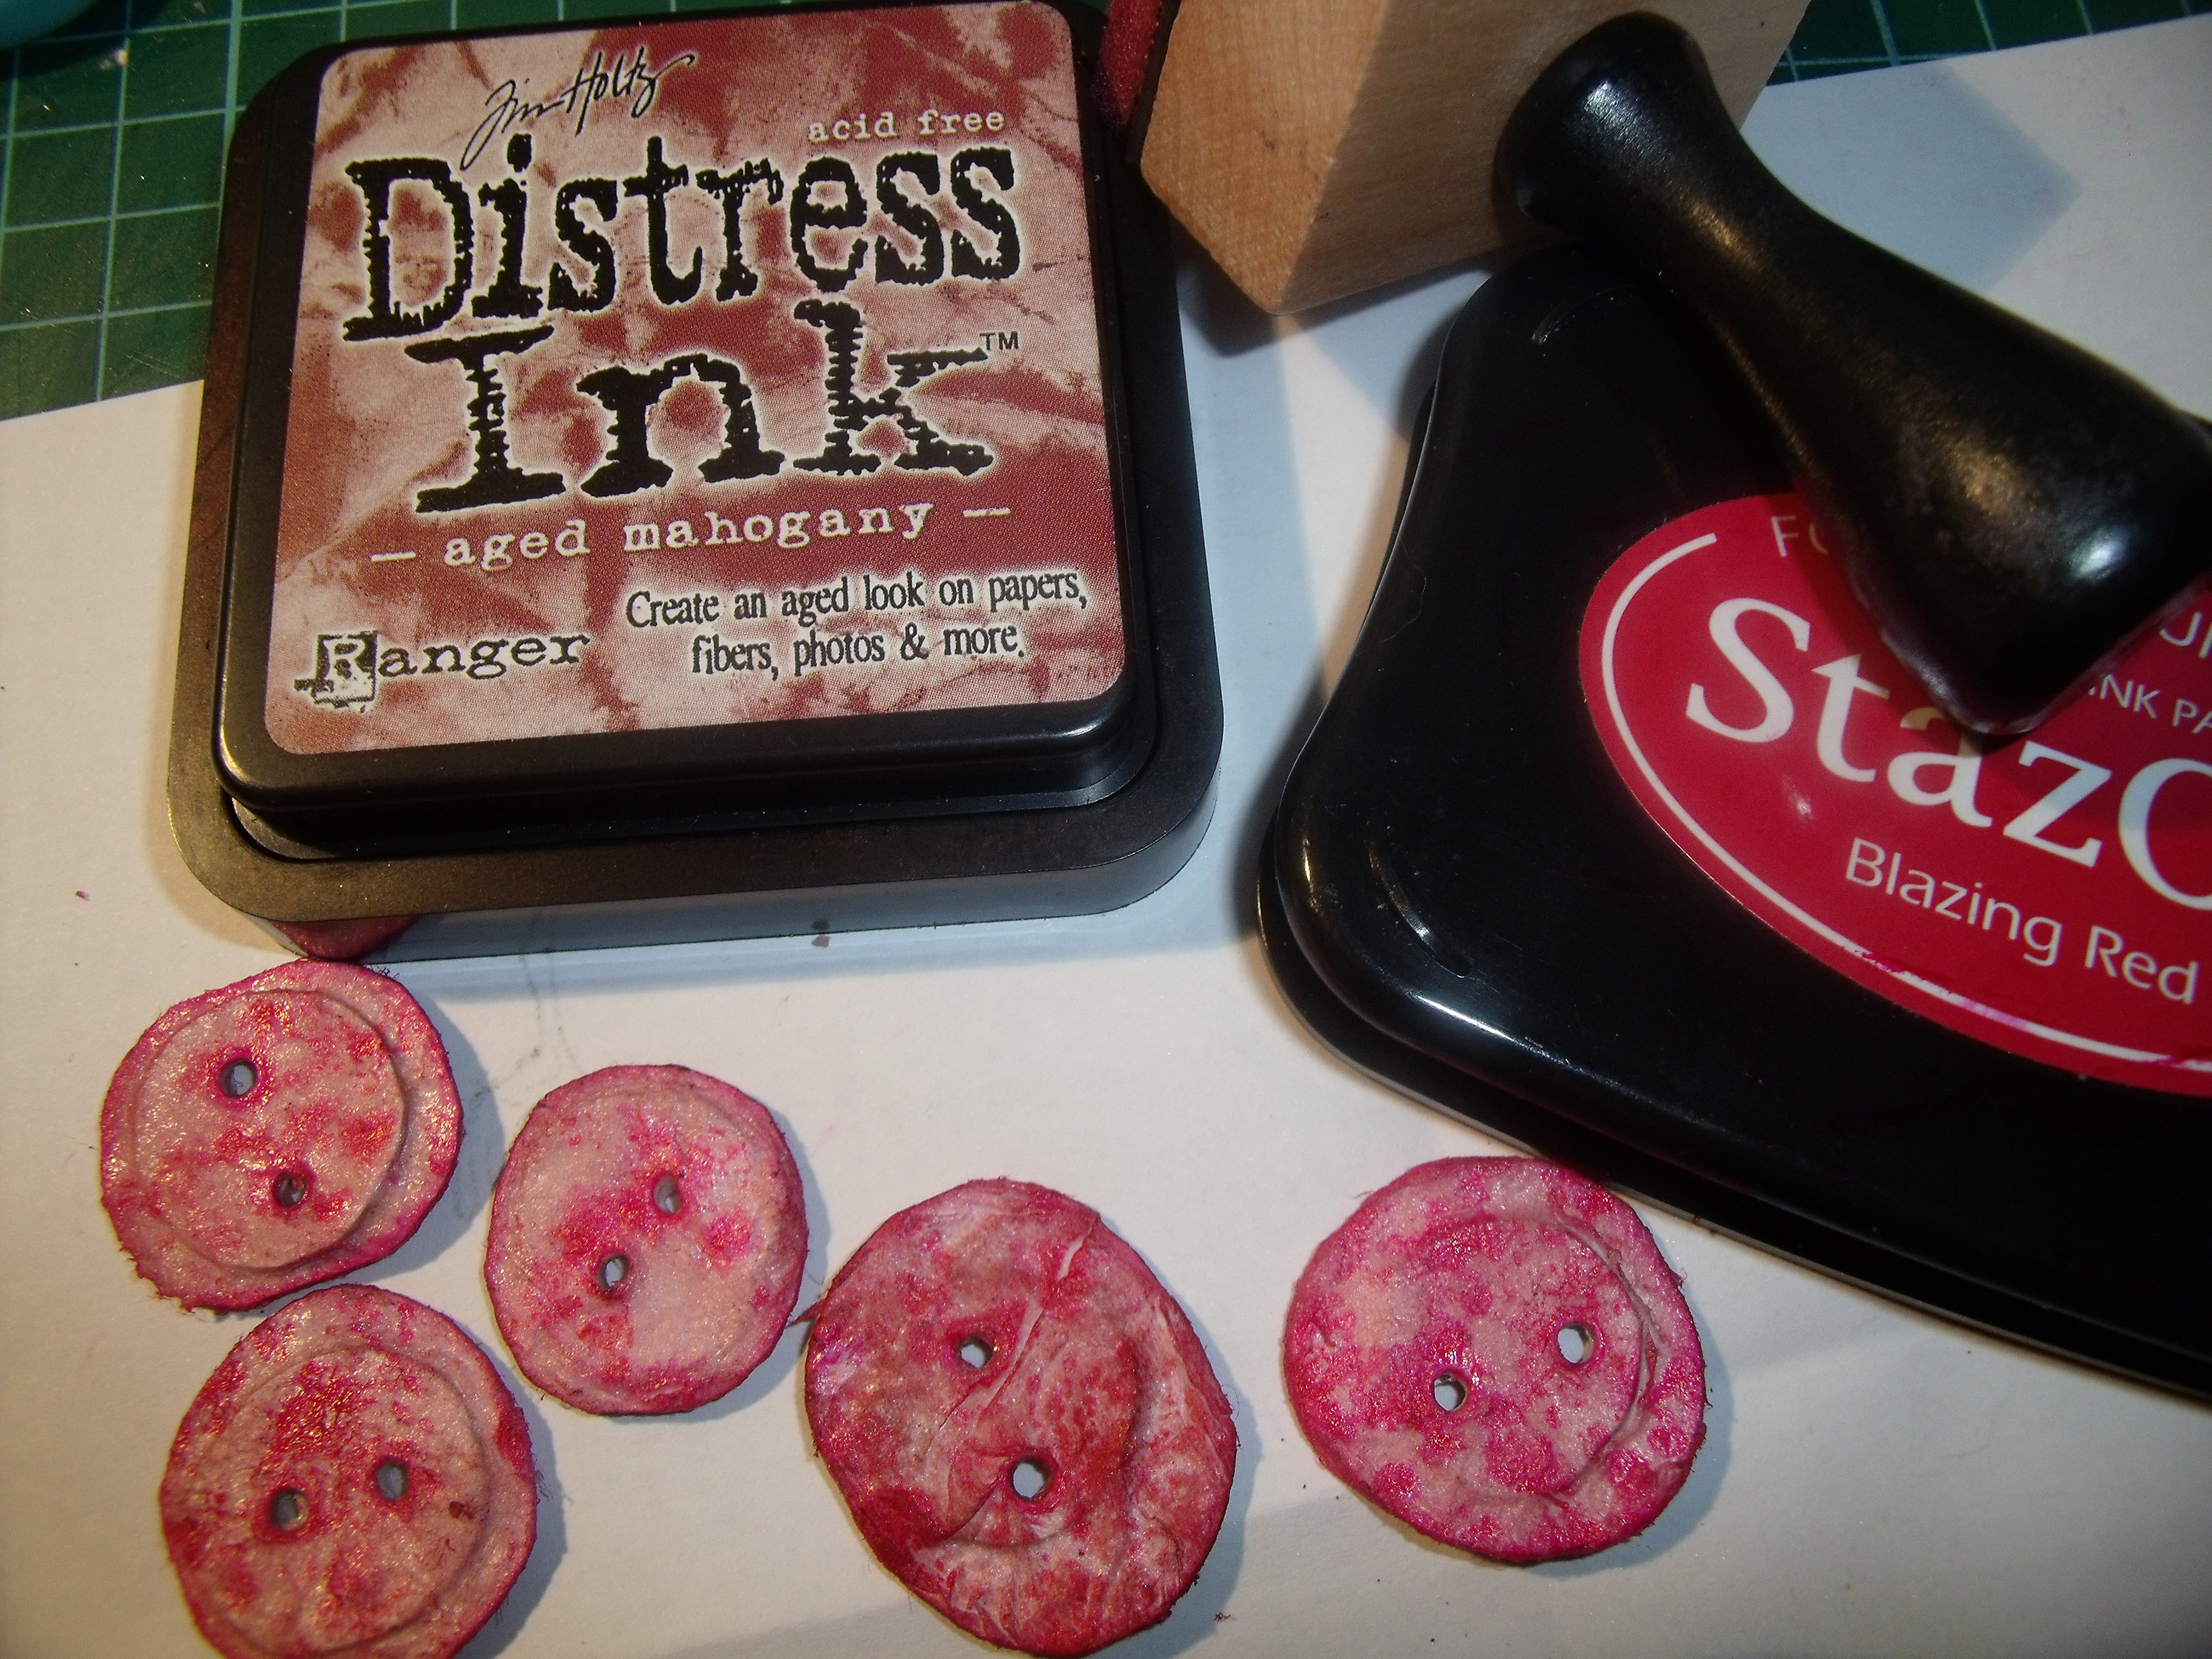
I achieved this with a base of ‘Aged Mahogany’ and then randomly stamped a little floret stamp in ‘Blazing Red’ over the top.
When the inks were dry I embossed with clear powder to get a glazed appearance for the coloured buttons and made up a mixture of black, gold and green embossing powders to give an aged worn-gold appearance to the two black buttons:

And now I have to apologise for the quality of photos [yes, again!] any light coming into my play-room had been stolen by the black thunder clouds that had moved in and begun to hurl hail stones the size of golf balls at my tiny house………… poor Orlando retired to the bedroom and burrowed under the duvet ….. where I was tempted to join him despite it being 1:00 in the p.m.!!
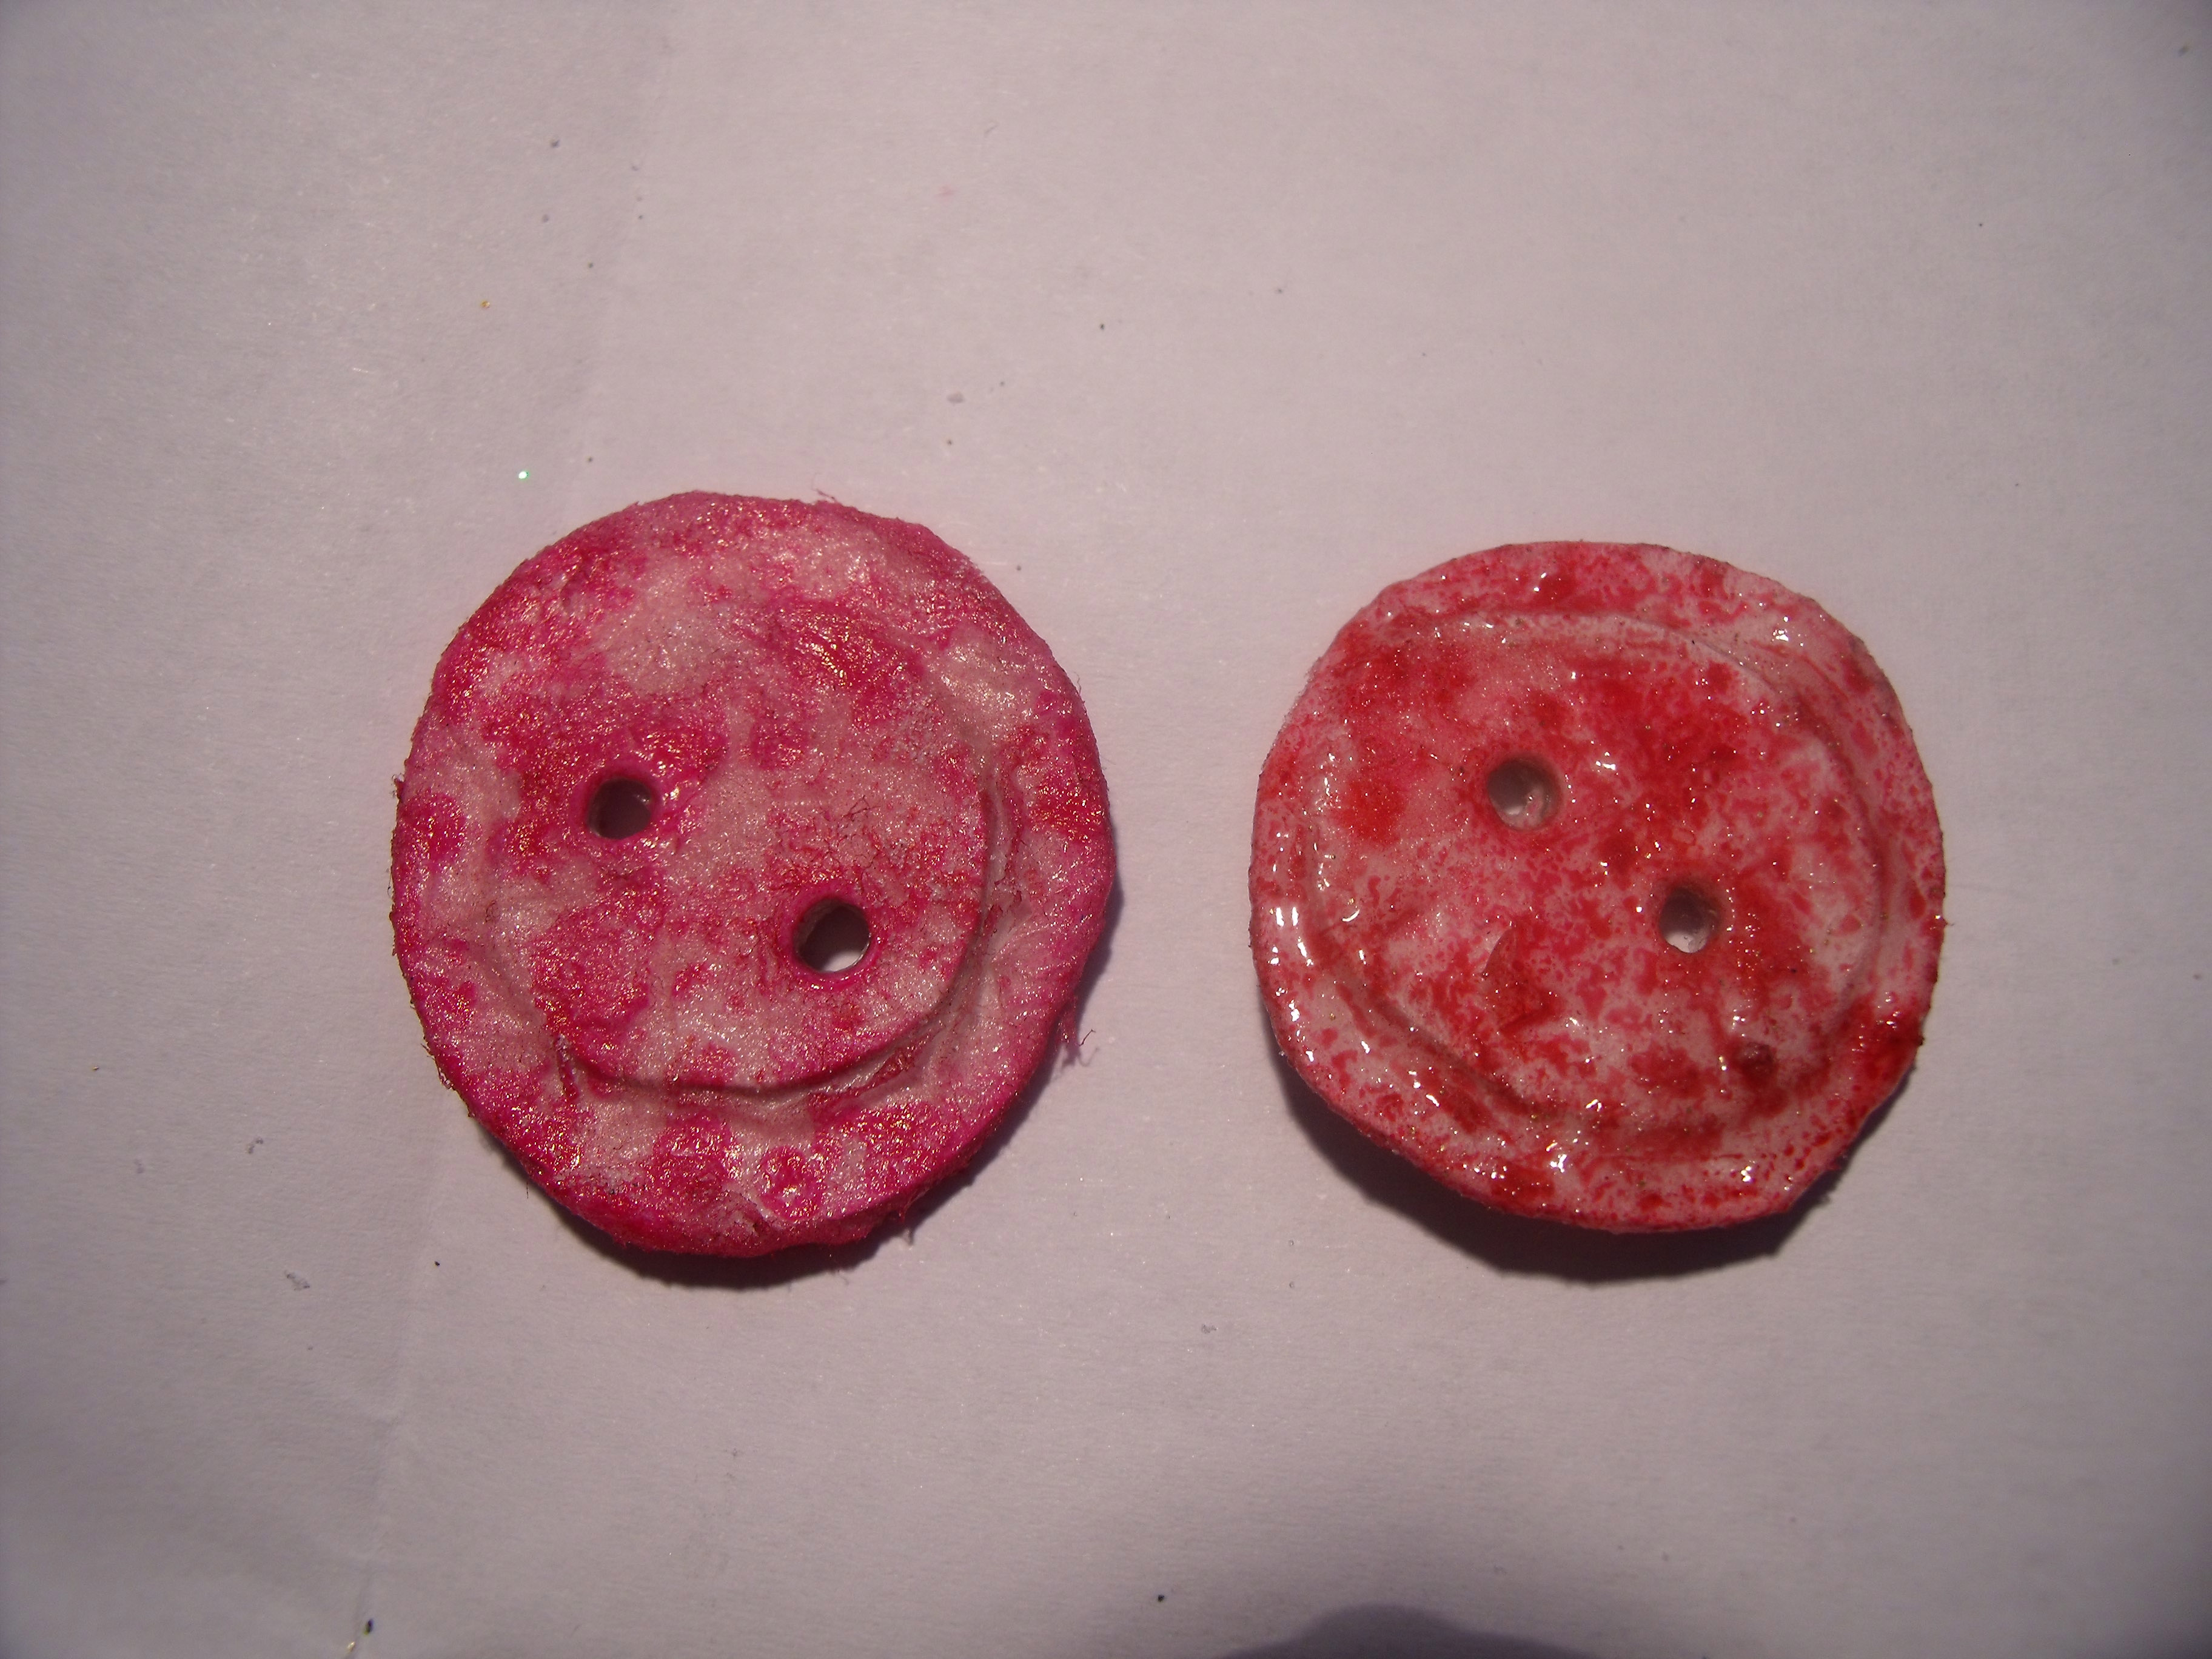
I soldiered on and kept on embossing until I was satisfied with the results. Here is a close up of two buttons, on the left is un-glazed and the one on the right has been completed:
And here are all nine, finished and ready to go:

One pink button has been treated to a wee scatter of the worn gold mixture and has a satisfyingly well worn appearance, which my unfortunate photography skills have entirely missed capturing ….
Now it will be interesting to see if they make it into the current project – or maybe turn up somewhere else altogether!
Thanks for dropping by – always lovely to see you’ve been! 🙂


