All Our Christmases

Hel-looooooooooooo!!

toy24

Today Orlando and I received a package in the post

1

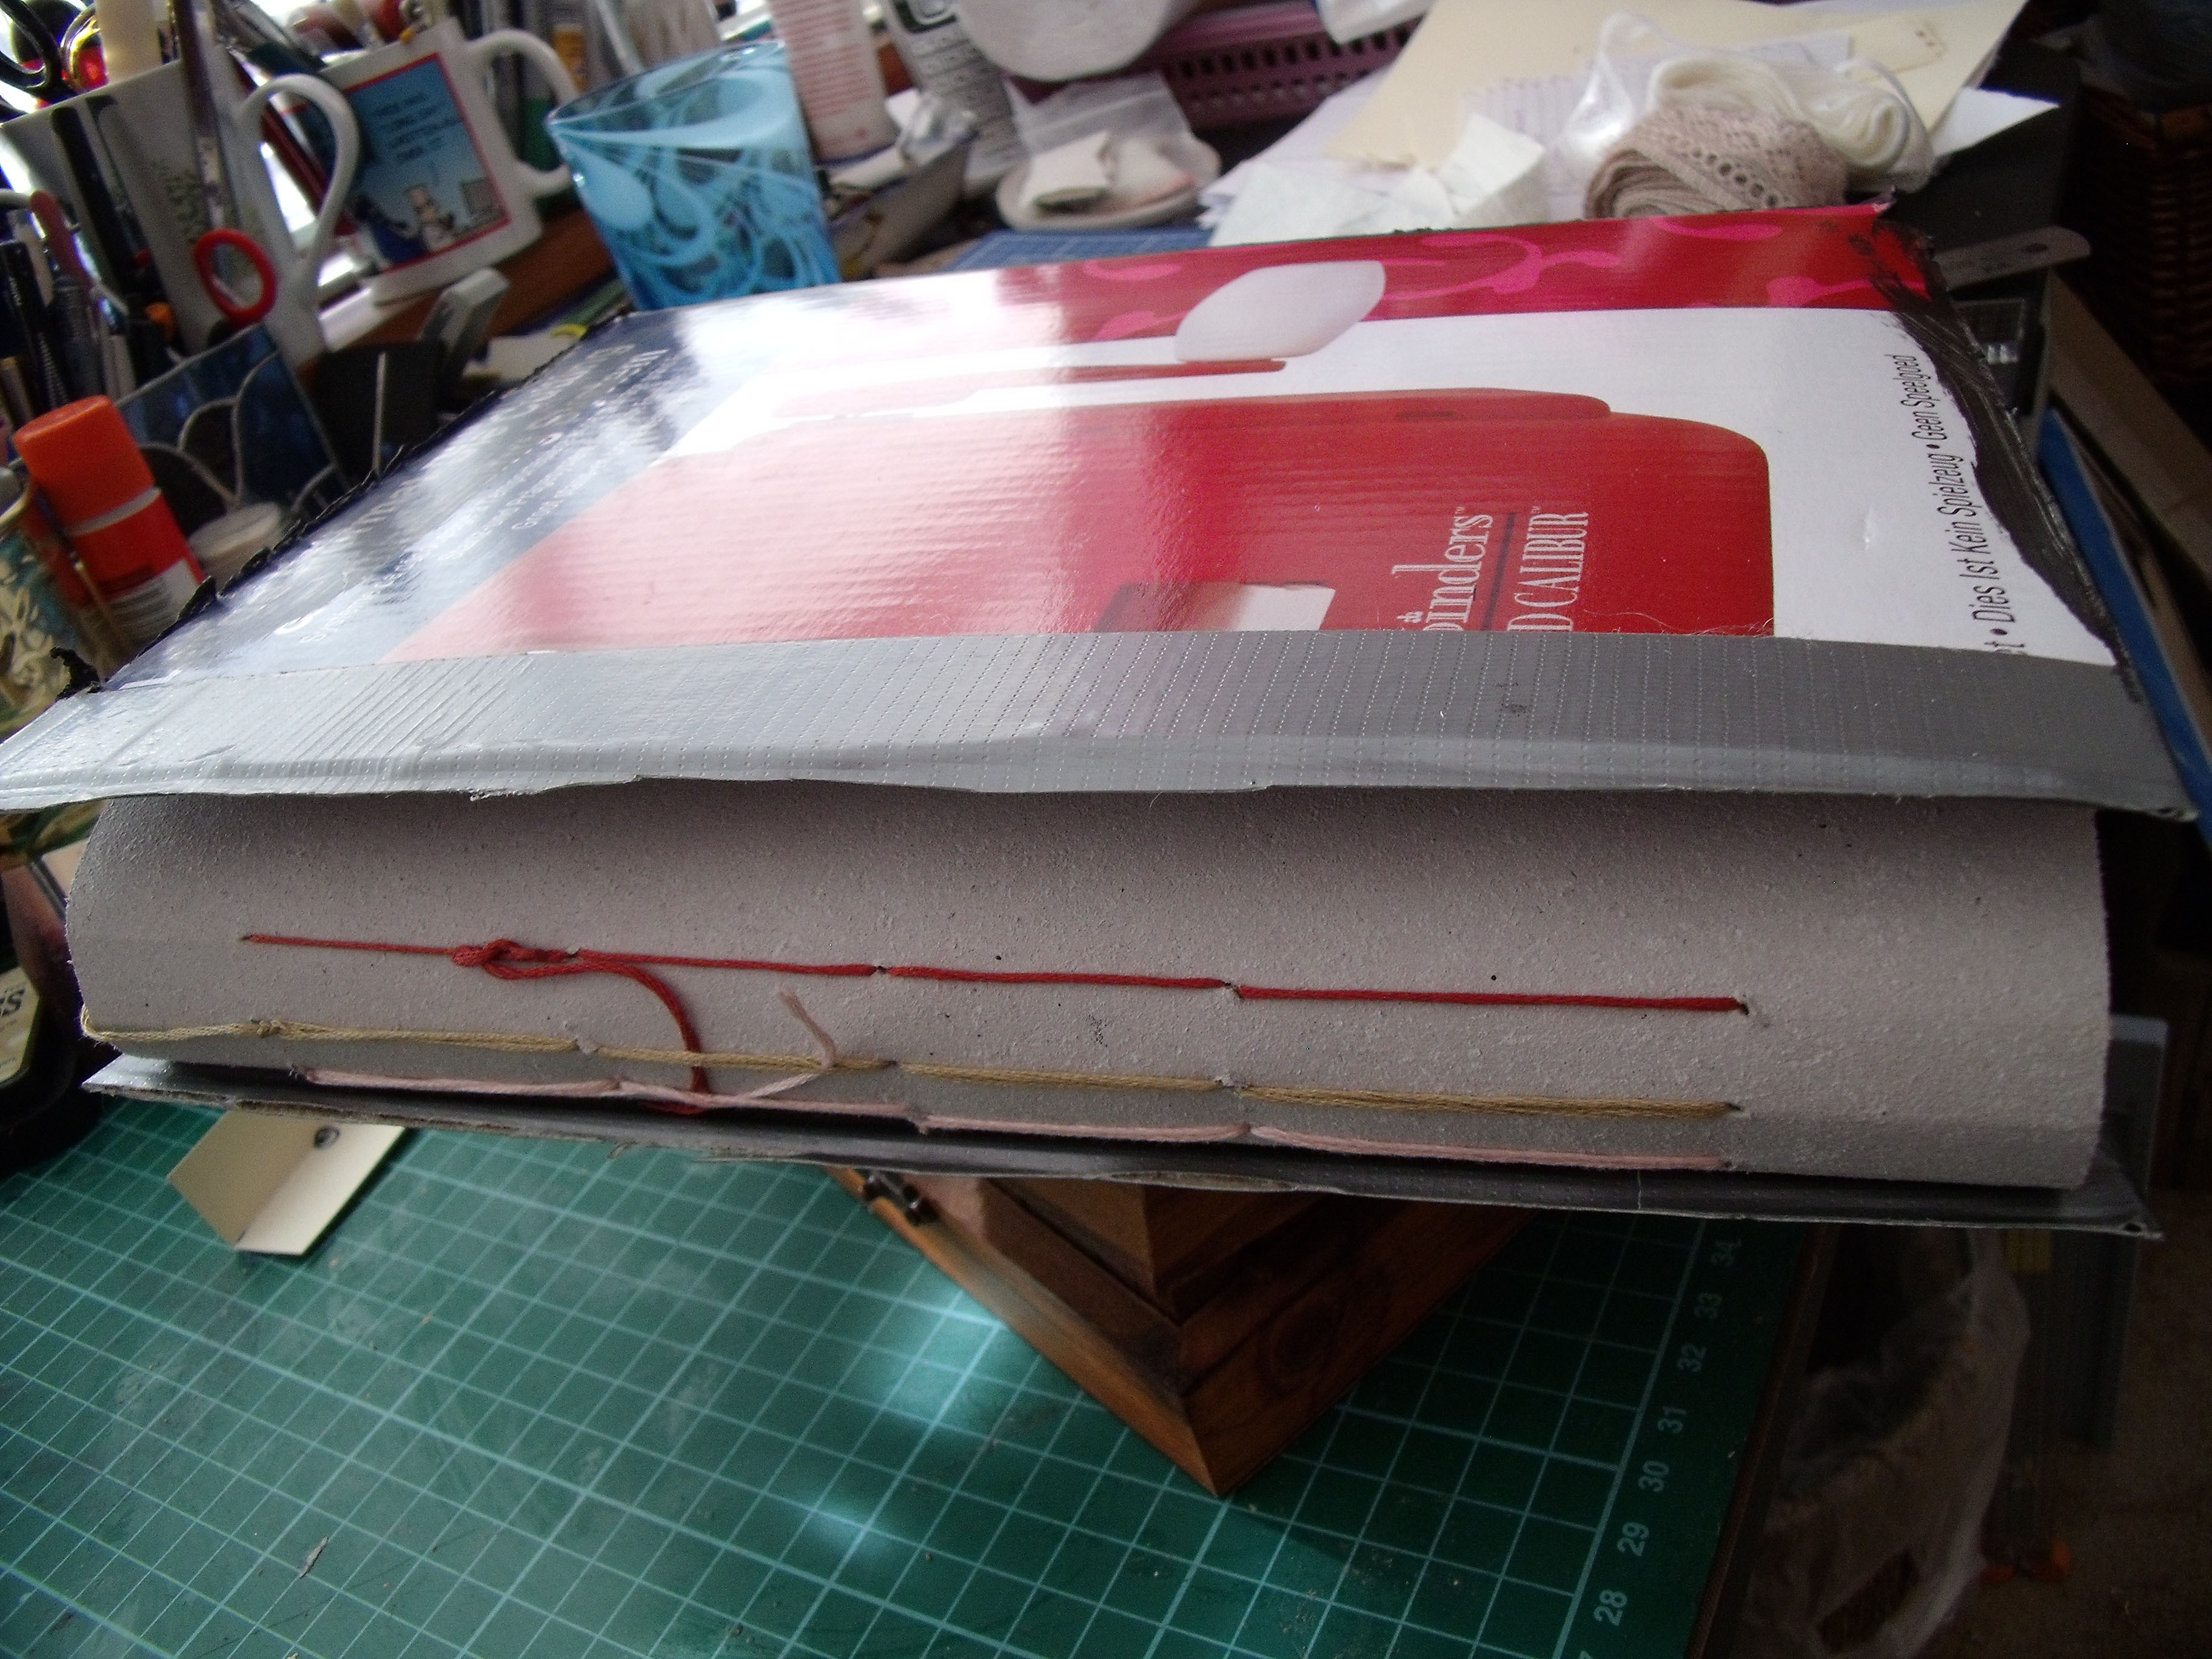
I set about opening the extremely well sealed package wielding knife and scissors carefully and several minutes later

2

We were very excited!


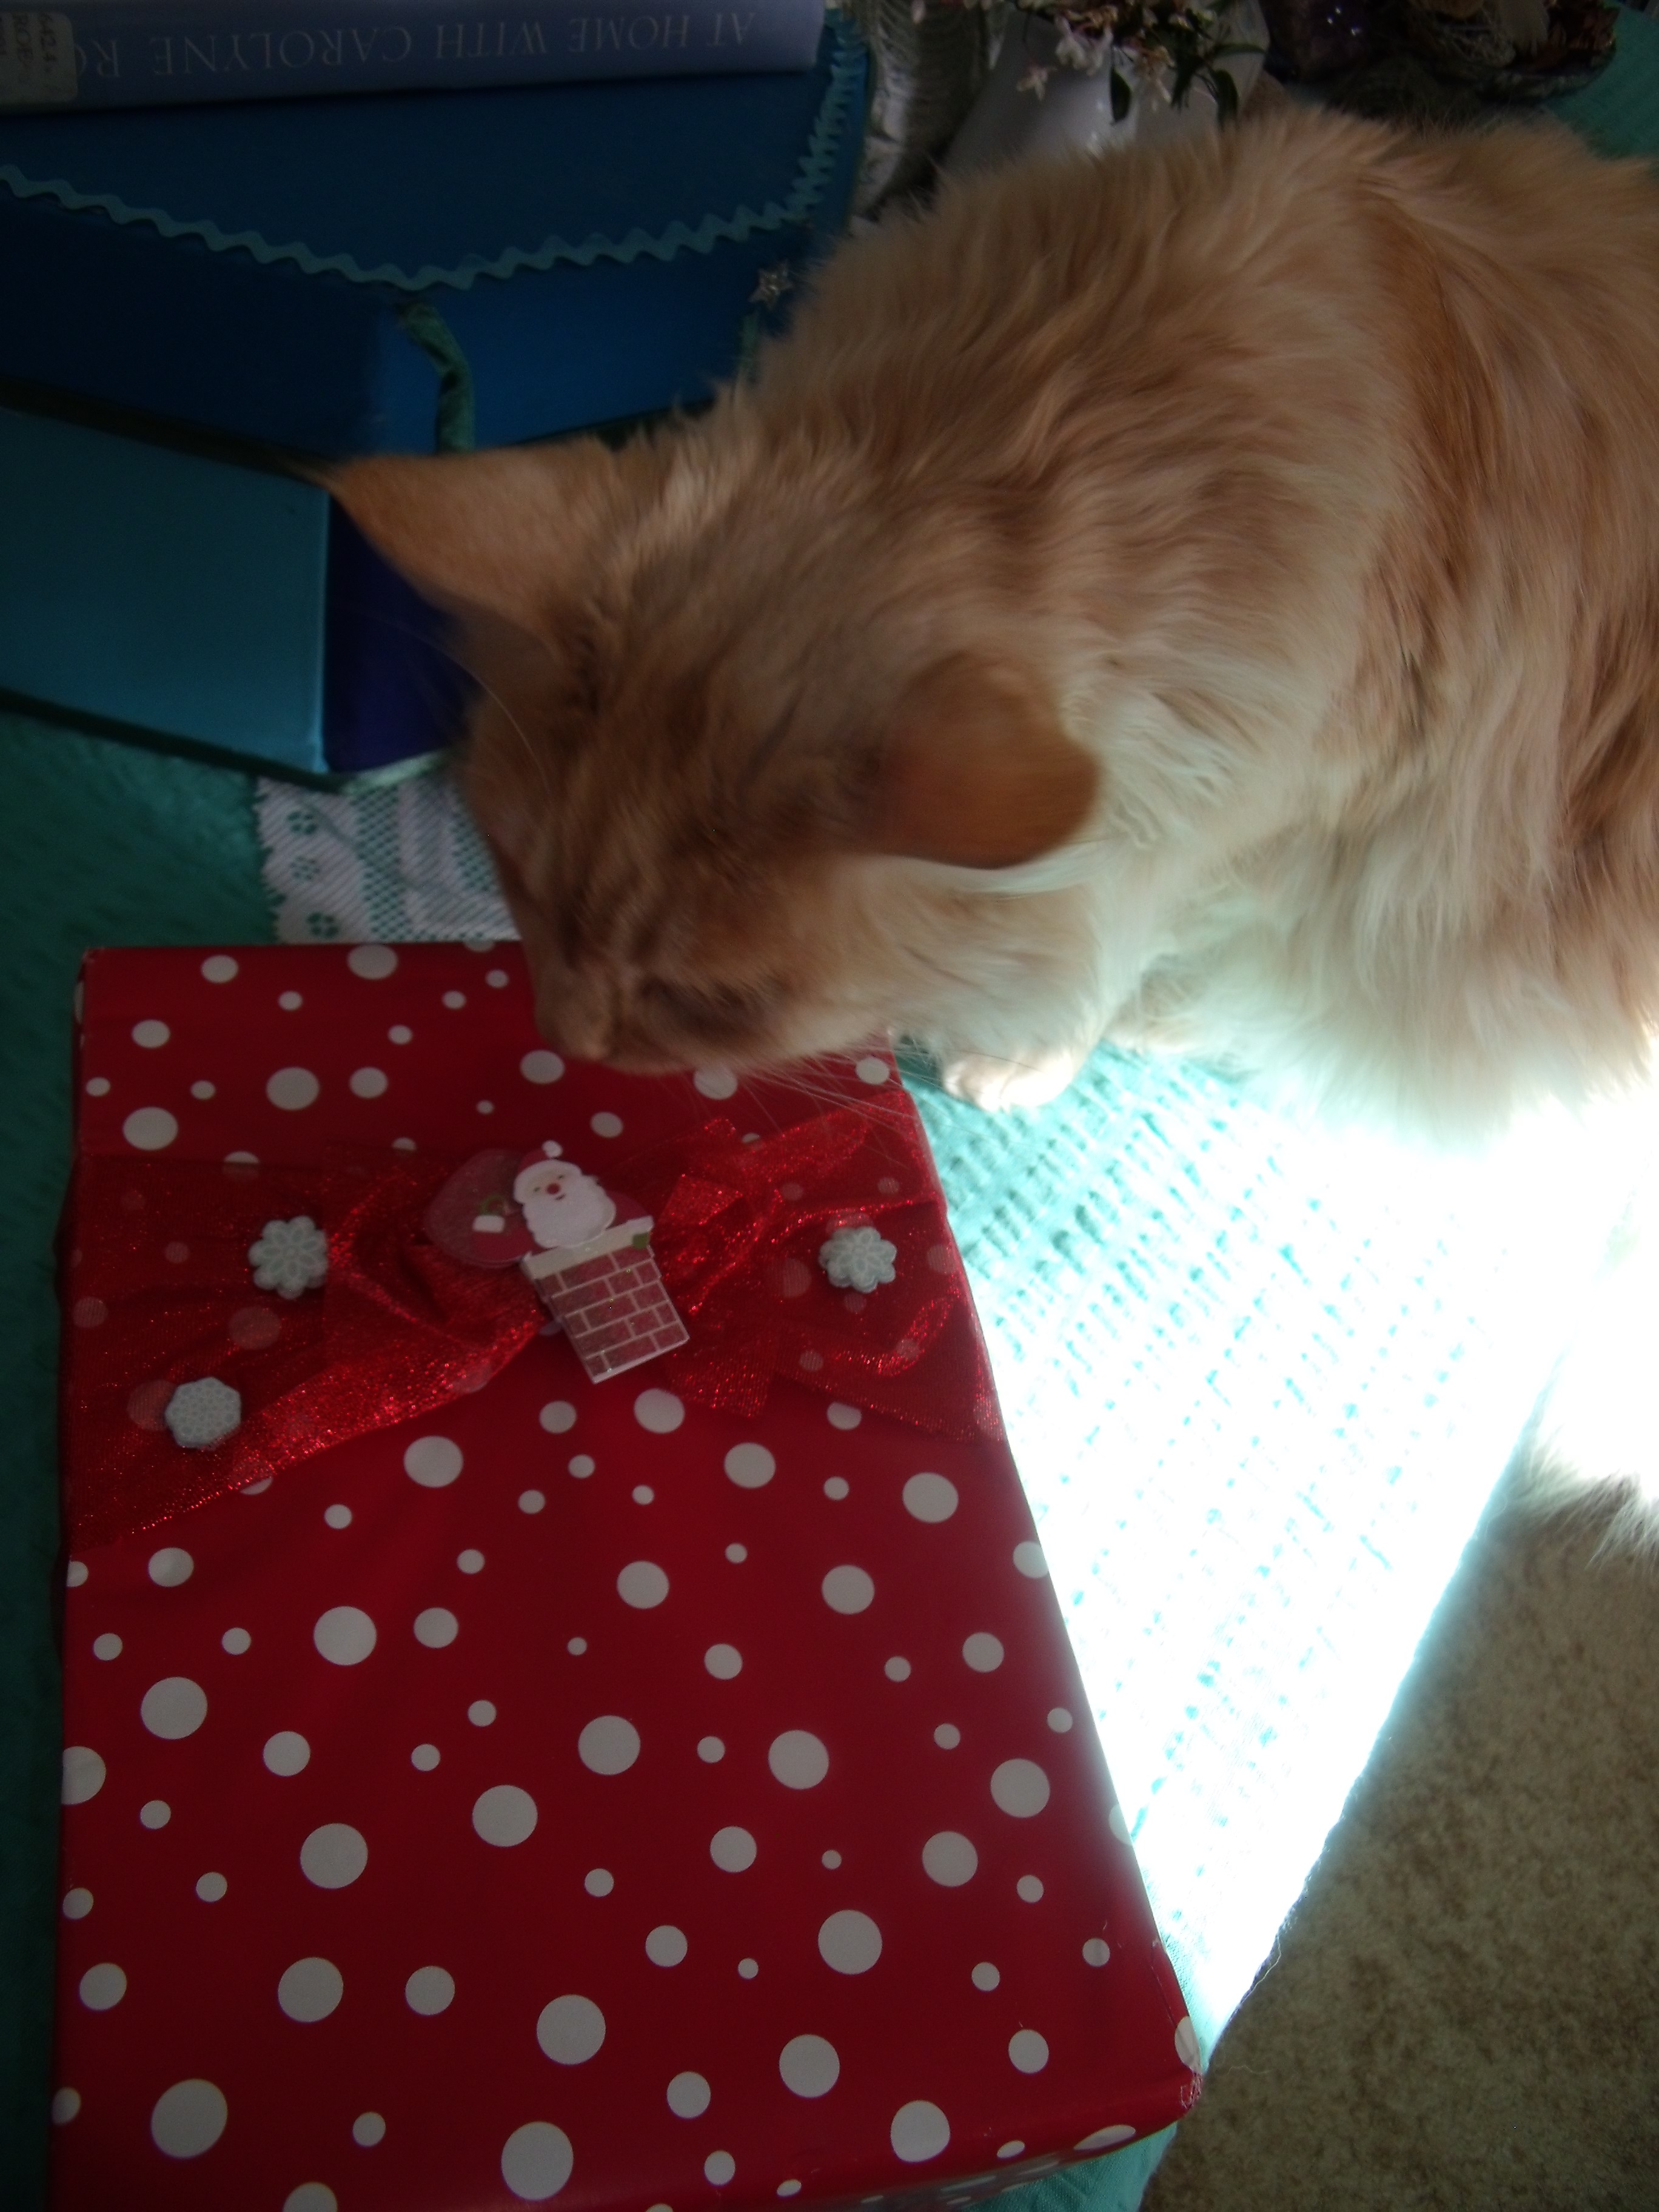
Orlando was especially keen to see what was inside for him

4a

[gickr.com]_cfaa9aa0-32c8-0584-e1e9-c3a8af4d3c3c

“C’mon Mumma” he is saying “Let’s open it!”

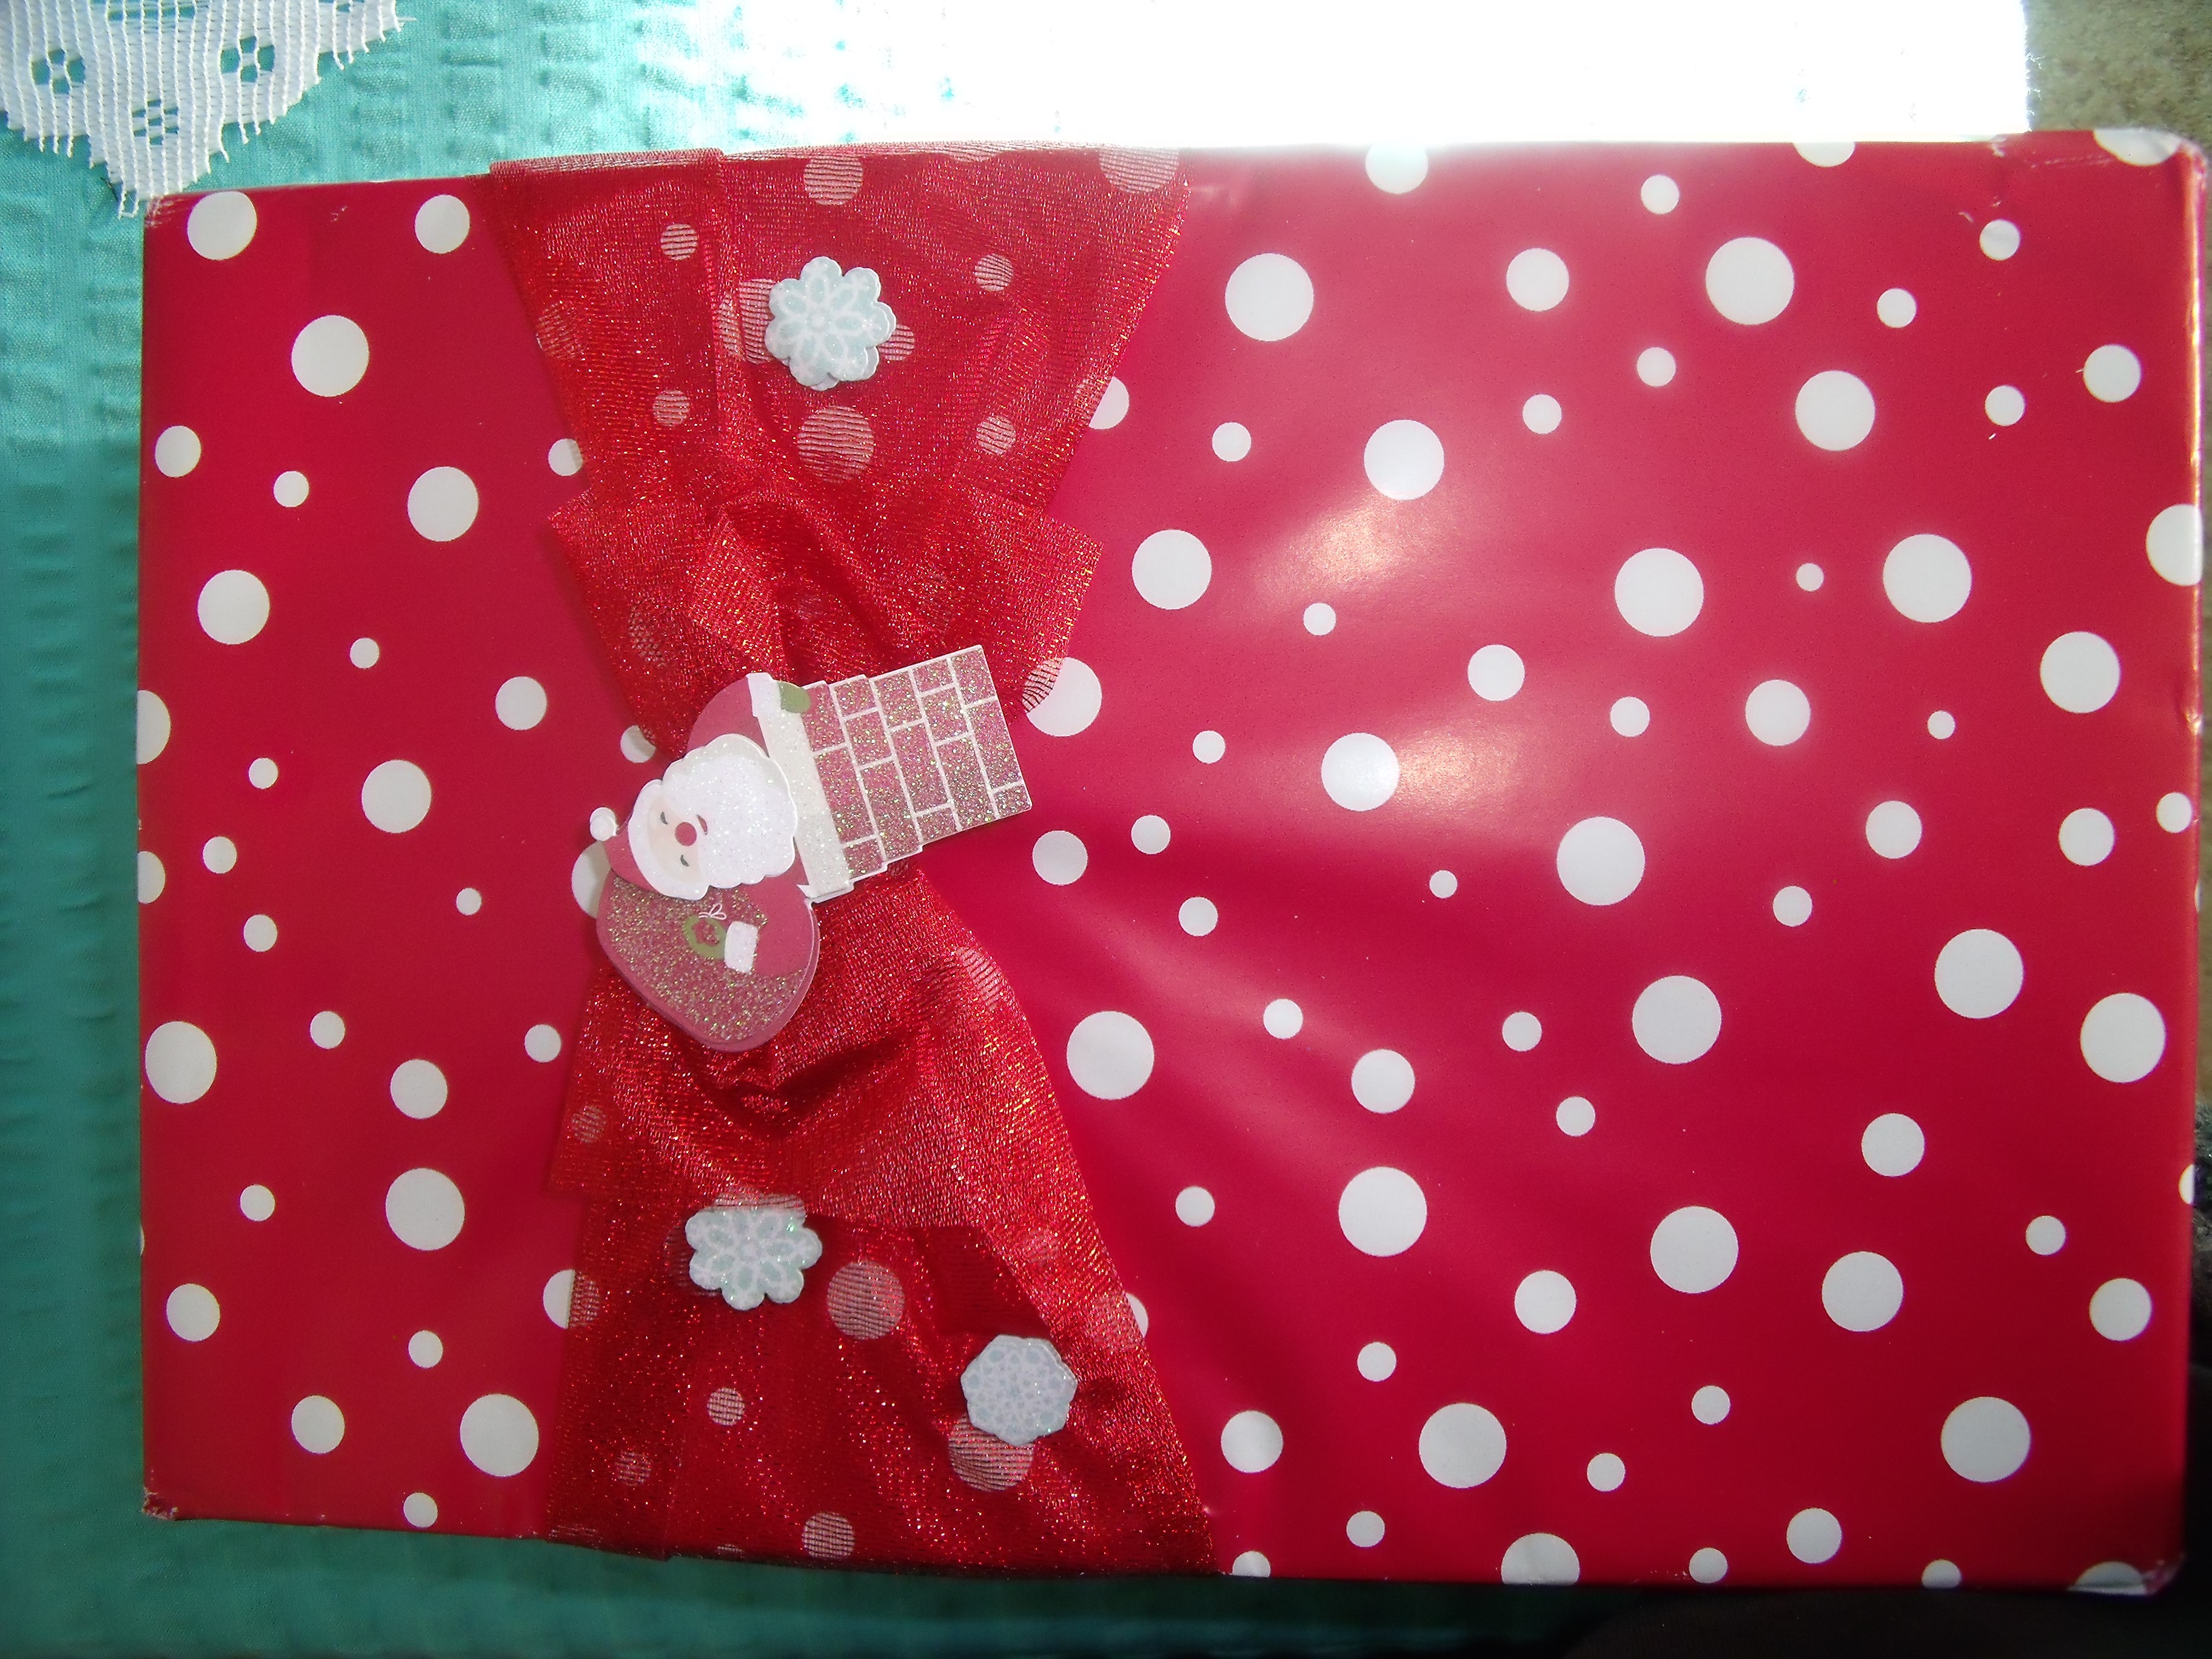
While I was trying to enjoy the pretty packaging and practise ‘Anticipation 101’ my cat was nudging my hand and insisting the box be opened.  Once opened the contents were thoroughly investigated and then he went looking – he knew there was something else, he just had to find it ………..15

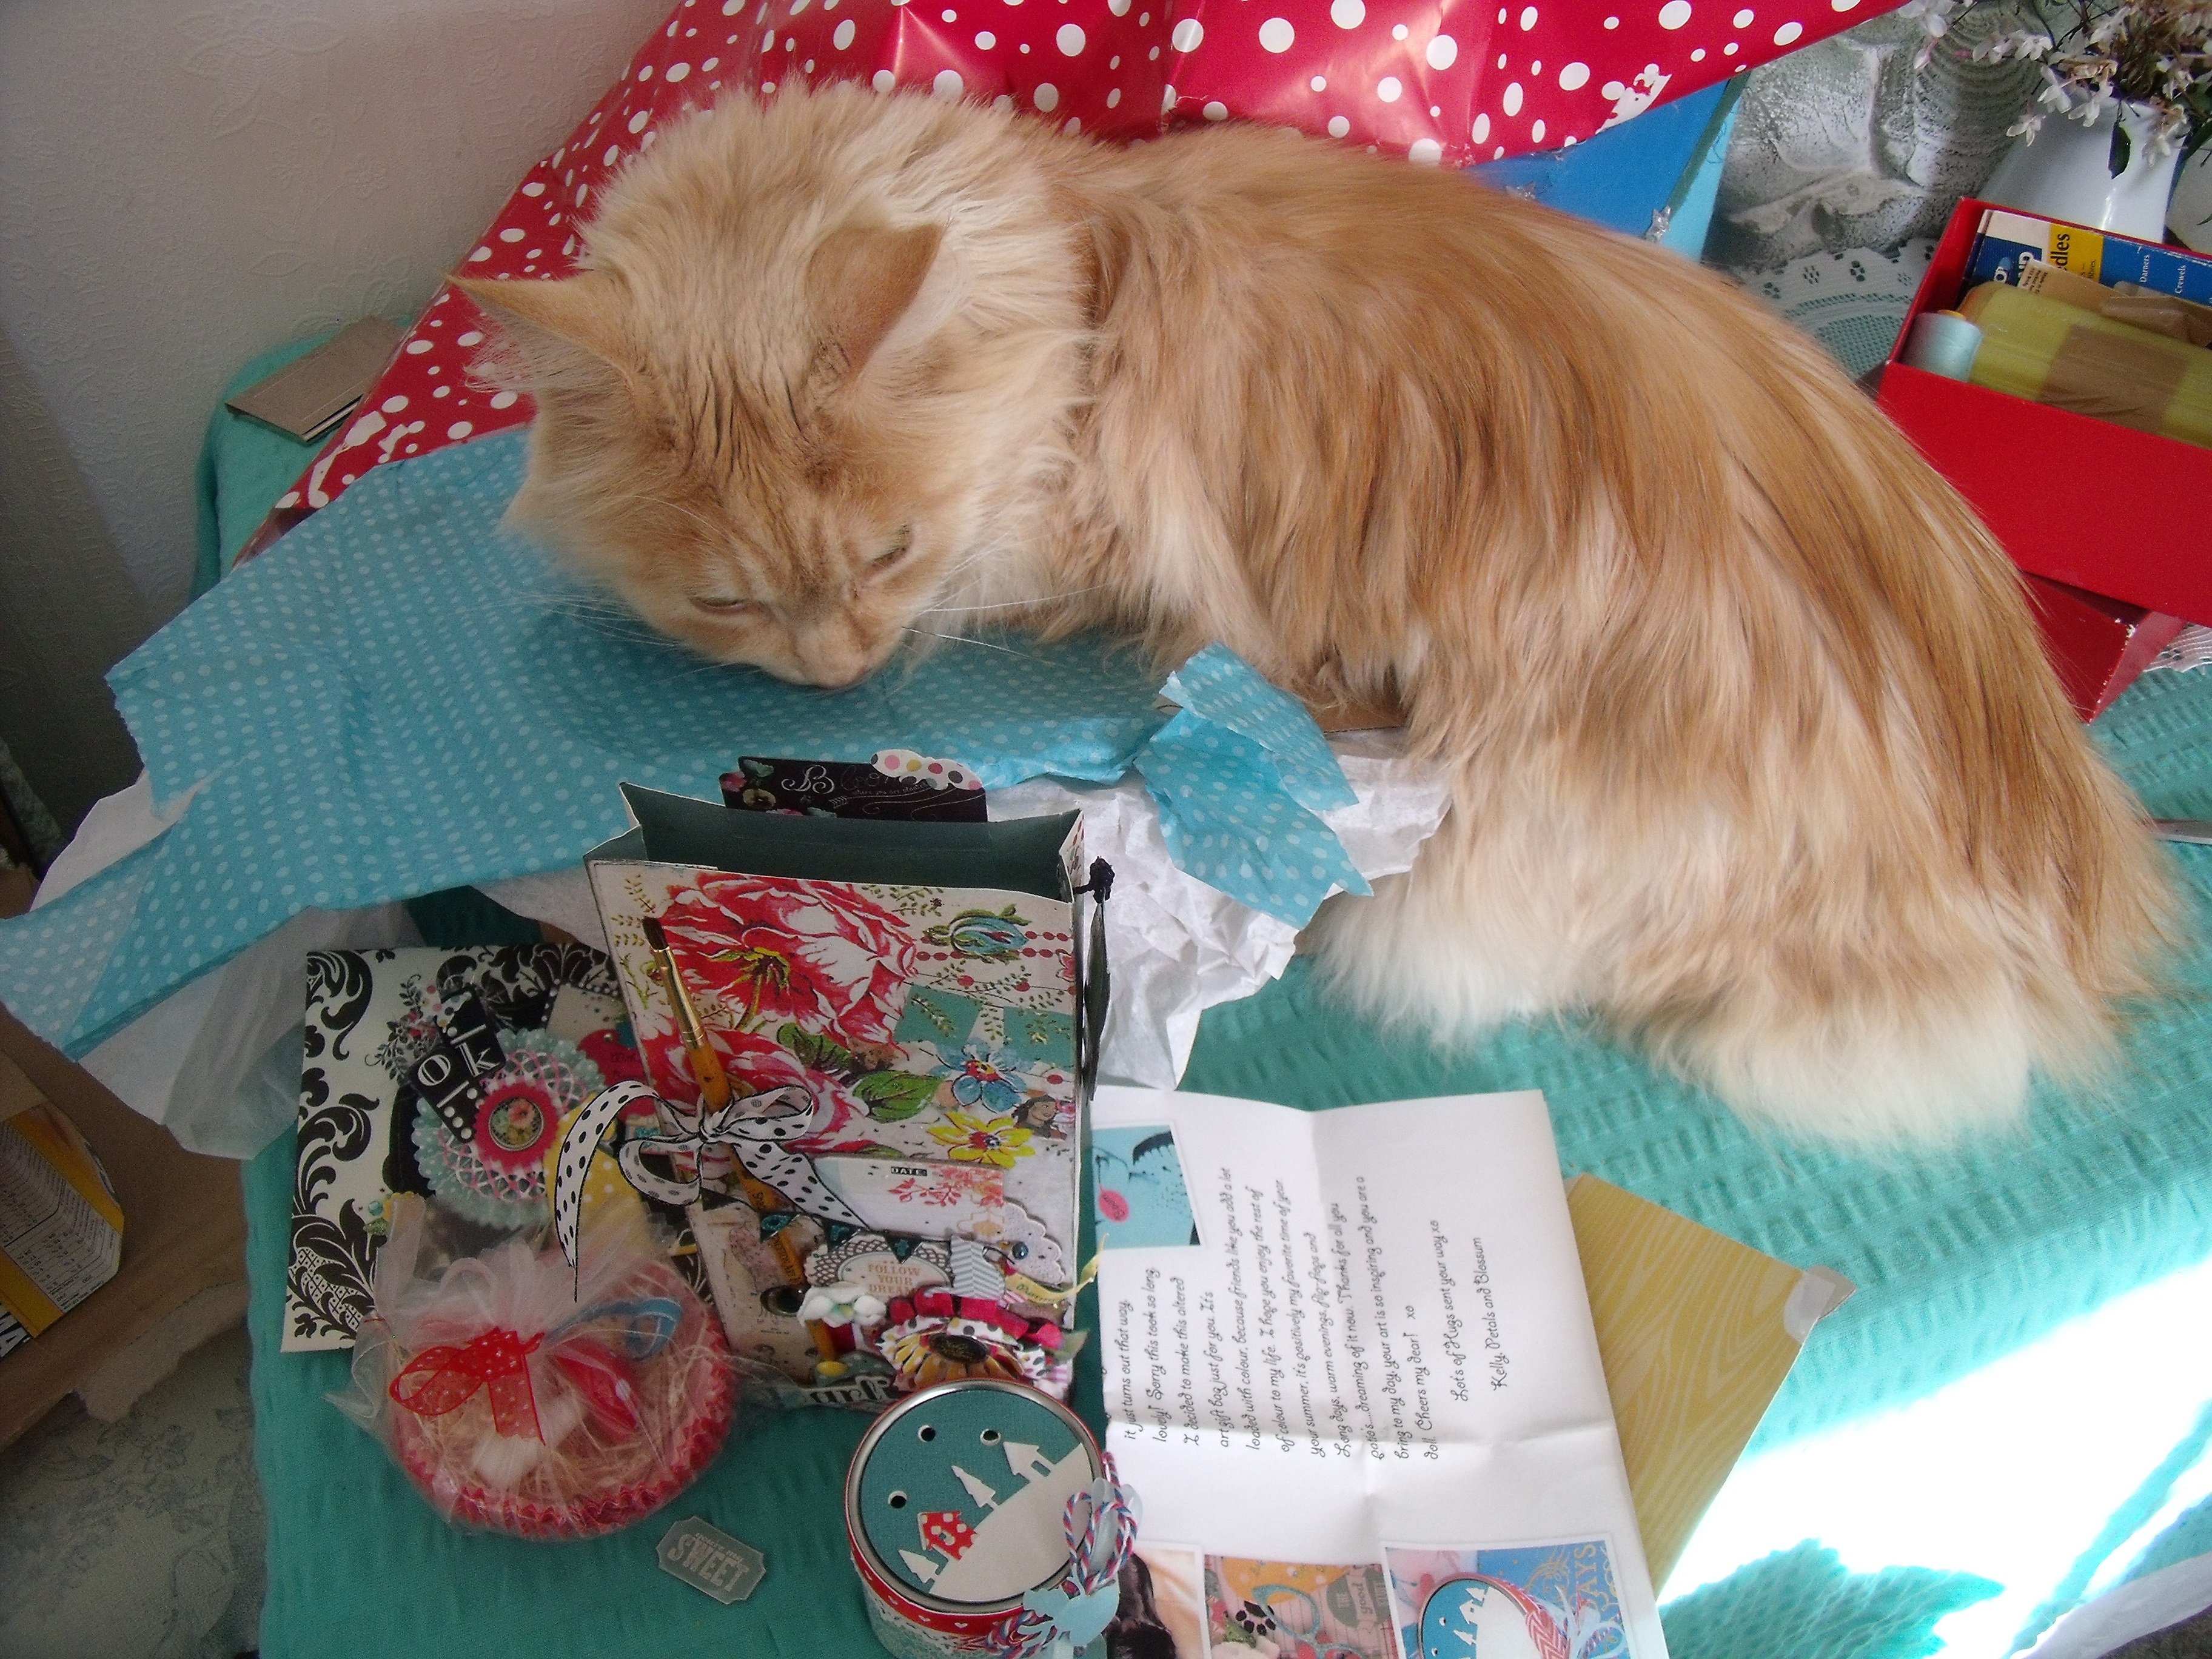
The whole thing went something like this

Happy Mail2

Then we got to the really exciting part – his present!

Orlando's gift


Orlando's gift2

The package was, of course, from the absolute Queen of beautiful gifts, the wondrous Ms Boomdeeadda. While King Orlando snuffled and nudged, I oohed and aahed at the gorgeous packaging, the envelope, the letter, the sweet smelling pot-pourri……  Then I settled down with the gift bag – truly the most impressive gift bag I have ever seen in my life.  So pretty, so detailed, so impeccably put together in terms of colour and combination and detail.  The woman is a genius!

I wish the photos could convey the texture and subtleties better

HM1

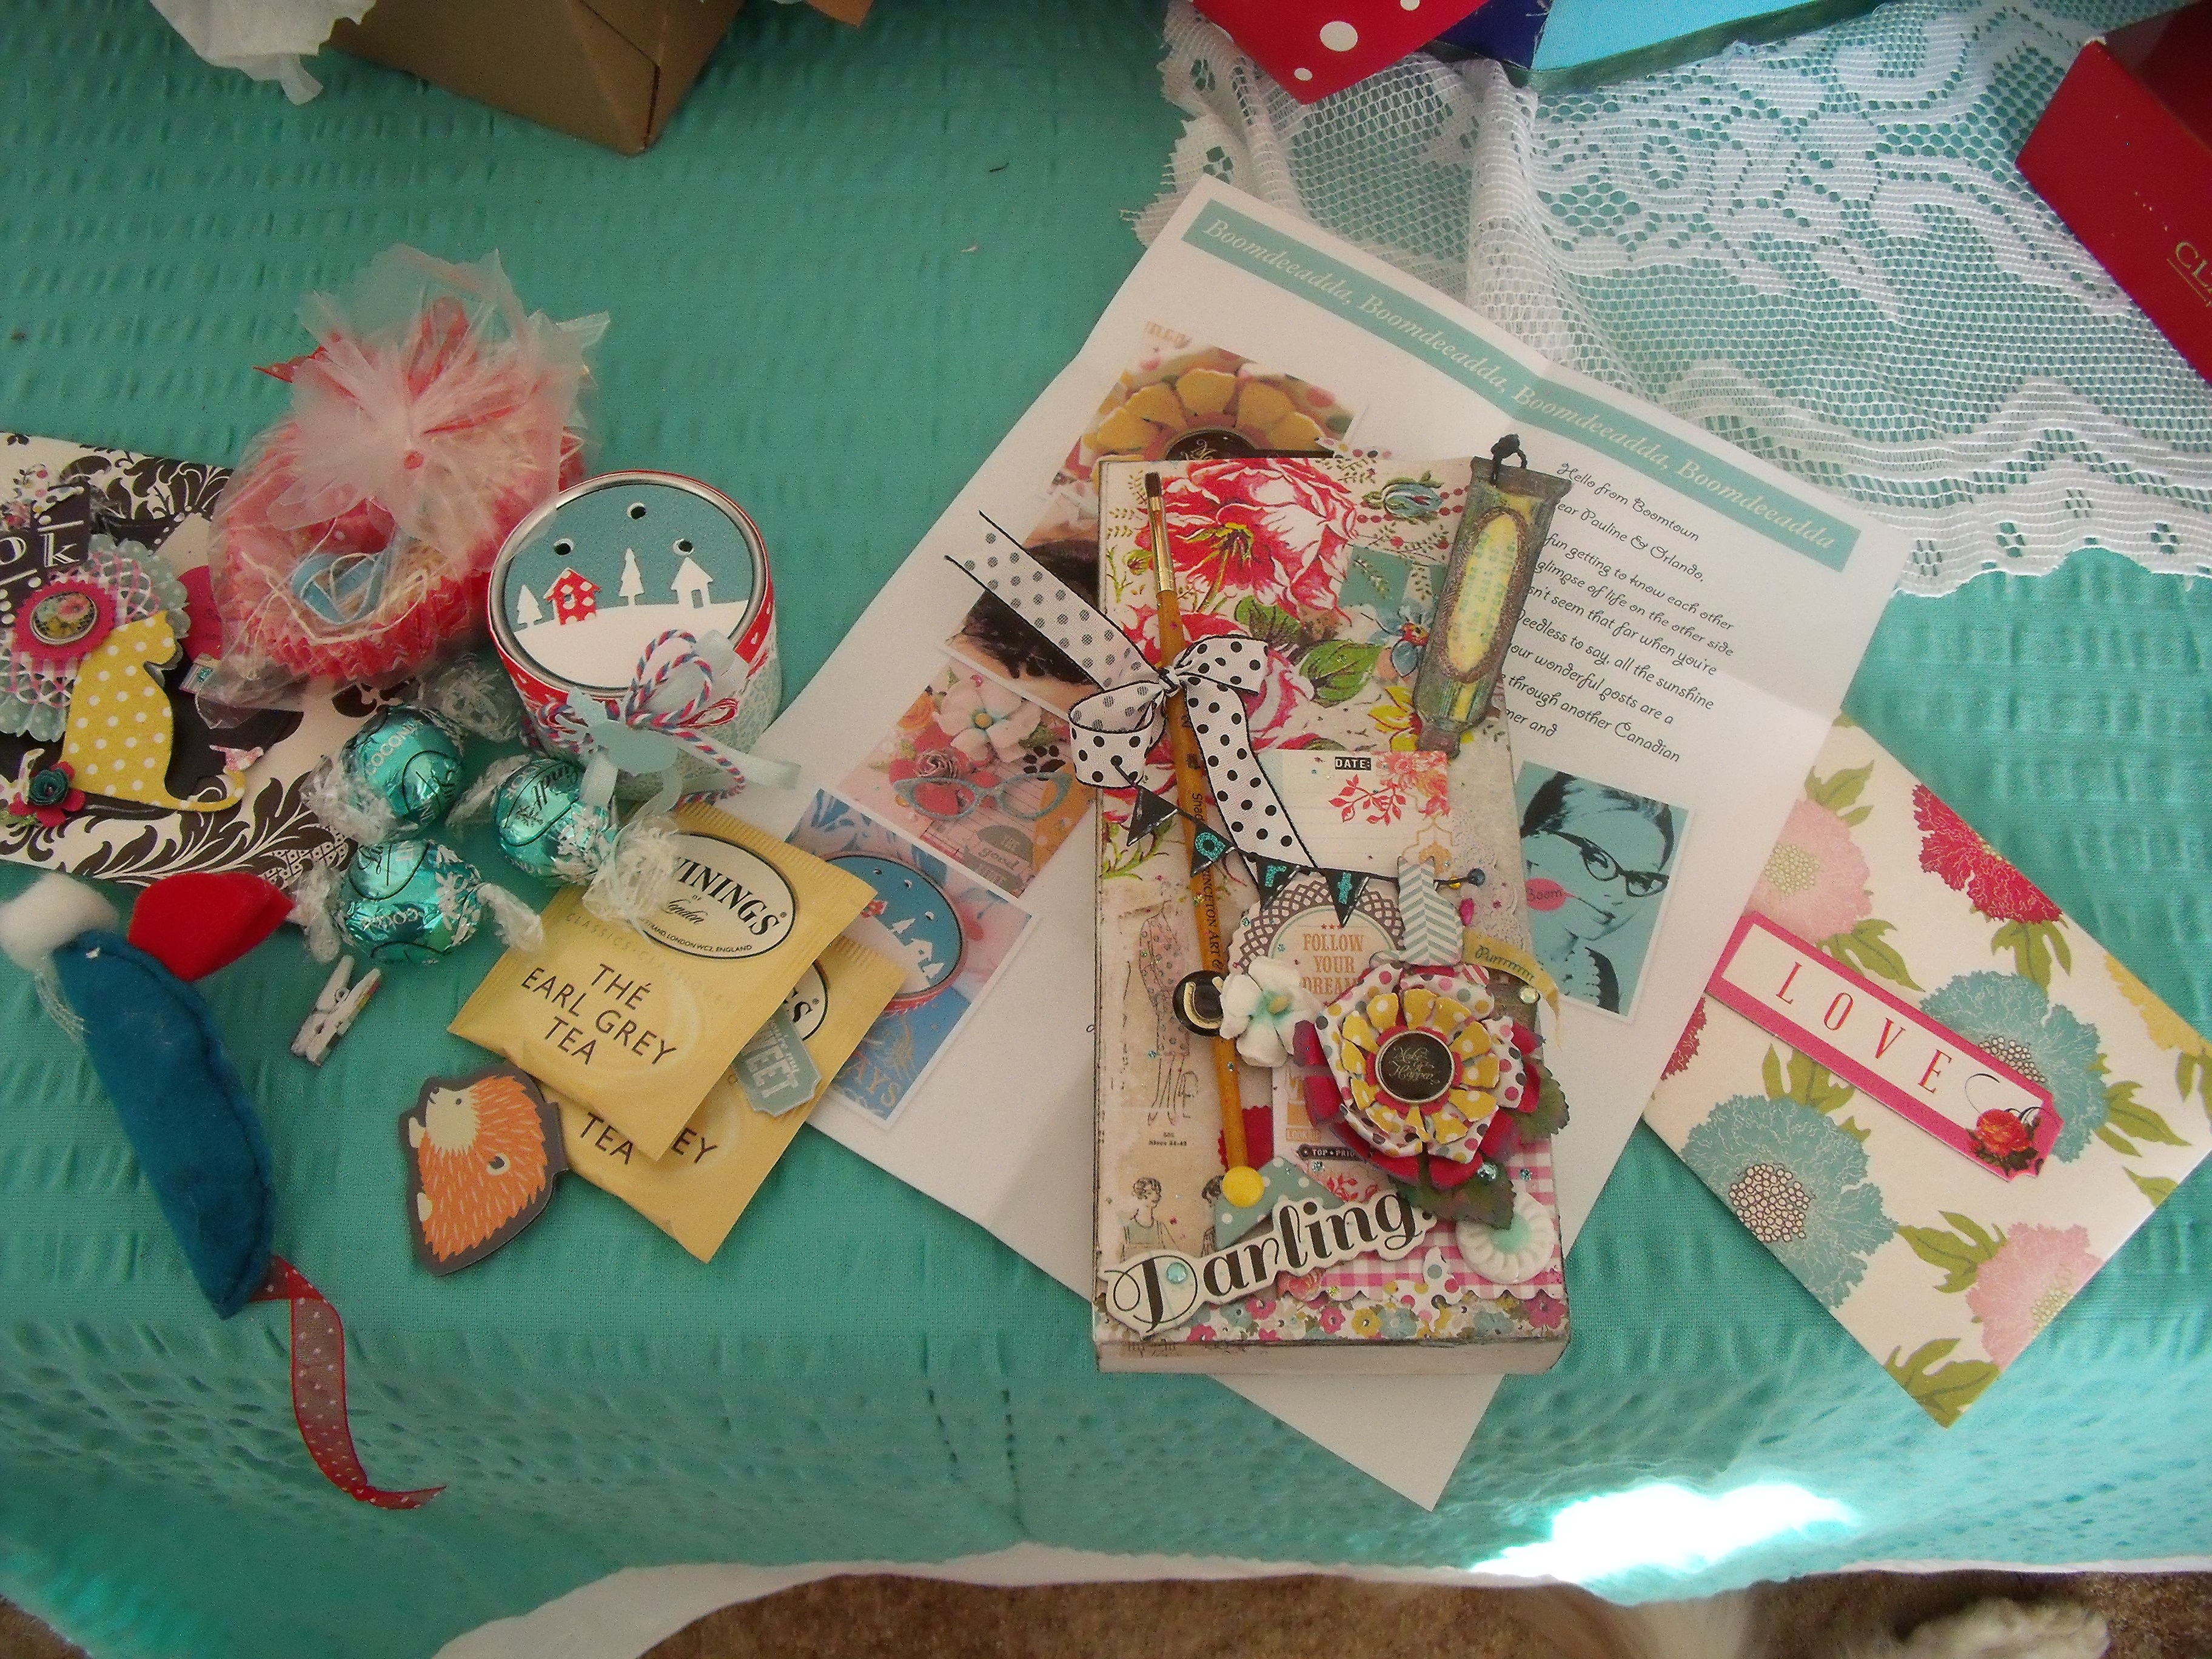
The front of the gift bag

HM2

The back of the gift bag

HM3

Bearing all the wonderful signs of my dear blogging friend – I felt it really didn’t matter if there was anything inside the gift bag or not – in itself this is such a treasure.  But there were several more  little treasures and tea bags and chocolates wrapped in aqua foil [of course – if you follow Boomdeeadda then you know how much she loves aqua!  If you don’t, go on over and say I sent you – you will love her blog!]

I knew Boomdee had sent me this wee container of pot-pourri as I had squee’ed over it last December when she posted about making them.  With her big heart all aglow she had obligingly wrapped one up and sent it off via a nice postal person who hiked from Alberta, across British Columbia to the sea and then swam southwards across the Pacific to my door.

And here it is at last.  A beautiful, woody, piney, spicy, rich smelling wonder which in 24 hours has wafted through my home filling it with the memory of my Northern Hemisphere Christmases – with perfect timing as Father Winter has just begun to rap loudly on my window pane here at the other end of the world!

potpourri


This amazing package also contained a little something from Alyster – see the specially packaged little porcelain toadstool surrounded by some of the gift bag contents – thats especially for us, from Alyster 🙂  Next thing I’ll be making fairy gardens!!.

Alyster

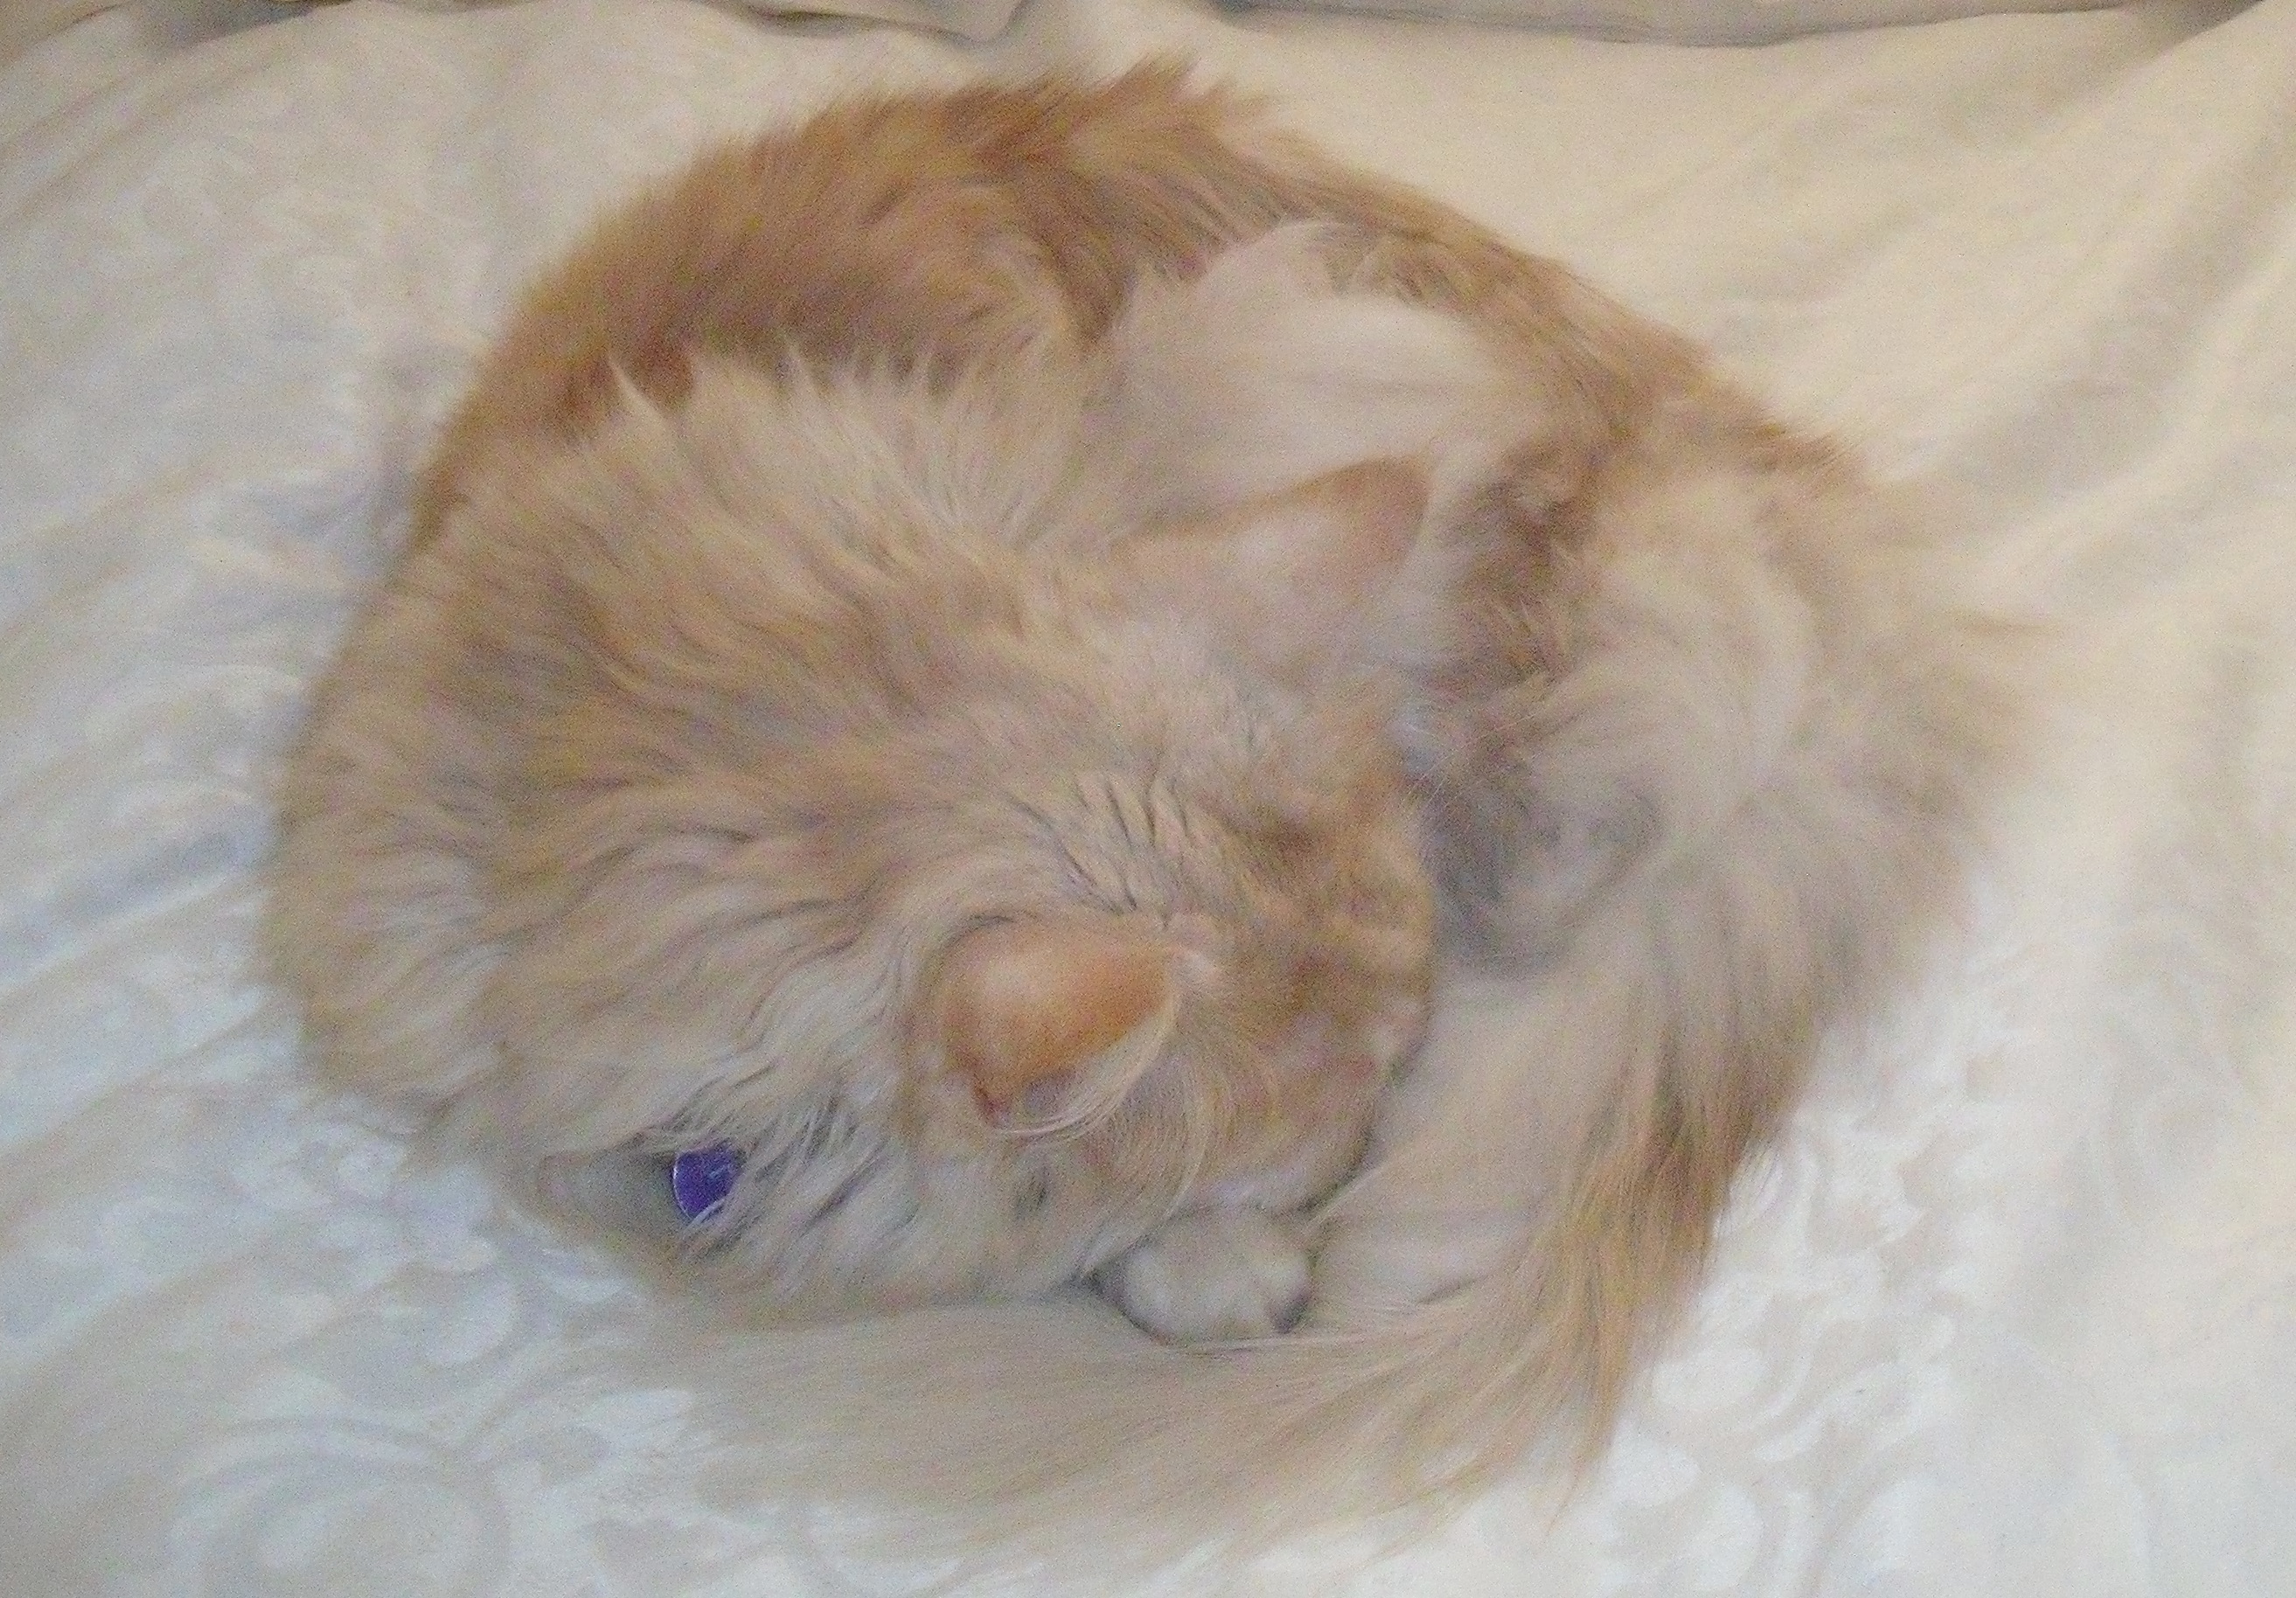
And to end, this is this mornings shot of a boy  and his new best friend, who have just been woken from a sound slumber by a crazy woman with a camera.

snooze

This was a lovely break from my house cleaning and tidying – the job has grown and grown.  The bathroom has been re organised and given a good seeing to.  The laundry has had the same treatment and my bedroom is also getting a redo.  My ‘Create Joy’ room is inaccessible as that has become the place where everything gets stored until it is ready for relocation, either here or elsewhere…….. YD is still selling stuff on Trademe and other sites.  Various charity stores have been the recipients of trunk-loads of stuff and other bits and bobs are making the giveaway rounds of family and friends.  I am so light!!  My wardrobe has been halved, my ‘one day it might be useful’ pile has all gone. My ‘cottage by the sea’ accoutrements have also now all gone.  I have left only what I need and use.

And, of course, my arty-crafty stash 🙂

And please, do pop over and visit Boomdee – I know you will enjoy her, she is a lot of fun!

Thanks for coming by today, I love that you did!  🙂

My Arty Organiser/Faux Filofax

I had a crazy notion about two weeks ago that it would be a good idea – instead of having five different notebooks of varying shapes and sizes plus one note pad scattered over my coffee table, and side table in the lounge and two more large exercise books and various bits of paper with random notes, quotes and ideas on scattered about the creative room – wouldn’t it be a good idea to have it all in one place…..

Mmmm – I set my mind to it – I first had the idea for a cover but was a bit woolly about how to actually do the rest when by serendipitous good fortune down the email arrived a link to a You Tube Video, made by a country-woman of pretty darn good creative ability:

All was made clear.  I had about seven notebooks still sitting in a drawer from the summer before last when they were on sale for five cents each – I bought twenty of them, just because they were five cents each!

Organiser3

I took the covers off and painted them.  I painted them with my two favourite colours cerulean blue and viridian green.  There’s a wee touch of white in there too…..

I poured glossy mod podge over to stop the paint scratching off and when that was dry gave each cover a good coating of car polish and buffed them up. Mod podge is not the best sealer around.  When dry it still has a sticky tack and a bad habit of making things stick together when you don’t want them to.  The car polish puts a sleek shiny sealed surface over the mod podge and solves that problem.

Organiser2

I made the cover – and I just love how it has turned out!  I used one of my postcards made from the original painting and embedded it onto the hardboard cover with texture paste which I then painted with the cerulean and viridian paints.

Organiser1

The rest was pretty straight forward.  I made some little pockets to hold the odd bits and pieces that might come floating by.  Fiddled about a bit with the spine to ensure it was strong and sturdy and could do what I wanted it to do.  Bought some hat elastic and wrapped it around the spine inner, which was then glued to the spine outer – meaning no-ones going nowhere baby!  slipped the notebooks into place and voila – one artists organiser complete with the obligatory spot of bling…..

Organiser4

I forgot to say earlier I made the little medallion thingy from a metal embellishment.  I dunked it into embossing ink then into white embossing powder and heated it.  Twice. Then I finished it with a dunk into some sparkly clear embossing powder and got the look I was after. I coloured the elastic with ‘Peacock’ Distress Ink.   Here’s a spine view:

Organiser5

Adding tabs ensured there is, amongst other things, a place for notes, a place to list things I want, a place to list gift ideas, a place to keep track of giveaways and winners of giveaways, a place for ideas, a place for quotes, a place for tracking expenditure and another for tracking earnings [giggle!] and a spare place for something else that might pop up.

Organiser7

If you peer closely into the centre of the book you will see the hat elastic doing its job and holding the notebook into the spine quite snugly.

Organiser9

And here is one of the little pockets which have been scattered throughout to hold the odd random bit of paper that may need holding onto….. and there is the blingy page marker at work too 🙂

Organiser10

And that my friends, is my version of an organiser – now to find out if it holds up and actually works….. she should do everything but make my morning coffee!

Organiser6

If I missed anything and you really, really want to know what I did or how I did it ask away 🙂

Thanks for coming by today, I love that you did!

The Adventures of a Prima Doll Stamp

I got myself a new stamp.  It is so pretty!

Now before we go any further I just need to tell you that I was never able to be a little girly girl when I was a little girl – and, as a result, I have never quite gotten past the frilly-blingy-dress-up-pretty stage – ’nuff said?

So here is the stamp – she’s quite a tall lass, standing about 20 cm [8″] and the primary colour used in the composition, Distress Ink  ‘Peacock Feathers’ an absolutely delicious colour:

Prima Doll Stamp

And this is what I did to it:

Prima 2

Sh is coloured with water colour pens and the dress is over stamped in a pattern by randomly plonking a small swirly type stamp over the four colour base.  Even though the dress has a sort of bottom frill, i wanted more, so made the fabric look frill from paper coloured in the same way as the dress and then pleated and shaped to get the look of movement.  It’s topped with a row of tiny pearls.

She looked a bit cold so I took a piece of narrow white cotton lace and turned it into a shawl. Later, the harsh white will be softened with a few dabs from the green and blue colour palette.

The next day I decided the black was too harsh and did this:

Prima 3a

Tiny pieces of my encyclopaedia paper are glued down and brushed with some gold ‘Perfect Pearls’  which also made their way onto the gown  The edge is treated to some ‘Peacock Feathers’ ink.

Now she needed to rest a bit while I had a think about where to go next – did she need to be affixed to a double layer of scalloped edged card?  Did she like having flowers around her?.  I often stand my half completed work out where I can see it when I’m doing other things.  Getting a glimpse of it when I’m not focused on it, helps me know what is needed as a next step.

The little fella likes to get in on the action too:

Tig & Prima

She spent an evening out of the play room and when she went back in this happened:

Prima 4

I think she’s finished – but you can never be quite sure …… not until she is safely tucked up in her cellophane bag or gone to her new home!

Thanks for coming by 🙂  I hope you enjoyed your visit, do let me know what you think – constructive criticism is always appreciated!

Hand Made Flowers and Me

My last post had such a lovely reaction from my few faithful readers and also brought a couple of questions via email from my non-Wordpress readers – that I thought I’d try a brief explanation of the different types of flowers I make and especially how I make hand rolled flowers.

I make so many flowers – mainly due to the absence of mojo – that last Easter I put some into a bowl and made a little centrepiece for my table.  It still survives, mainly as Orlando has no interest in it due to the fact that these flowers don’t smell pleasing to him.  They don’t smell at all.

Bowl of flowers

This is a good example as it has lots of different kinds of flowers made with different kinds of paper.

Some time back when YD and I made a trip to the local junk shop, we scored big time in the book section.  We picked up some big books – almost A3 size – a cook book, a Kaffe Fassett knitwear book and a travel book.  All glossy pages and fully and colourfully illustrated.  The books were 50 cents each.

I also scored an old Brittanica Encyclopaedia [B] which is the mother-lode really, for 20 cents!  These books were made to last forever, they are made with high grade paper and high quality inks.  The pages don’t discolour or bleed or degrade with time.  I use this book paper for all my pages that want to have words somewhere in them and I have not made a discernible dent in the density of the book yet.

The other three books are my suppliers for the ready coloured flowers.  I have to admit that as a book-o-phile I was quite challenged at the thought of tearing pages from a beautiful book to make flowers, but once the first page was torn and the first flower made, I was on the road to hell!

The pic below stars a suitably autumnal flower made from the cookbook.

Bowl of flowers 6

These glassine flowers are made with a die, nothing to it really just cut out and layer up:

Bowl of flowers 3a

But today we are primarily concerned with these little blue beauties:

Bowl of flowers 1

You will need:

Book pages

Scissors

Tweezers or quilling tool

Pokey tool 🙂

Glue gun

Colouring agents: water based inks – I use Distress Inks; glimmer spray of some kind works well too, glitter if wanted

A favourite TV programme – and off we go!  [Just fyi – I’m a late comer to Grey’s Anatomy.  I’ve been watching for about a month and am up to series 3 – hooked!]

Cut your book pages into circles.  The bigger the circle, the bigger the flower.  I tend to make circles somewhere in the vicinity of 6 -8 cm [2 – 3 inches]  Next you will spiral cut into these circles.  It’s important to understand that the narrower the gap between spirals the flatter the flower will be.  And it depends on how you want to use them – a high standing flower doesn’t work well on a card for instance, but looks great on a canvas……  I like to make my cut slightly wavy as it gives the top of the petal a more natural look.

The following blurry photo is my attempt to show you the cutting and rolling process:

BP flower unrolled

There will be a small circle left at the end of your spiral cut, this is the base of the flower.

Using the tip of your tweezers grasp the outside edge of the spiral cut, with right side facing roll up the paper keeping the bottom edge as level as possible.  I roll quite tightly then let the flower unroll a bit to find its happy place.

I make a big pile of flowers up to this point – and I maybe cut out a few dozen petal/leaf shapes as well.  For the next step I retire the TV and return to the play room.

I hot glue the spiral cut flower to the base.  Hot glue is best, it sets quickly before the flower can escape the shape you have chosen.  Lately I have learned to add an extra layer of ‘petals’ to the outside edge.  I flip the flower over and, making a pleat in the bottom of each petal, I hot glue an odd number onto the base, overlapping as I go.

Now I add colour.  Sometimes I colour with a product like glimmer mist, but typically I use water based inks, swiping the pad along the top edge of the flower and outside petals quite strongly.  Then I spritz with water.  The ink will bleed and spread the colour.  Don’t use too much water or you will have a soggy pile of wet paper pulp [yes, I’ve done it!]  While the flower is still damp I like to use the tweezers and roll back the petals, especially on the outside of the flower.  Denting, stretching and making little tears is all okay, it adds to the natural look.   Leave the flower aside to fully dry.

The flower on the left has had the extra layer of petals added, you can see the difference, right?

BP flowers 2

Now I make leaves.  I forgot to photograph this part.  But it’s pretty easy.  The left overs from the petals you glued on in the last step will now become the leaves.

BP flowers 3

I swipe some green ink on.  Draw a centre spine and some veins with a green water based pen – I use Marvy’s but anything will do – then go back in with my water brush and bleed the colour out.  I scrunch them up to and make a pleat before gluing one or two or even three to the bottom of the flower.  The pleat is important as it makes the leaf stand up and have body:

BP flowers leaves

Next is the fun part.  BLING!  You can never have too much bling, even on book paper flowers…..

I inserted half pearls into the centres and employed the wipe on – wipe off method with some glitter on flowers and leaves:

BP flowers bling

And then, because I could, I made a card, just for you!  🙂

BP flowers card best

As you can see from the photo, it’s dark and past my bed time.  Orlando has already gone…………

So, wherever you are in the world, I wish you a good night – or a good day!!

In bed

Any questions, please do ask ’em.

Thanks for dropping by, love that you did!

When My Mojo Leaves …….

When I am wanting to create, but inspiration has packed her bags and left I either make cards or flowers!  I can spend hours – days even – making cards and flowers!

I play around with dies and stamps and try to put together something that is vaguely pleasing or pretty …….

Collection 1

It doesn’t always work out ……………………

Collection 5

……….and other times it does!

I went through an Owl phase when I got a really cute owl die with movable parts:

Collection 8

And a teddy bear textured phase – when you touch this teddy bear, it feels furry, I painstakingly glued on flocking…..and it was really fun to make!!  [This is a Magnolia stamp, coloured with Spectrum Noir ink pens.]

Collection 9

Collection 9a

Collection 9b

All these cards are heavily embellished and impossible to post in an envelope.

I now have a large carton full of cards and other created items – we need to go to a market day and sell ’em off!

I wish my mojo wouldn’t leave quite so often.

Thanks for dropping by, do leave a note – it’s always lovely to see you’ve been  🙂 

Box to Book Part 3

Two weeks have gone by and the work on this project is not going according to plan …..   But I am remaining true to my usual way of working, and continue merrily on with my hit or miss style

I’ve been working on different embellishments that will be added into the book – most of them still requiring finishing touches as I kept running out of supplies – and as I buy most of my stuff on-line there can be a five day delay between ordering and receiving.

If I discover, say on a Friday afternoon [and this actually has happened] that I need more embossing powder it can be Thursday before it gets to me – depending on the supplier.  It can really stop me in my tracks – so I’ve spent a  bit of time checking everything this week and making a list…………. [Yay me!]

So consequently all I have to show at the moment is the layering process which is underway.

What you are about to see is simply phase two and there are at least another two steps to be taken in this process – And just to keep your interest up [hopefully] I’ll finish with a quick peek at a possible phase three page.

Day 6 Layering 1

This is a page towards the back of the book.  Card-stock has been torn, dry embossed [the script] and then attacked with some ‘Old Paper’ ink to age it up.  The edging of lace is done the same way – but this may well disappear altogether as I don’t really like it……

The strip of fabric edging on the right side is loose so that more pages can be tucked under it later on.  Most of what you can now see will soon disappear…..

Day 6 Layering 2

A close-up of the lower left page.

Day 6 Flip Page

This is a page towards the front of the book – it’s actually two pages as the curved part is the edge of a flip page, narrower and incorporating a pocket for more embellishments to be tucked into, and the bird belongs on the following page – I quite like that you can see this glimpse of what comes next..

A couple of pages on you’ll find this:

Day 6 Envelope Page

Another flip page, made to look like an envelope with lace edging and ribbon tie.  Well it doesn’t just look like an envelope, it is an envelope and will hold a couple of poems inside.

Day 6 Layering 3

This is the page before the envelope – that’s the back of the envelope on the right hand side.  The page on the left has its first layer on and the next pic shows what I am considering as layer three for this particular page:

Day 6 Layering 4

I can’t adhere anything as yet as I still haven’t decided what text I am going with  – but two strong contenders are Khalil Gibran – selected extracts from ‘The Prophet’  – or a selection of my favourite Rumi verses…….decisions, decisions!!  But once that decision is made and the verses all printed out then everything will come together – I’m hoping another two weeks will see it done………

Stay tuned!

Thanks for taking the time to drop by – I love that you came!

Order Restored

I worked like a mad woman – but it still took several hours to sort, re-catagorise, move around and move around some more.  When I at last found my desk tops they were filthy – covered in dust from all the edge sanding that has gone on in preparing my box to look like an old book.  Also I had been cutting out some intricate dies that left a layer of minute confetti sprayed across all surfaces….. and, lets face it, it got away on me  I’ve been on a series of creative binges without stopping to clear up in between projects.

I’m a Virgo for heavens sake – we like organised and we like clean!!

Anyway – here’s some pics, can you see the difference?

The long shot - notice the tower of boxes is missing?

The long shot – notice the tower of boxes is missing?

The back desk - usable space for sewing, die cutting, hot gluing and more...

The back desk – usable space for sewing, die cutting, hot gluing and more…

Major sort out in this corner.  Now all stamps, dies, patterns and papers are accessible.

Major sort out in this corner. Now all stamps, dies, patterns and papers are accessible.

Craft Room 8 Cleaned

We have clear working space again ………….. and even Orlando is happy – though he leapt off his chair when he saw the camera coming towards him – modest chap!

Box to Book – Part 1: Transformation and Recycling

A while back I was wandering around in You Tube and came across a beautiful altered book video by a talented young woman called Paveena whose channel is called ‘myautumnsunset’.  The book she is showing is absolutely stunning – and I was inspired!

One of the things I really liked was the thickness of the pages – she had been able to burrow into them and inlay some found pieces.  I didn’t have such a book to hand, nor was I likely to find one.  So the idea sat for a while somewhere in the dark recesses of my creative mind.

Last Christmas Eldest Daughter had completely surprised me with a wonderful gift – a new ‘Grand Calibur’ die cutting machine.  It came in a lovely big, strong box which was sitting under a table in my play room, getting in the way, but with it bound to be handy for something one day, I had refrained from sending it to the recycling station.

So that lovely ‘Aha!’ moment arrived – and although I did not cry ‘Eureka!’ and leap from the bath – metaphorically you may say I did!

You know where I’m going with this – ‘The box’, I said to Orlando, ‘will perfectly transform into a book….’.

So that idea sat for a bit – which is my usual way of working.  When I get a new idea I let it sit around, I move it about a bit, imagine the end product – which gives me a kind of over view of how I might get there – sometimes I even jot down a note or two, but nothing much outwardly happens.  Then one day I’ll go into the play room and lose busy myself in the creative process.  Most often the finished product bears little resemblance to the initial idea – hence the ‘hit or miss’ label I give myself.  But something interesting usually transpires.

But this task is different.  This is everything from a box, I only have one box so can’t muck it up – well not too much anyhow – I have to have a plan, a process, a recipe.  I have to think before I leap – or cut – I have to know how it is all going to go together……..

Now this is the part where you get to be very pleased, proud and happy for me – I did it!

And not only did I do it, I also remembered to photograph each step along the way – or nearly every step – nobody’s that perfect are they?  I didn’t actually take a photo of the box before it began its transition ……

So here we go:

Day 1: Dismantle and cut up the box into page size pieces.  Paint all edges black.  Tape two ‘pages’ together to make a double page with a slight gap between the two for ease of folding and the later step of sewing the signatures together.  Do this three times.

The 'pages' painted and taped

The ‘pages’ painted and taped

Day 2: Choose paper and cut to size.  Distress all edges by tearing, razoring [?] and applying ‘Old Paper’ Distress Ink.  Using tacky glue liberally adhere paper to cardboard pages.

Goodbye box, hello page!

Goodbye box, hello page!

A small corner is left to remember it's provenance!

A small corner is left to remember it’s provenance!

The three cardboard signatures ready for the next step

The three cardboard signatures ready for the next step

Day 3: Now that the cardboard signatures are ready I made a paper insert for the centre of each one using paper from the same line.  These were shaped and the edges were distressed in a similar manner to the cardboard.  Then each signature was individually stitched to a pre-measured and pre-spiked length of grunge paper which is to be the inner spine. [Grunge is perfect for this due to its strength and flexibility]  I used embroidery floss to sew each signature to ensure the colour matched the paper .

The signature ready for sewing to the spine inner

The signature ready for sewing to the spine inner

The three signatures sewn to the spine inner with the cardboard cover balanced precariously on top - so you get the idea!

The three signatures sewn to the spine inner with the cardboard cover balanced precariously on top – so you get the idea!

Tomorrow I am having a day out with Youngest Daughter which will give me lots of time to brew an answer to the question do I put the cover on next or start decorating the pages?

Do I leave the cover til last?

What would you do?

Thanks for reading this far, I love that you took the time to pop in.

Have a great day and come back soon! 🙂

Learning To Dance In The Rain

It’s time to post the final ‘retrospective’  journal page, completed sometime in February I think.  My [previous] bad habit of forgetting to date my journal pages caught up with me and I now own, and use, an actual date stamp!  Hola!!

This is the page where I learned about using car polish over gel medium to stop pages sticking together.  [Thanks to Claudia Rossi – again!]  The added benefit, as you will see, is that the sheen adds to the wet look I was trying to achieve.

The first thing I did was cover the pages with various shades of paint in blues and watered down reds  and drag the colours downwards with a variety of makeshift instruments as I was trying to achieve the impression of falling rain.  It actually looked really effective until I started applying the mod-podge when, of course, the water reactive thing occurred and I lost my lovely down-pour!  Never mind – live and learn is the motto of the hit or miss crafter!

The house shapes were cut from old encyclopaedia paper – I like my art work to look learn-ed!

Dance In Rain 6 March 13

I used stains and paints to colour the houses and hit them with a ‘crackle’ stamp to add texture.

I die-cut the clouds from more book paper, stamped the winged flock and made the text using my trusty ‘Dymo‘ label maker.

Dance In Rain 4 March 13

This side retains some of the downpour texture I was trying for:

Dance In Rain 5 March 13

Tim Holtz stamps make another appearance, I stamped the rain man and the Model T onto tissue paper using black staz-on ink  and bunged them into place. My white gel pen outlined rain man:

Dance In Rain 3 March 13

I was feeling pretty contented at this point – and then decided to try the mod-podge and car polish effect.  As soon as I hit the page with the medium the colours started moving and blurring – I worked as quickly and lightly as possible to try and minimise it, but as I said before, I lost my downpour effect.  When the medium was dry I raided the car cleaning kit and applied a liberal coat of car polish, buffing vigorously.  I really like this – the finished page shines with a wet look sheen that is really effective for the theme and the pages don’t stick together – an added bonus!!

Dancing In The Rain

See, I even put a date stamp on it…….. and that’s the end of the ‘house’ themed journal pages – for now any way.

It’s time to hit the play room and create something new.

If you stuck with it – thanks for dropping by and have a most enjoyable day!

Link

It’s been a while since I posted – if you have read previously and are waiting to hear more about the new life style, all I can say is it is going well – I still spend more time in the kitchen than I have for years and am still experimenting happily with recipes both old and new.

More important though is how I am feeling [within my body and health and well-being generally].  At the end of week five I am pleased, proud and happy to report that all is going very well…… for the first time in over a decade my body is pain-free, the inflammation has subsided substantially – I can now touch my toes while keeping my legs straight – something that had eluded me for some time!  And I feel good – that ephemeral feeling of general well-being and ease within the physical translates into a sense of greater contentment.

I’m sprouting [mostly alfalfa and a seed mix known as ‘Energy‘], making yoghurt, cheese and oat cakes [ see a previous posting for the recipe]  Oat cakes on plate

and chicken broth [which becomes a yummy soup].       

Chicken soup is a common classic comfort food ...

Did you know that when you put a dash of cider vinegar into the water it helps to pull out more of the vitamins and minerals from the chicken so that your broth becomes an even more potent cure-all.  There is wisdom in the old-wives tales and folk medicines!

My window sill is full of fresh herbs and regenerating bits and bobs such as celery and spring onions and my freezer is full of pureed pumpkin, chicken stock and soup, spicy nuts [for a quick pick-me-up snack] and bags of activated walnuts and almonds just waiting to be added to the next meal.

I’ve even made my own salad sprinkles – a tasty mix of various activated nuts and seeds mixed with dried karengo [a nutrient rich seaweed] and crisped coconut flakes.  This has been a great favourite and even though summer has given way to autumn, and salads are being replaced with hot dishes, I feel confident they will be just as tasty sprinkled over vegetables!

Now, just in case you think I’ve become a health nut, let me hasten to reassure you, all the old cravings for comfort foods are still being satisfied.  Why just last night I prepped up a couple of parsnips and sweet potatoes and rubbed ’em down with some oil and peanut butter [homemade, she said proudly] popped them in the oven with  good sprinkle of salt and enjoyed myself some hots fries and watched a movie!!  It was just that kind of night!

I think what I’m enjoying the most about this change in life style is that it is not a ‘diet’ – it is really a chance for me to enjoy good wholesome food without the crap that factory made stuff is liberally covered in and because I use home-grown or organic wherever possible I know it is good for my body and health too.  I’m enjoying finding out what my body likes and what it doesn’t like – perhaps for the first time ever I am really paying attention to the messages it sends me…….. a little later in the day, but hey, better late than never!

Now apart from all this, I’ve also been busy in the craft room – lots of stuff underway, lots more ideas waiting to be trialed in the art journal but here is a quick pic of the latest card:B'day Card front March 13 B'day Card Inside March 13

Front                                                     Inside

Made for my eldest daughters mumble birthday.

I’ve also popped those photos onto Orlando King’s pinterest page if you want to have them.

Thanks for popping by – leave me a note to say you’ve been, I enjoy hearing from you!