Box to Book – Finished and Given, At Last!

Cover finished 1 a

It took the better part of a year – but I got there and I am so happy and relieved to report to those of you who have so faithfully and patiently waded through posts and photos that it was well received.

These photos were taken late at night on my ED’s birthday after a long and full day of zooming halfway up the Island and back again and a rather scrumptious dinner of mussels and Belgian Beer at The Leuven in Wellington City………. On the phone to her right is YD, partaking long distance in the present opening and without the benefits of mussels and Belgian Beer!

present1

present3

Here once more is the history of the Book of Love to refresh memories.

For Christmas 2012 I received a Spellbinders die cutting machine from my lovely Eldest Daughter.  The box was a biggish, strong, brightly coloured affair that sat in my craft room for a couple of months with me looking at it and wondering what it could be used for.

At some point I had the bright idea it could and should be recycled into a book and given back to the giver of the gift the following Christmas.  I was inspired by a beautiful project I had seen on You Tube and also by thoughts of creating something that looked as if it was really old and well loved from ordinary crafting items.

I wanted to give my daughter something that featured my handwriting and lettering, something that could be opened at random and would hold an uplifting message or thought and something that could reveal, or unveil, more layers every time she looked at it.

I ended up deciding to make all my pages and inserts look like palimpsests and consequently spent many happy hours taking ordinary cream coloured card stock and wrinkling, ripping, stamping, dirtying, writing and shaping it to my requirements.  Whilst not strictly meeting the requirements of old parchment that has been recycled and written over many times, it made me feel happy and added depth and interest to the pages that appeared.

The box was roughly cut up into pieces the same size and covered with papers.  Little pieces of the original box however can be seen here and there so the provenance is not altogether lost. I wonder if you spy any of those odd edges and corners as you go through?

The project took longer to complete than expected – mainly due to me getting back into mixed media painting and opening an Etsy Shop and wasn’t ready for last Christmas – but I was determined to get it completed for ED’s birthday last Saturday.  I made it by the skin of my teeth!

We made a little video of the book before I left to come home with my rattly little camera – it is a bit shaky and ends rather abruptly due to me not knowing how to do fade-outs and such like – but may show some aspects that are harder to see in the photos.  Please forgive the quality.

Here we go – I hope you enjoy  🙂

bday1


bday2 bday3 bday4 bday5 bday6 bday7 bday8 bday9 bday10

The eagle eyed amongst you may notice that I’ve somehow lost a photo here – a page is missing.


bday13

bday11


I had a wonderful week away, we were so busy and so happy and it went by in  flash – and I took almost no photos – completely hopeless!

But here is a photo of Wellington Airport for you Lord of The Rings and Hobbit fans:

Middle-Earth-Airport-Wellington

Thanks for coming by today – I’m so happy that you did!   🙂

No Paintings – Just Life!

I haven’t posted for some three weeks – some of you have even messaged me   🙂   Those of you who follow along on the Contented Crafter Facebook page are kind of in the loop…… briefly put it’s been a little bit crazy with not much going on in the Create Joy room that can be shared.

First off I decided – completely out of the blue – to give my tiny house a wee bit of a makeover, a do-up, a preparation for winter if you like …… in my usual inimitable fashion and with not much spare cash I began a one woman crusade to find how best to gain space, colour, comfort and energy into a room measuring roughly 3.20 x 5 metres [or for you non-metric types: 10’6″ x 15′]  It’s a challenge!

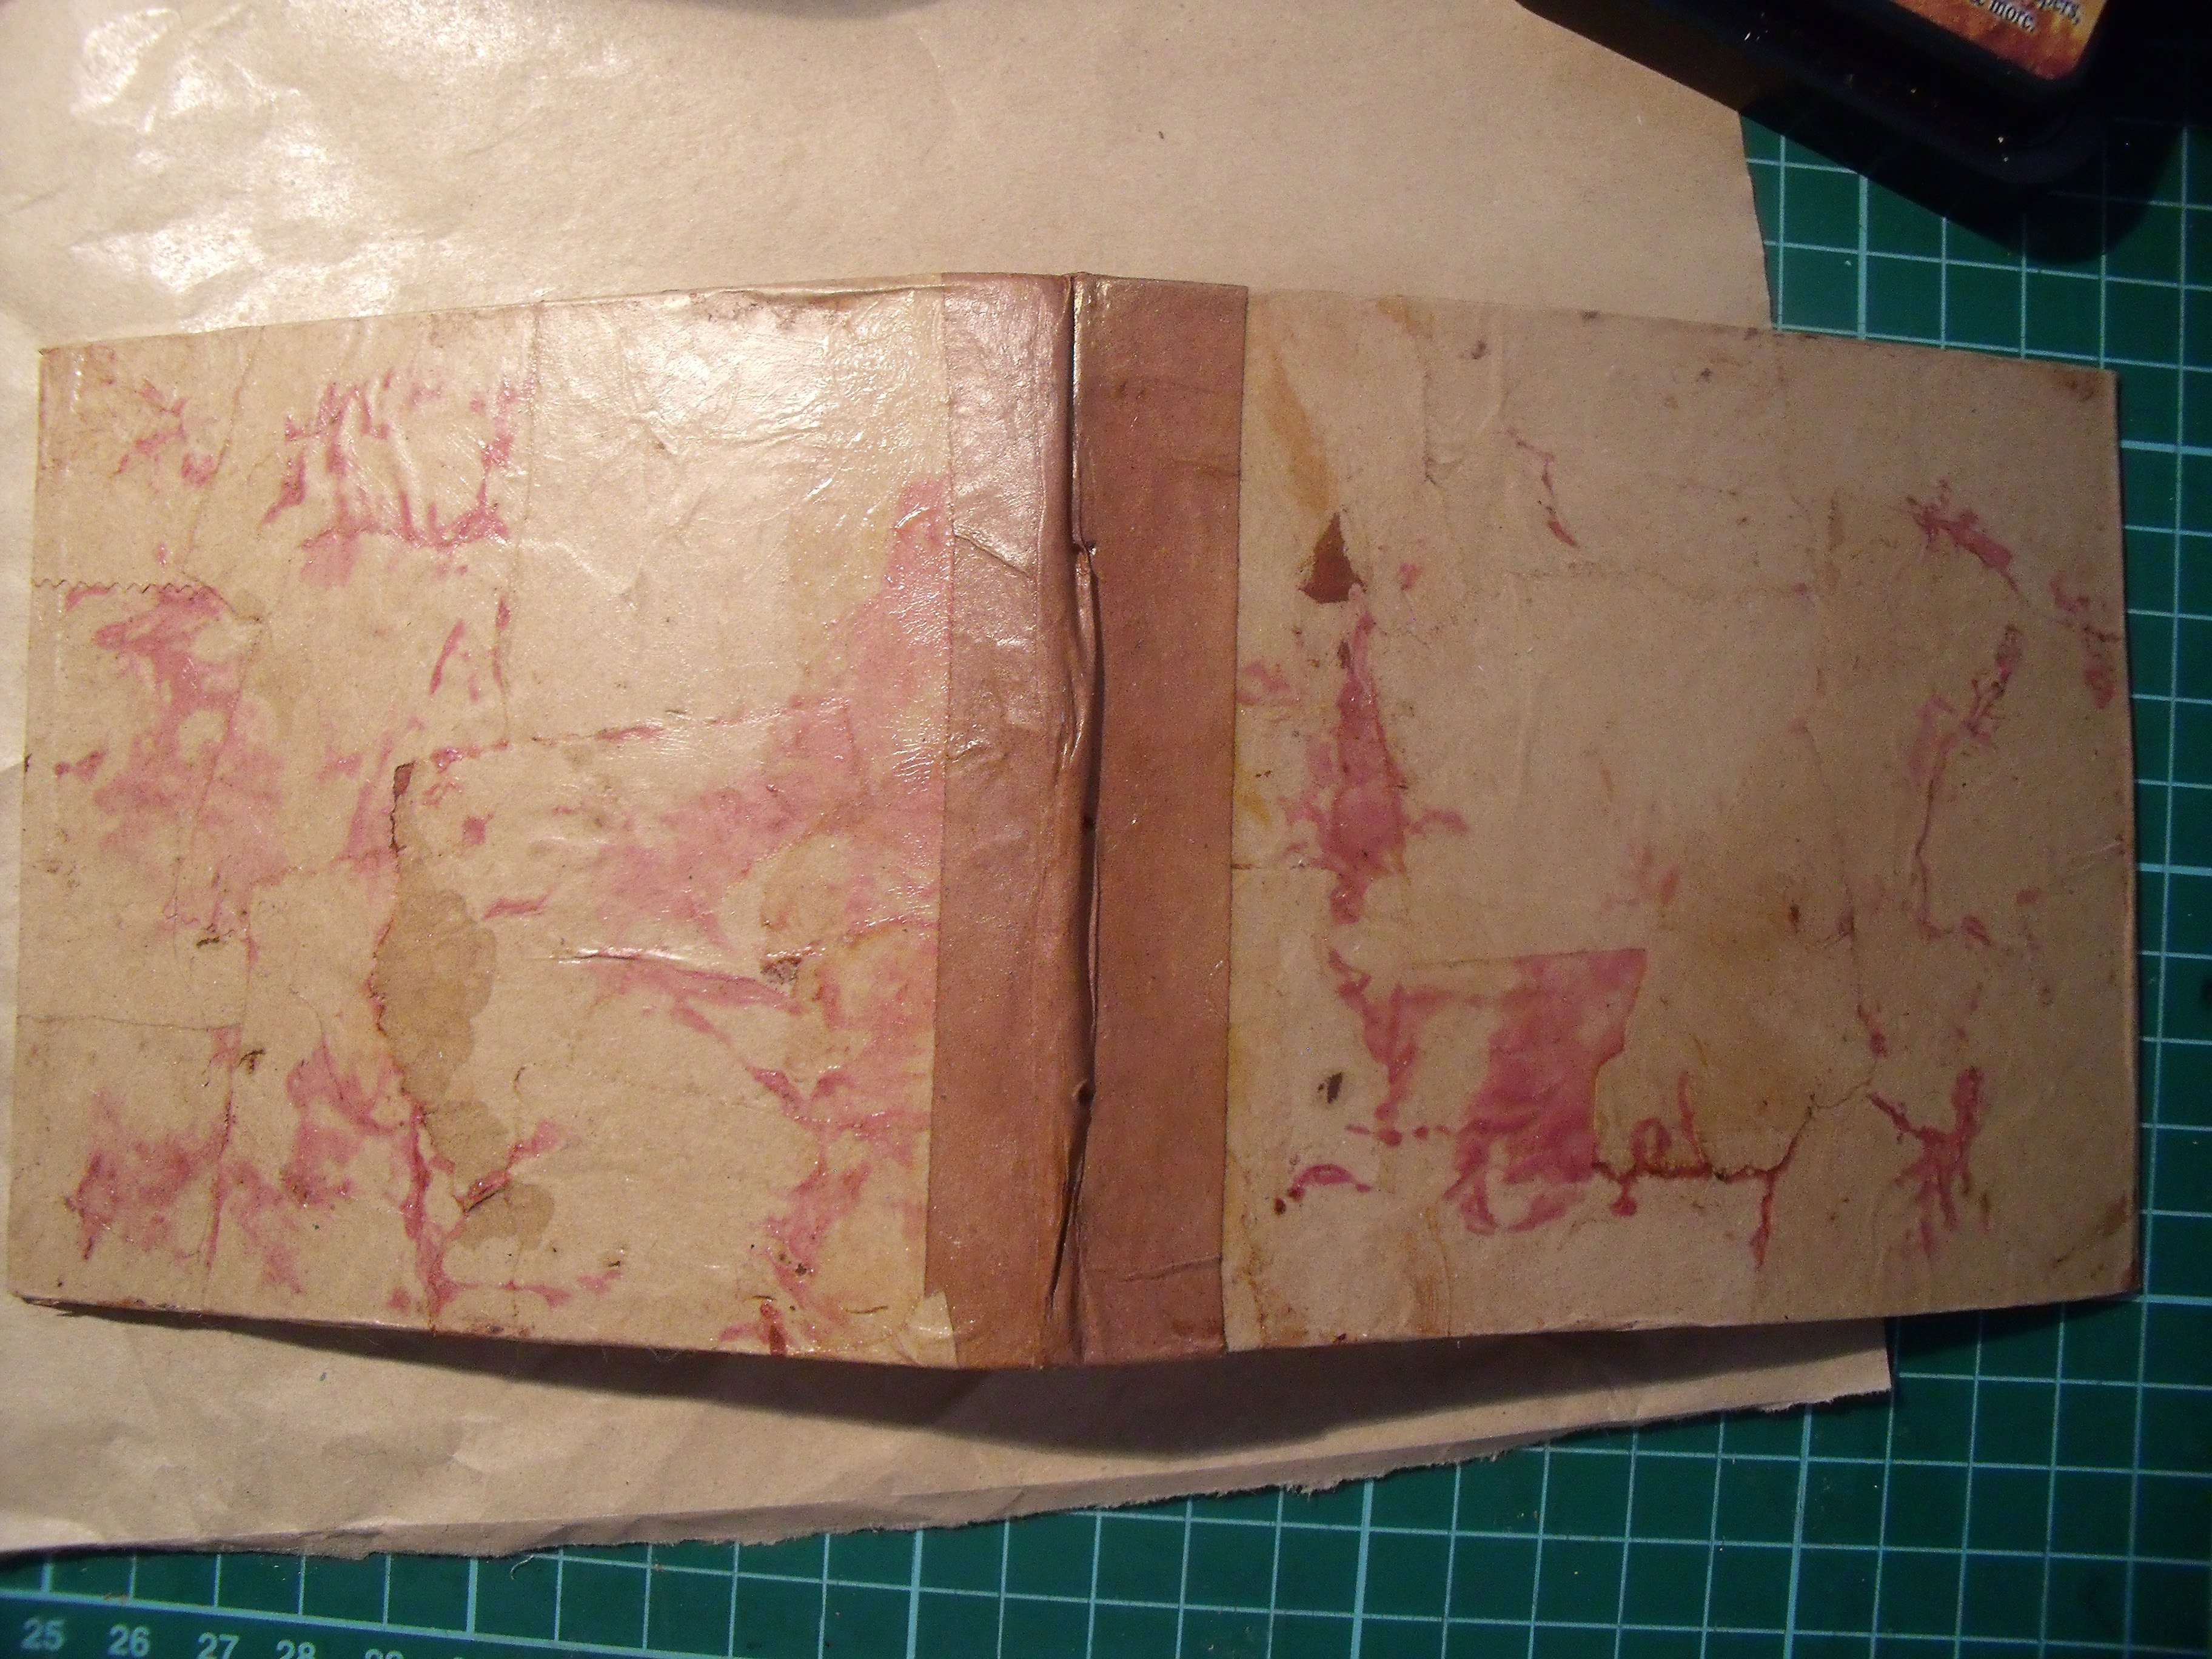
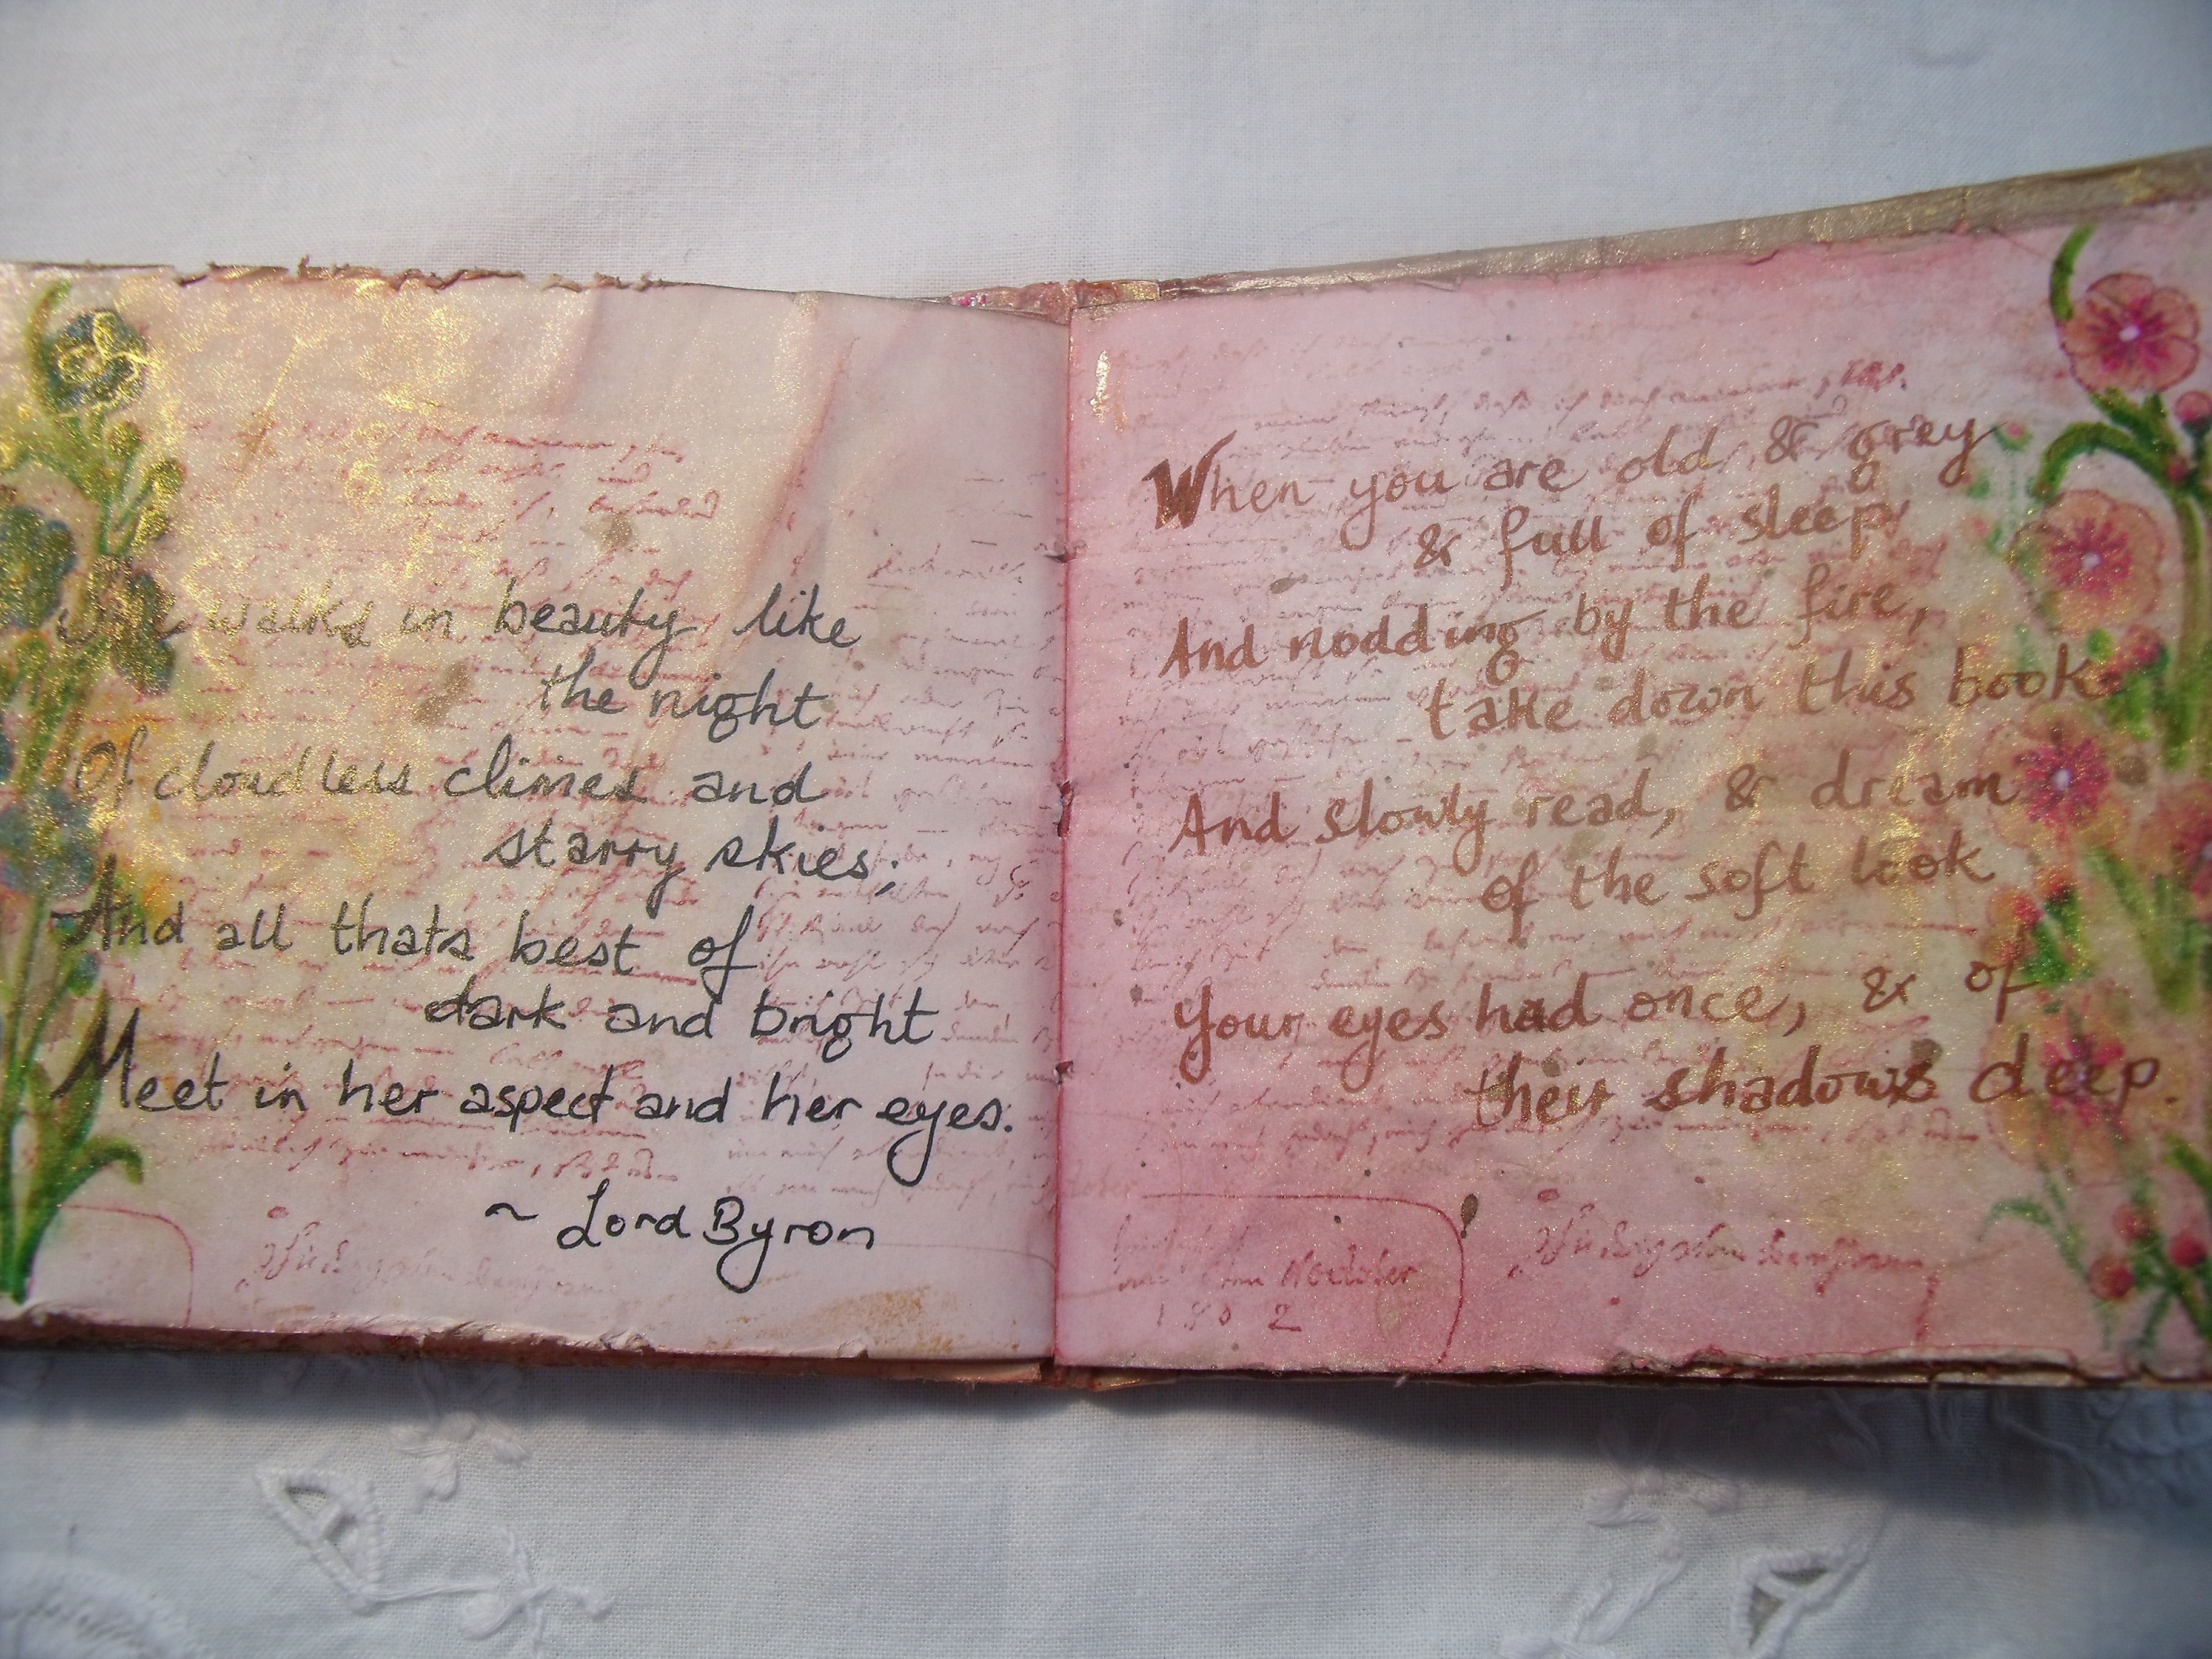
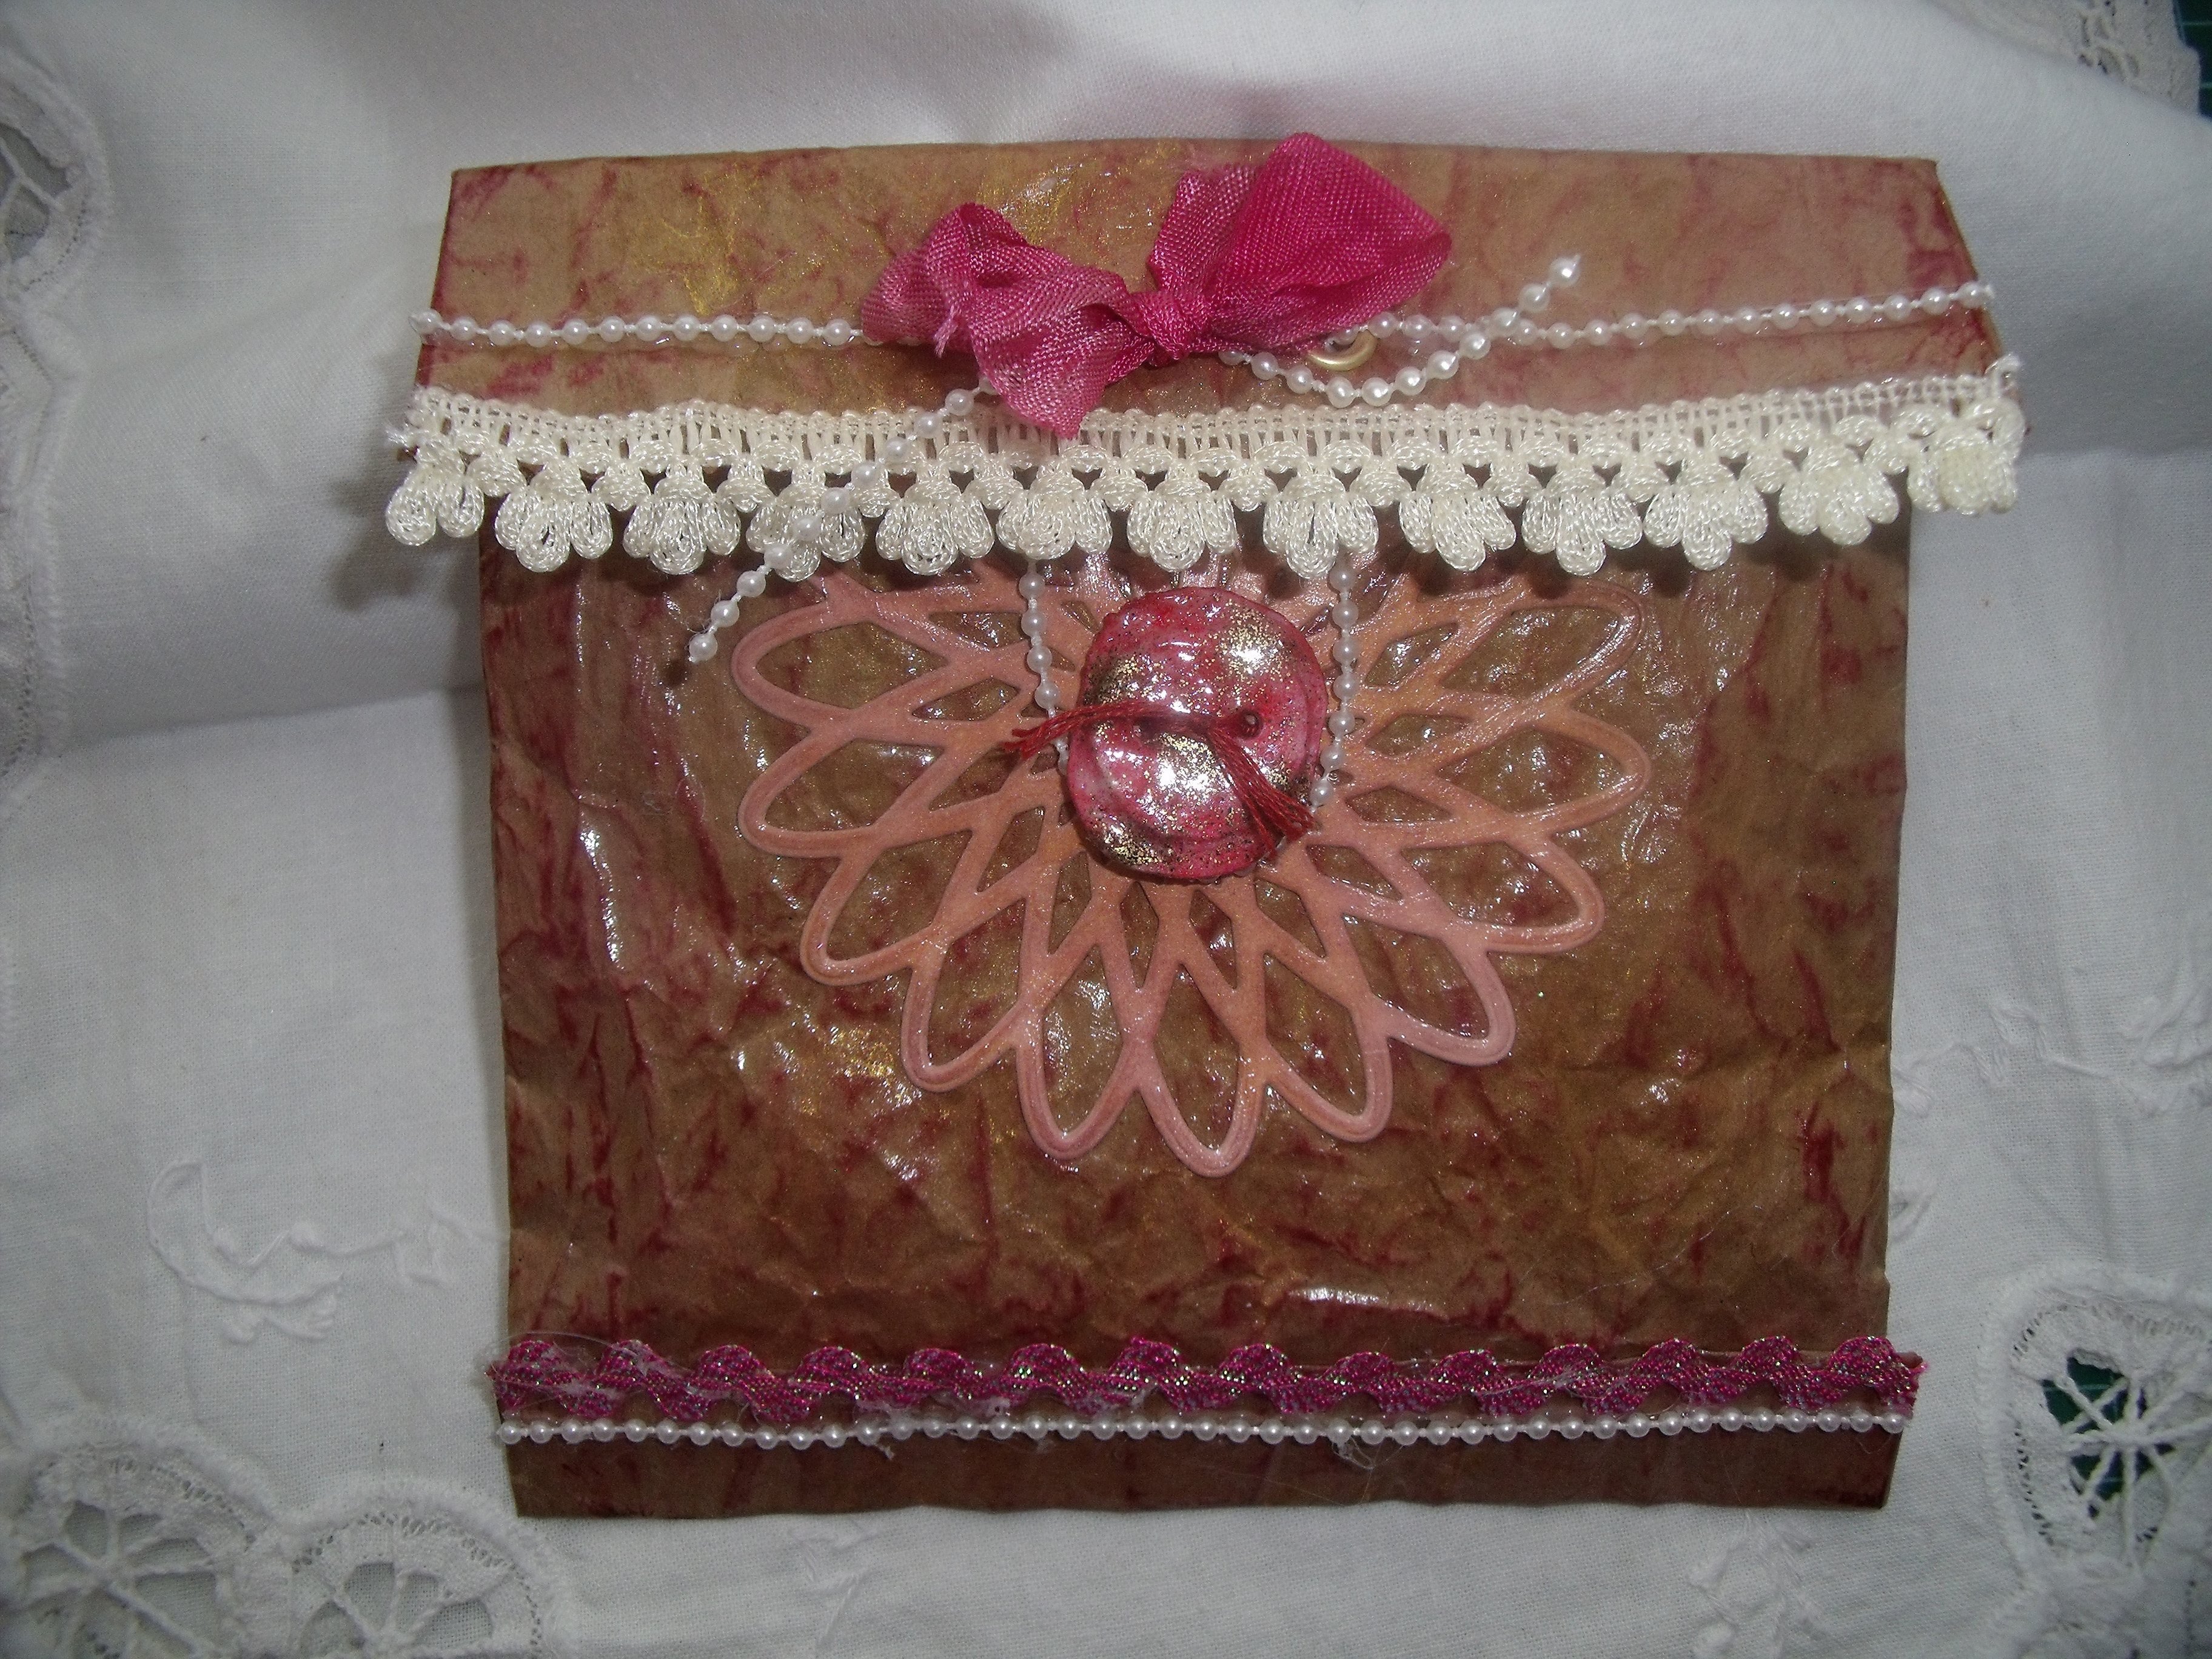
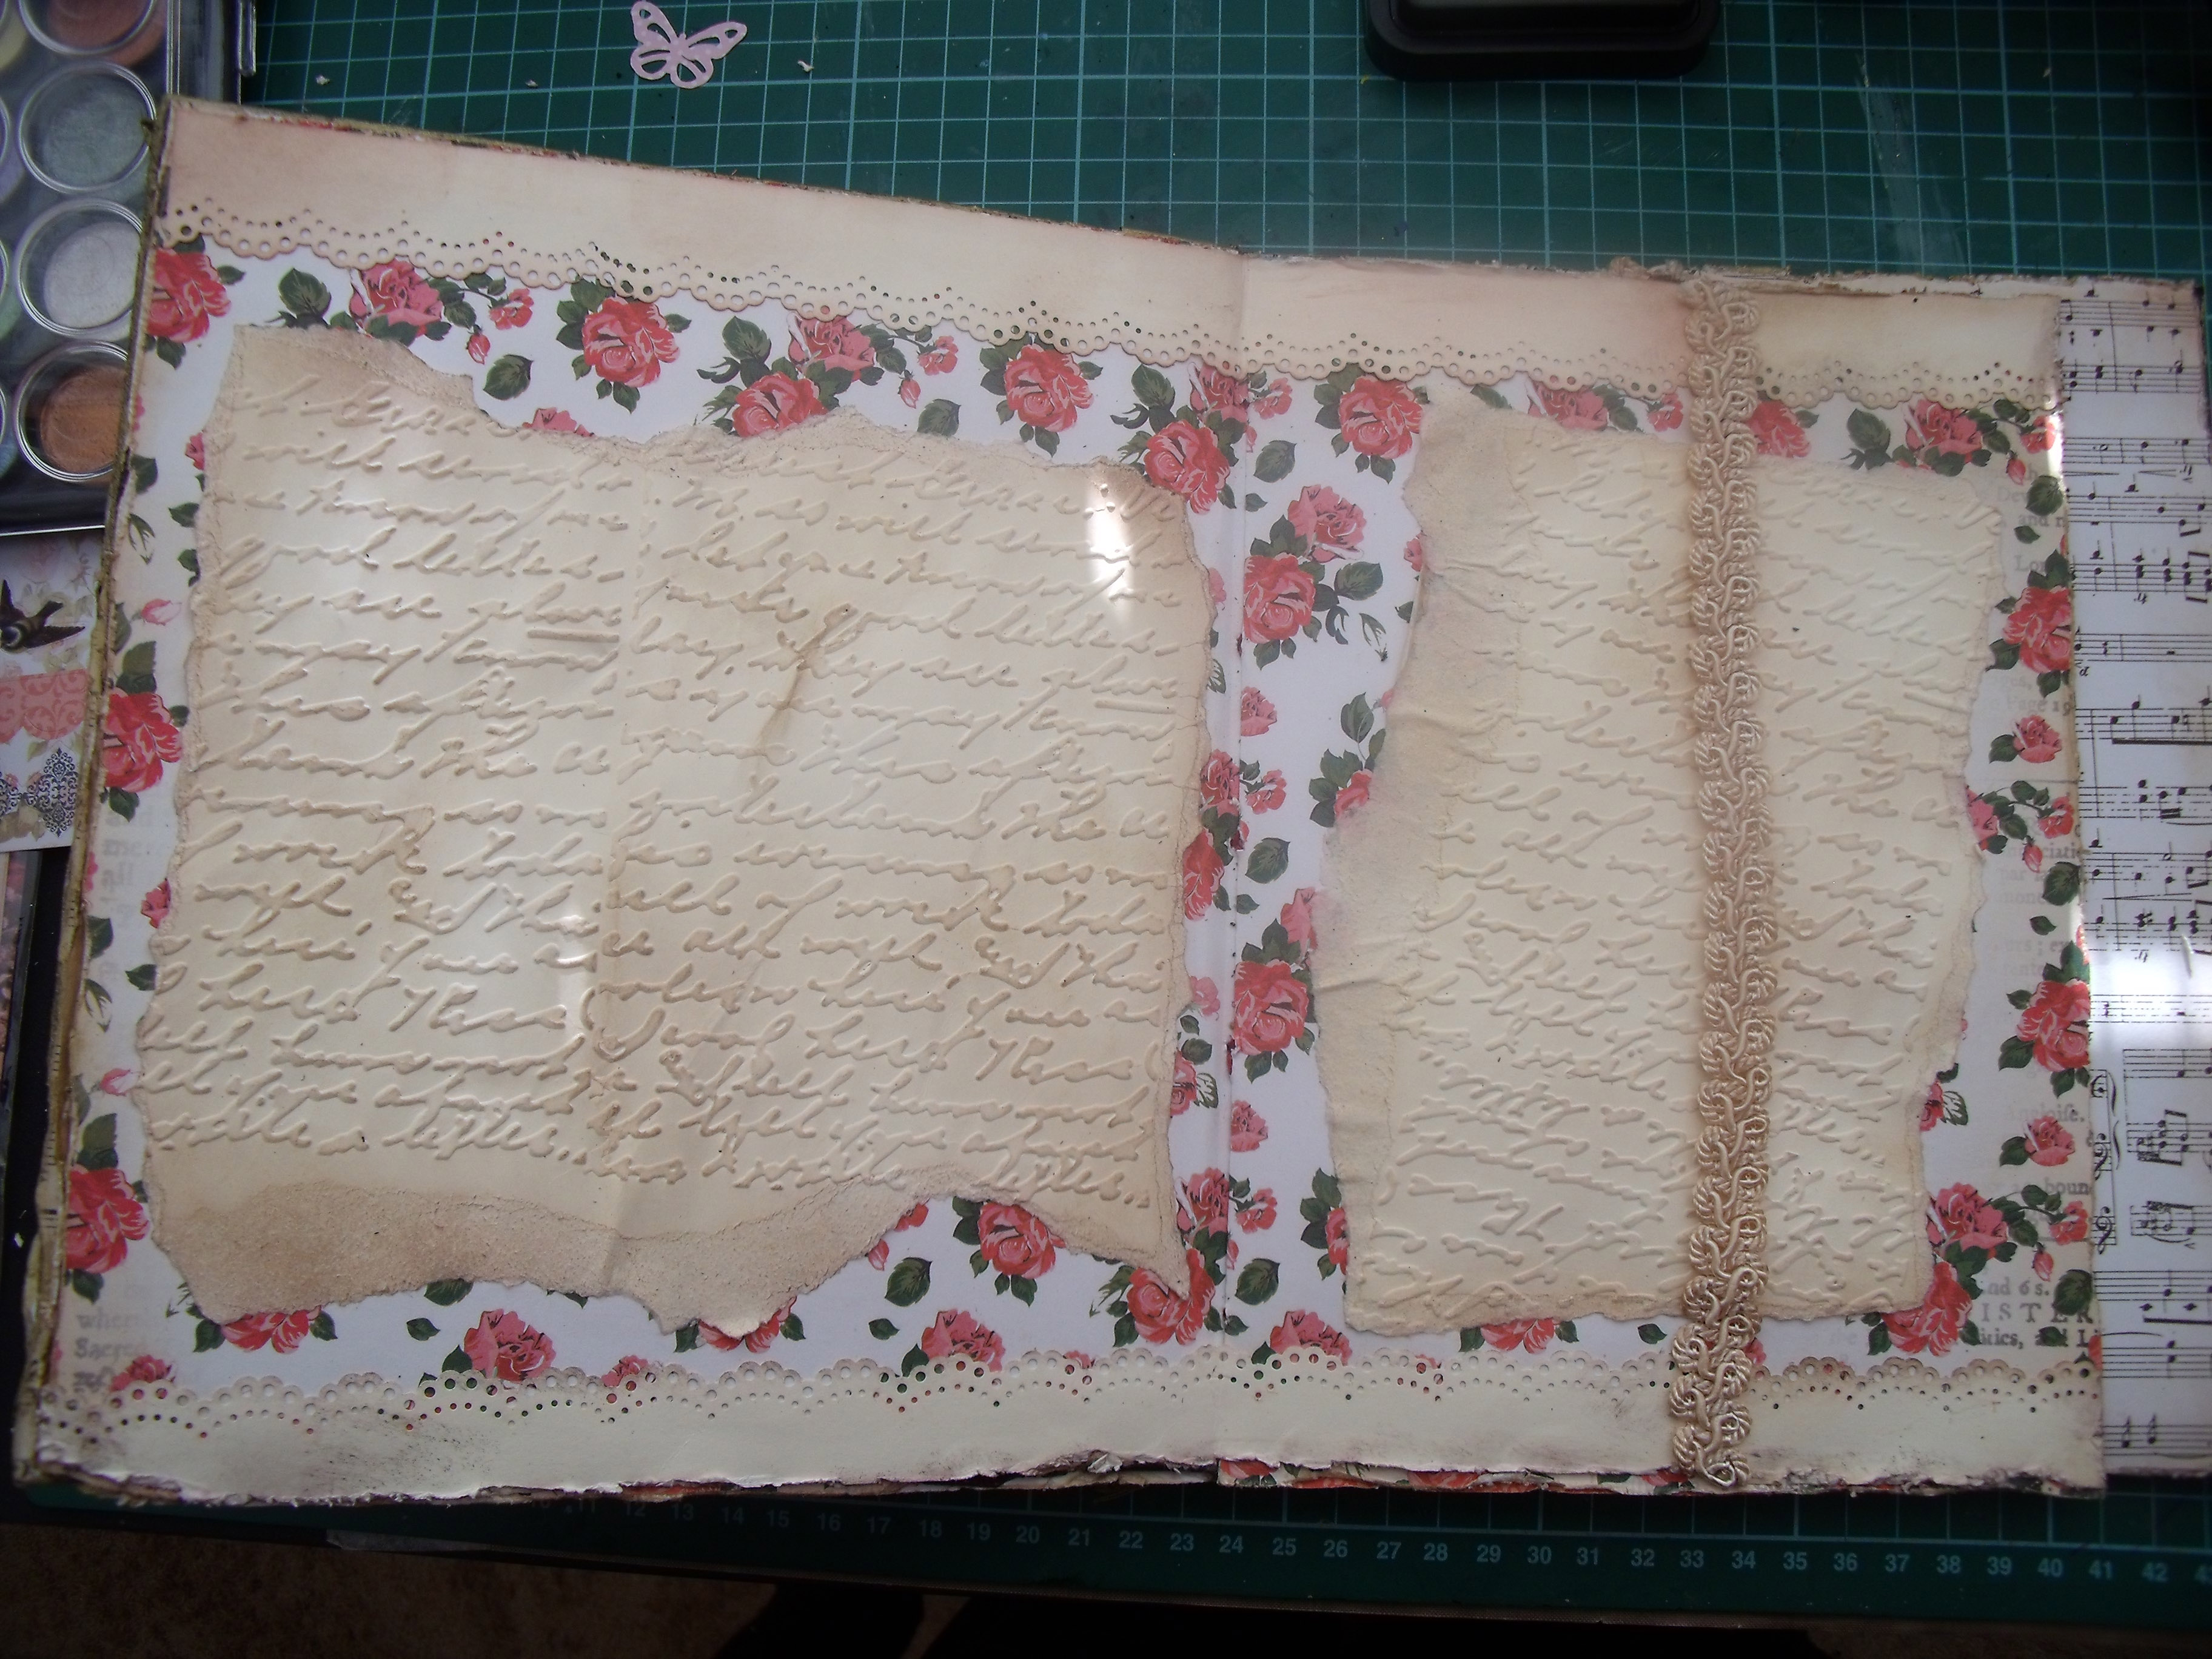
Then other activities began to intrude – there is my ED’s birthday gift to finish.  I’ve been working at it on and off [mostly off] for a year now and you can follow it’s earlier progress here and here and, if you are really interested, here.

I dislike leaving things unfinished and so it must be completed even if I wish I could have a complete re-do.  I’ve discovered [again!] that you learn so much from an activity and get better at it the more you do – hence the wish to start again!  But I can’t as the original idea was to recycle a box in an unusual and worthwhile way and the box is now no more and we have what we have.  So on I went with my project, all the time backtracking to add in, embellish up and do over.  Like Topsy it has grown and grown and developed and evolved and is ending looking nothing like the original idea.  Isn’t this the way of life?

Intruding into this work came several more activities.  YD is on a five week long vacation from her job.  She spent most of the first three weeks taking me out shopping with her – just for fun she said, and I am always up for some fun!  I never ‘go shopping’ any more and found it fun, but quite exhausting.  Several items have found their way into my room makeover stash.

With all this time on her hands and nothing but good ideas in her head, YD turned to me as we drove home from one of our shopping trips and said “Let’s have a garage sale on Saturday!”  It was Thursday afternoon.

We have been talking about having a garage sale for months.  We have stuff to get rid of.  I have a tiny house and can’t keep stuff like I used to.  I have too much stuff.   I have stuff in boxes and cupboards and in the way.  I would like to get it gone.  And it would supply me with some much needed cash for my beloved redo…….. But, like, in 36 hours time?

“But we haven’t advertised it”  I said.  That was no concern to YD, we would put up some big notices on lamp posts and attract all the Saturday morning strollers who would be heading to the Esplanade for their Saturday morning Latte’s……

“But, we haven’t sorted” I said.  No problem!  We would do that this very evening and transport all my stuff to her place, where said Garage Sale was to be held, tomorrow.

I don’t seem to have the word ‘no’ available for use with either of my girls and so we were off and running!  Cupboards were emptied of boxes, sifted through and piled into cars.  Cupboards got a quick once over, drawers were emptied out and resorted.  The bookshelves were relieved of some of their burden.  The boxes of stuff that had already been set aside for our garage sale day were loaded up and disappeared.  My house felt lighter immediately.

Over at YD’s house on Friday we did the same activity for her and the piles of stuff accumulated in her carport.  I discovered my inner hoarder and pulled a couple of items back, strictly with the living room makeover in mind….

Friday night, and again at 6 o’clock on Saturday morning, we drove around the area and stapled notices to lamp posts exhorting any one who could read to come to YD’s house and spend their money on our unwanted stuff.  What we were both blissfully unaware of was that my neatly handwritten invitations – black Sharpie on brown cardboard – were far too dull and small to be readily seen by all the latte seeking hordes……….

Our Garage Sale was a fizzer.  The fact that we made $60 was a small miracle according to YD’s best friend tLK who had driven around looking for the signs on her way to help fend off the hordes of bargain hunters.

What I was really pleased about is that all my junk is now at YD’s place living in her guest bedroom and YD and tLK decided they would have a second go at a Garage Sale – and do it properly this time with advertising in the media and readable lamp post signs and everything else required for a successful day on ED’s birthday – when I will be in Wellington celebrating said event with the ever-so-lovely and aging ED!

It all worked out rather well I thought.

While all the above activities were going on I had discovered that my vacuum cleaner wasn’t actually doing any more than picking up the minimal amount of dust and debris it could get away with.  I had cleaned the floors vigorously with it and when that activity was over got down on my hands and knees with a lint brush and brushed up a rather remarkable amount of dust and debris – and hair from one Orlando King.  The cleaner, despite its roaring and puffing and vigorous movements, had done minimal work and was due for a sideways promotion.

I spent several days perusing my options online and armed with my new found knowledge and requirements set off to visit three stores and see what they had on offer.  Imagine my joy when, at the very first store I was approached by a tiny young woman with a friendly demeanour and an extensive knowledge of vacuum cleaners!  Imagine – there she was, working in the appliance section of a store and knowing her subject!  Fantastic!

vc sales girl

I spent a happy ninety minutes with her, discussing so many different aspects about cleaners in general and three in particular that I am now a walking encyclopedia regarding the pros and cons of the things!  Having educated me enough we began to play with the possibilities.  I happily cleaned large areas of floor for the department store, scuttling customers and servers out of the way with my vigorous brushstrokes.  My friendly and capable retail person scuttled about too, finding more dirt and debris to scatter in front of my searching motorised broom while I oohed and aahed at the sight of all that muck disappearing up the pipes despite her valiant attempts to rub it into the carpet and scatter it about in inaccessible places.

15577954-lovely-housewife-with-vintage-maid-dress-cleaning-using-vacuum-cleaner

With two cleaners tried out and my back beginning to get a bit stiff from the bending it was on to number three.  Now to be honest here, I was a reluctant trialler of this model.  It was an upright – the ones that look like they used in the UK pre-war days and I have always been a girl who uses a lowdown cleaner – you know, the ones modelled on the electrolux in days of yore – there are still people in the world who refer to ‘luxing’ when they talk about vacuum cleaning their floors.

My friendly, but determined sales girl really wanted me to try it and honestly, I was just doing it to make her happy as she had been such fun to play with.

She plugged it in, showed me where all the switches were and I dutifully turned it on and ………..Wheeeeeee!  It dragged me around the store at a rate of knots.  If I was cartooning it for you you would see me hanging onto the handle, airborne like a para glider, grinning like an idiot!

I couldn’t find one of those but this may give you an idea:

cleaning frenzy

Of course it came home with me!  The absolute bonus on a fun afternoon was that that particular model was marked down, for that weekend only, by $100.  How much better does it get?

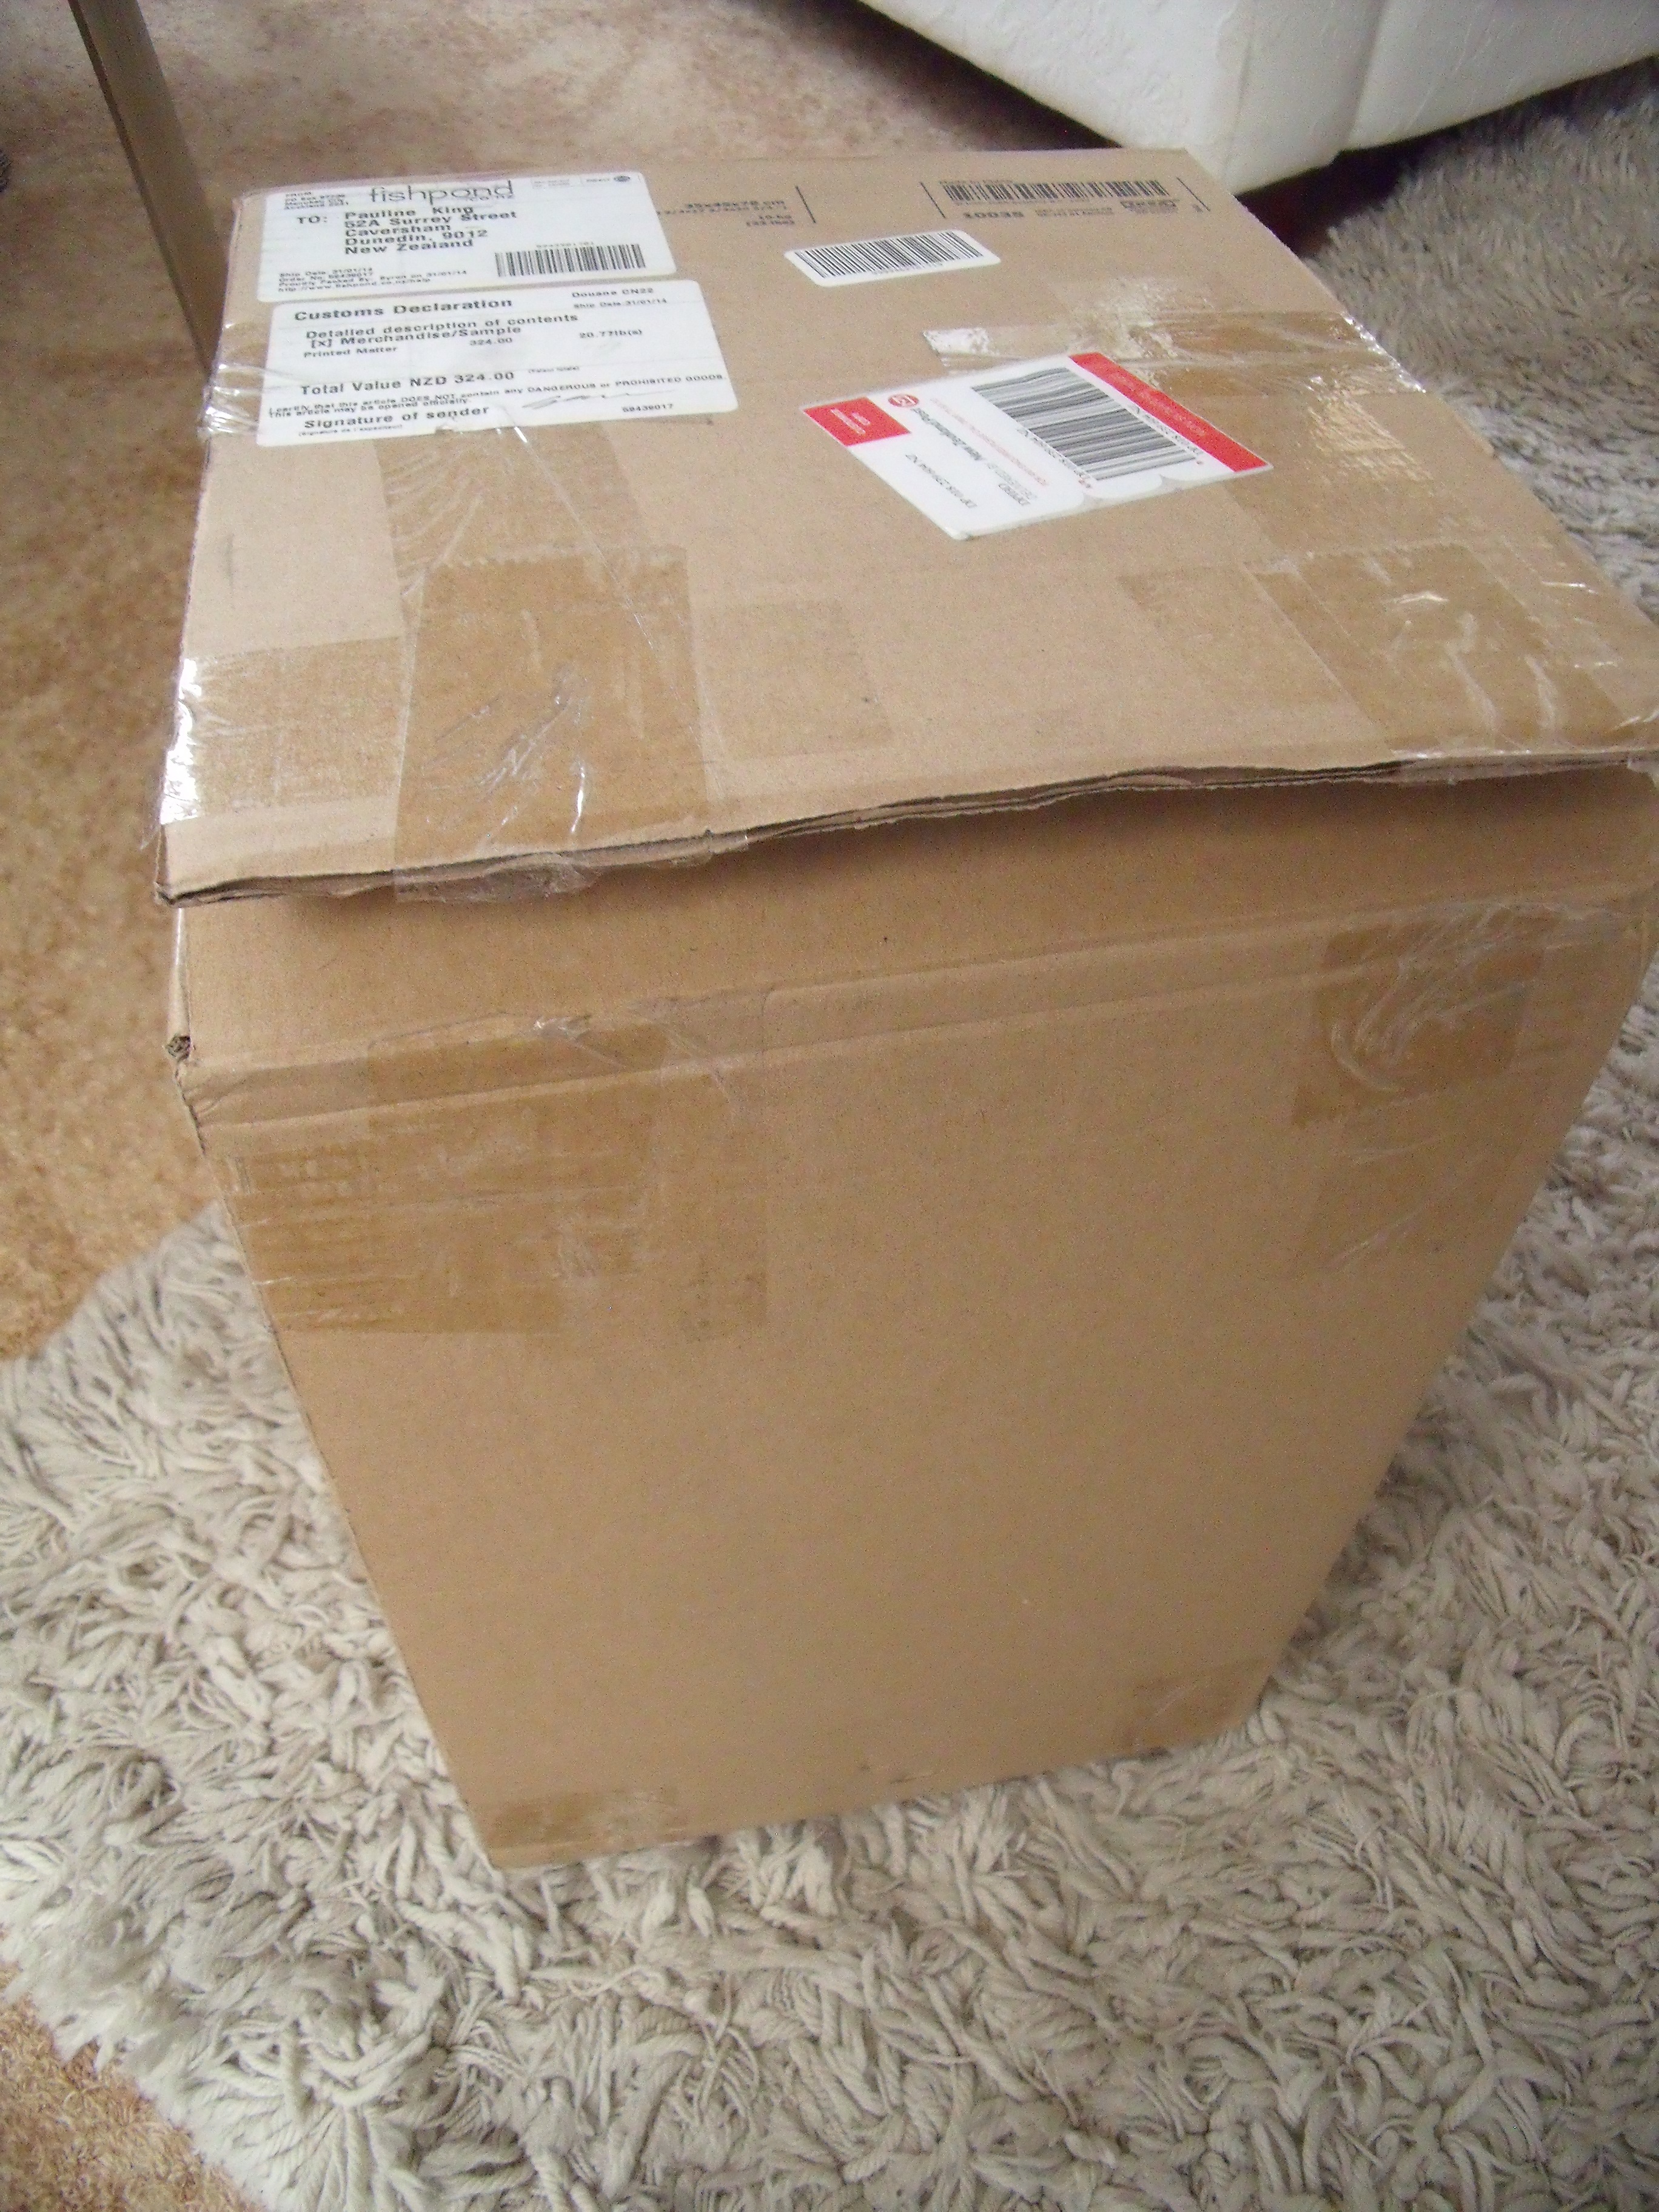
Here is a picture of the box, newly emptied of it’s goodies, proudly posing beside Orlando’s metre high wardrobe cat:

Bissellbox

And here it is a moment or two later – look carefully:

catinbissellbox

Do you see that hovering bird of light in the photo?  It’s a complete mystery to me how that got there!

As we are on Orlando, lets finish this post with a bit more about his latest obsession.

Due to my imminent room make-over the refrigerator has been moved to a fairly unlikely place, [but there is a good reason for it of which more later.]  This allows his little kingship full access to the back of said fridge, where the motorised bit lives and which gurgles in a most enticing way apparently.  He spends hours watching closely:

Morning,

catguard2

noon

catguard3

and night:

Fridgeguard1

Sometimes he falls asleep watching it.  Then it makes a big gurgle, or the motor switches on and he jumps.  He does that four feet off the ground, backwards leap that cats do when they get a scare.  Sadly for him, this makes his mumma laugh!

Thanks for coming by today, I love that you did  🙂

A Mostly Pictorial Walk Through My Week

It sure has been a busy week!  I thought I’d share a few of my little adventures with you all …..

First up, I’ve been taking a class with Claudia Rossi.  [Don’t, whatever you do, Google her – you will get a million listings for a porn star of the same name!]  If you know of the mixed media Claudia Rossi, you will be familiar with her ‘pretty girls’ and her art journals. I’ve been watching her on You Tube for at least a year on and off, she is verbose and funny and real and I enjoy her random prattling and gorgeous artwork.  Claudia’s girls are kind of opposite to mine – I draw big eyes – she draws big mouths……. I decided to take her class, not because I want to draw a ‘Claudia Rossi’ pretty girl – though I have – but because I think that learning is important and the more skills you pick up and add into your kete [a woven bag] the better, it all helps define your own style.  Besides I got a discount coupon offer and so couldn’t resist!

It’s been slow going for me as I have so many other things I am busy doing.  But when I can I work in the evenings and use my TV as a giant computer screen while I watch her and then work on my own version.  I still have to finish my girl – but here is what I’ve done so far.  This is the pencil sketch, following a quite complex grid pattern:

CRFace1

Here she is with her shadowing in place – you may notice I made the mouth smaller as I made it much too big in the first place:

CRFace2

And here she is with the skin-tone glazing done, the eyes and lips and hair too: for once underway I could not stop:

CRFace4

You can bigify it by clicking twice if you want to see all the minute detail – shes not too bad for a first attempt.

I think Claudia is a good teacher and I enjoyed taking this class – if you happen to be thinking of it – or just want to learn how she does her faces – I do recommend her class!

*************************************

Next I got some more happy mail this week too – only this time it was something I had bought for myself.  I splurged big time and bought myself a present that I had lusted after for a long, long time but never thought would be available to me – then ‘Fishpond’ one of our on-line book-and-everything-else-you-could-ever-possibly-want-or-need stores came up with an Ikea Raskog.  An IKEA RASKOG people!!  It was one of those moments when while the voice of reason was saying ‘Oh dear, what a shame you can’t afford it’ the impetuous bohemian artist had already stuck her fingers in her ears and was singing “La-la-la-la-la!” at the top of her lungs whilst hitting ‘Buy Now’………..

So, many, many weeks later and after a lot of restrictive belt tightening, on a wet and gloomy day this arrived:

Raskog1

I’d already ripped into it with a knife before remembering to a) take some photos and b) practise ‘anticipation’ – but blow that – too late, sorry Linne 🙂

His Little King-ship had already retreated to a safer place

Raskog2

And there he stayed until ….

Raskog3

the clanging of metal on metal became too much for his sensitive sensibilities and he is about to do his Elvis impersonation and ‘leave the building’…..  I am about to put something together with just a pictorial diagram:

Raskog4

And I did – thirty minutes later:

Raskog5

And off we go to the Create Joy room and fill her up – here she proudly poses alongside my other indispensable – my pretty bucket of paints

Raskog7

Everything I use on a daily basis sits in the top within easy reach

Raskog8

Middle shelf holds containers of coloured pencils, pens, glazes, mediums, tapes and watercolours

Raskog9

Bottom shelf holds a selection of my favourite and regularly used stamps, stamping paraphernalia and masks and templates:

Raskog10

And of course the Day Card commemorated the event:

Raskog11

It’s fabulous, I not only have everything to hand beside my work bench – and more free space on my work bench –  but when I want to play around in the evening and watch a You Tube video, or a movie, I can wheel it in to the lounge.  Well worth going without a few meals for 🙂

And His Little King-ship also gets a wee treat:

Raskog6

****************************************

If you are a relative of mine and go by the blog pseudonym of ED stop reading and go away now please.  [Yes Joanna, it’s you!}

Some of you may remember my ‘Box to Book’ project which is now into its second year – the beginning of the story can be found here and here and, sigh, here.  It was put aside when I went back into mixed media painting, not altogether forgotten though – I had made the decision to keep it for a birthday gift rather than the Christmas it was originally planned for.  I’ve been working a bit on it whenever I can find a decent block of time:

Final1 Final2 Final3 Final4

Still got heaps to do – must keep at it, must keep at it, must keep at it ……….

**************************************

And the week has concluded extremely happily with the unexpectedly early arrival of more ‘Happy Mail’ of the real variety.  From the lovely Fran and the even lovelier Steve at Serendipity Farm comes this bit of gorgeousness photographed on my table in the early morning sun:

Spoon1

Can you see that heart shaped point on the handle end of the bowl?  It is just exquisite and makes my heart sing!  It is like the point of a heart so I will think ‘Love’ every time I go to use it and all my cooking will be done with an extra added ingredient and we will all grow lovely, just like Roald Dahl said we would!!

Spoon2

Look at the bowl of the spoon – it is exquisite craftsmanship!

Spoon3

It feels smooth and satiny, it looks beautiful and it smells good too – how can I possibly use this to stir my pot of rice or my cheese and oat cakes?

Here it is sitting in the broken plastic jug that serves as my utensil holder beside the newly made weeks supply of cheese and oat cakes, which I had just finished making when the mail arrived [and which is my bread substitute, just in case you are interested].

Spoon4

So now I’m in the market for an uber posh utensil holder to match this gorgeous spoon!

Thank you to Fran and Steve at Serendipity – what a great swap!!  I feel like I got the better end of the swapping deal yet again!

I think that covers the highlights of my creative and blogging life for the past week what a great time I’m having!!

Big hugs to you all, thanks for coming by today, I love that you did!

The Paper Bag Book

Bag & Book

I decided to make the little book for several reasons –

1) it was originally meant to be included in the ‘Box to Book’ project, but just wanted to be too big for its intended slot – so it became a stand alone piece.

2)  I wanted to experiment with more aged and tattered looks, I wanted to make a little book that looked as if it had been well loved for a long time.

3) I’d been reading about the importance of leaving behind examples of your own writing for your loved ones – and remembering how touched I had been when I discovered words handwritten by beloved old relatives, now gone.   I thought I should make something that was written in my own hand.   I started it in the ‘Box to Book’ project, and continued it here.

4) My recycling bug needed to make use of some cardboard and paper bags and used dryer sheets that were lying about on the desk getting in my way…

So, here we go.  The first pic depicts some of the items used in the process of turning a bit of cardboard and a brown paper bag into a faux leather book cover, assembled around the almost finished book:

Booklet 1

I cut the cardboard into two pieces.  The brown paper was cut to size, crumpled up and generally mistreated.  Then it was hit with swipes of ink straight from the ink pad in two colours – my favourites at the moment, Aged Mahogany and Old Paper.  The two pieces of card were then joined with binding tape, leaving a small gap so that the signatures could be sewn in

Booklet 2

The inside of the cover recycled a used dryer sheet, which has a really nice texture, like old hand made paper –  liberally sprayed with a glimmer mist concoction of colours:

Booklet 3

The almost finished cover – before the tweaking process:

Cover

The pages were made from ordinary white paper, cut to size, tattered along the edges to look like the hand cut paper you used to see in old books and generally mistreated to achieve that well worn look……. I wanted to get something of the look of a palimpsest* to the thing [don’t ask me why, it was just another crazy idea….] so I stamped every page with an illegible handwritten stamp from La Blanche in Old Paper, coloured over it with a coat of Aged Mahogany and then  splattered drops of Old Paper in liquid form about, made a coffee cup sized stain on some pages and dog-eared others.  I then hand copied a poem or a quote on every page.Booklet 5

The pages looked too plain for my taste, so now the flower stamp you saw in the first photo was utilised on every page and I spent a couple of happy hours colouring in and producing ‘water colours’ .  Still not satisfied I hit every page with a good spray of gold glimmer mist for a bit of sparkle.

Cover Inside 1

Page 2

Page 1

Detail

Detail

Byron & Yeats

The little book looks suitably well worn, with coffee stains, age spots and the glimmer of worn gold still visible on some pages.  It’s tatty and dog eared pages contain a wide variety of quotes and poems – from Winnie the Pooh to Khalil Gibran; Rumi to Leonard Cohen and includes Elizabeth Barrett Browning, Shakespeare, Yeats, Byron and more.  It’s all about LOVE!

With the book all but finished [tweaking!] I turned my mind to the bag.  I opened up another brown paper bag and cut it into two, then stuck it back together again.  I crumpled it up and mistreated it in a similar fashion to the paper that made the cover of the book.  I glued down the medallion and gave it a good coat of multi medium gel for shine and strength and [hopefully] durability

Bag w gel

At this point I realised I’d stuck the medallion on the wrong side of the bag and would have to disguise the rather prominent hem, which you can see at the top of the picture ….. so out came the lace and the ribbon and pearls and hot glue gun…… and we ended up with this.

Bag 4 finished

And did you spot the button?  It is one from the set that was made a few weeks back which I posted about as ‘Antique Buttons’.

I had fun making this and learned a lot in the process!

Thanks for dropping by, hope you enjoyed it – do say Hi – it’s nice to meet the visitors!  🙂

*Palimpsest literally means ‘scraped clean and used again’ 

Back in ye olde dayes when few knew how to write and paper/parchment was hard to come by it was common practise to scrape away previous script and use the paper again.  It was still common practise in the early medieval period for monks [who did most of the beautiful script work that survives today] to re-use even older manuscripts considered of no importance to produce their work on.  A recent discovery is the Archimedes Palimpsest.  It has caused great interest when it was found that the original writing was a 10th Century copy of a previously unknown treatise  by the renown philosopher.  Scientists and scholars are still working together to try and decode it. 

The ‘Last Tweak’ Syndrome

I’ve been playing around with a number of different ideas in my craft room – I have five projects in various stages of completion because I get to the ‘finished’ stage and then think ‘Oh, if I just do this, that bit will look better ……’  Then when I’ve done that I discover some other part of the project would also benefit from a wee tweak………. having done that of course the rest certainly requires being brought up to speed – and so it goes.

This is the case with the ‘Box to Book’ project, which is still in process, but which I assure myself is okay as it isn’t required until Christmas, so isn’t it good that I gave myself an eight month timeline with it …..?     🙂

The up side of all this prevarication and tweaking is that all kinds of exciting discoveries occur which leads to more inspiration, and all kinds of little practise runs happen and this, of course, leads to ‘I wonder what would happen if ….’  and so it continues.

I usually have to say ‘That’s it – no more!’ clap my hands together briskly and exit the room in order to stop the endless ‘last tweak’ syndrome.

Here are a couple of pictures of two items that came into being due to the tweak syndrome

Blue Tag

Blue is my favourite colour – so I kept this for me.  It dangles enticingly from the reading lamp on my desk, reminding me that tweaking is good!

How Does It Get Any Better

This one made an appearance when I was first learning how to make flowers and use stamps and has hung around ever since – it holds an inspirational question, which I try to remember to ask myself every day.  [If you read my blog you’ll know I fell off the horse with that one recently, but back on again now!]

Any way – the tweaking syndrome has led to another side project that I think is almost finished and which I will post details of in a couple of days – so this has all been a teaser to get your interest level raised – and to ensure that I cease tweaking and get it finished!

Hint:  Its a small book in a paper bag ……….and now I hope it’s worth the intro and that you come back to check it out   🙂

Thanks for dropping by!

Box To Book – Part 5 – The Cover Finished

I thought I’d better post these photos of my progress before I get side tracked [again!]

We are having exciting weather – it was supposed to snow but that appears to have missed my part of the country and we have just had rain – endless rain …… cold, wet, hard-falling rain!

Lots of flooding and landslides and roads closed and bits of the promenade falling off into the wild southern ocean ….. I’m not a fan of weather like this – give me snow any day!

However Orlando is as happy as a bug in a rug – or a cat ….. he gets to go outside to potty and come back in and get a towel down.  He loves a towel down!  He suddenly finds he has to go potty many, many times in the day  – far more often than at any other [drier] time of the year – and, on his return,  presents himself side on so that I may touch the wet fur and retrieve his towel and do my job…………..

If I could film at the same time as towel down I’d post a little something for your eddication and enjoyment…….. head back, eyes closed, mouth a little open and rumbling like an aeroplane preparing for take -off……….

However I digress.  Here are the last photos I took a few days ago:

The finished cover

The finished cover

Cover finished 2

The title is made with individual letters stamped onto dyed grunge paper and embossed with gold and rubbed down a bit for a worn look.  The antique lace was an after thought – found in my stash when I was looking for something else –  and is perfect for just right there don’t you agree?

Lace has been attached to the spine for added texture

Lace has been attached to the spine for added texture

The row of tiny pearls shows up in this last photo, nestled alongside the antique lace…..

Currently I’m working on the verses and finishing touches for all pages – I do what I can in between towelling down the cat, keeping the cat warm, singing to the cat, taking the cat for his daily walk – well, I walk he rides in my arms and points the way with his nose – retrieving his lost toys from under furniture and or appliances ……and now and again seeing to the needs of myself or other folk……….

Lovely that you stopped by, leave us a note do….

Box To Book – Part 4: The Cover

Welcome, if you are a new reader [or follower 🙂  ] here is a brief introduction to this project:

Last Christmas I received a Grand Calibur die cutting machine which came in a large and sturdy box which – in a moment of madness – I decided to turn into a book.  There are three previous posts showing the progress I was making – I haven’t made much progress for a while really………….

****************************************

So I hit a wall – I was thinking too much and everything I did was awful – truly awful!!

A good lesson for me to learn – stop thinking and start creating!

I got into the rut because I really wanted to make something special out of that box – the idea is to return the box to the original giver in a new form, so therefore I couldn’t muck it up………….. and, of course, therefore I thought too much and mucked it up ….. !!!

So I had a wee paddy and went into the play room today saying through gritted teeth – just go with your gut and play and chuck out all the ‘shoulds’.

And a miracle happened and in just a few hours I made the cover for the book:

I took some cream card stock and painstakingly put it through the machine six times to get the embossed pattern into it.  I used stains in ‘Aged Mahogany’ and ‘Brick Red’ to colour it and when it was dry I sprayed liberally with glimmer mist ‘Black Cherry’ to get a slightly worn, but rich red.  [NB:- The photos were taken with the low winter sun streaming onto the desk, the colour is not quite this pink in reality]

Day 7 Cover 1

Then I prepared the inside lining for the cover.  The small paper example to the right is the original, to the left after it is sprayed with the same glimmer mist colour.  The edges are stained and slightly tattered:

Day 7 Cover Inside 1a

When I had made two boards – front and back covers – I left them to dry and played around with the glimmer mist on some lace and punched a length of pretty paper using a Martha Stewart punch:

Day 7 Cover 2

I decided it looked a bit insipid, so it too got sprayed liberally with the glimmer mist!

I cut a strip of grunge paper to size and that got a good coat of ‘Aged Mahogany’ stain and came out really pretty – it looks and feels like velvet!  Then I attached the dyed lace with a light coat of multi-medium.

Day 7 Cover 4 Spine

There was a strip of the inside paper lying around so I decided to use that on the front cover too, everything was glued on seperately and layered carefully.

Finally I attached the outer spine using a combination of hidden staples and tacky glue and then – fittingly – left it sitting under the weighty die cutting machine – the item which came in  the original box – to dry:

Day 7 Cover 5 Drying

When it emerged from under the machine it looked like this:

Day 7 Cover 6

I’ve started on the title and a little something else which is needed – and I’ve got a line of pearl beads to attach tomorrow –  but the worst of it is done.  What a relief!

I’m really happy as at last it is starting to look the way I wanted it to – like a really old book that was beautifully and carefully hand made and has been much used and is now just a little the worse for wear ……

Thanks for sticking with it – let me know what you think………..

Box to Book Part 3

Two weeks have gone by and the work on this project is not going according to plan …..   But I am remaining true to my usual way of working, and continue merrily on with my hit or miss style

I’ve been working on different embellishments that will be added into the book – most of them still requiring finishing touches as I kept running out of supplies – and as I buy most of my stuff on-line there can be a five day delay between ordering and receiving.

If I discover, say on a Friday afternoon [and this actually has happened] that I need more embossing powder it can be Thursday before it gets to me – depending on the supplier.  It can really stop me in my tracks – so I’ve spent a  bit of time checking everything this week and making a list…………. [Yay me!]

So consequently all I have to show at the moment is the layering process which is underway.

What you are about to see is simply phase two and there are at least another two steps to be taken in this process – And just to keep your interest up [hopefully] I’ll finish with a quick peek at a possible phase three page.

Day 6 Layering 1

This is a page towards the back of the book.  Card-stock has been torn, dry embossed [the script] and then attacked with some ‘Old Paper’ ink to age it up.  The edging of lace is done the same way – but this may well disappear altogether as I don’t really like it……

The strip of fabric edging on the right side is loose so that more pages can be tucked under it later on.  Most of what you can now see will soon disappear…..

Day 6 Layering 2

A close-up of the lower left page.

Day 6 Flip Page

This is a page towards the front of the book – it’s actually two pages as the curved part is the edge of a flip page, narrower and incorporating a pocket for more embellishments to be tucked into, and the bird belongs on the following page – I quite like that you can see this glimpse of what comes next..

A couple of pages on you’ll find this:

Day 6 Envelope Page

Another flip page, made to look like an envelope with lace edging and ribbon tie.  Well it doesn’t just look like an envelope, it is an envelope and will hold a couple of poems inside.

Day 6 Layering 3

This is the page before the envelope – that’s the back of the envelope on the right hand side.  The page on the left has its first layer on and the next pic shows what I am considering as layer three for this particular page:

Day 6 Layering 4

I can’t adhere anything as yet as I still haven’t decided what text I am going with  – but two strong contenders are Khalil Gibran – selected extracts from ‘The Prophet’  – or a selection of my favourite Rumi verses…….decisions, decisions!!  But once that decision is made and the verses all printed out then everything will come together – I’m hoping another two weeks will see it done………

Stay tuned!

Thanks for taking the time to drop by – I love that you came!